


Page 18
Page 19
One Year Parts Warranty:
For one year from the date of original purchase, your local reseller will provide free of charge, non-consumable replace
-
ment parts or components that failed due to manufacturing defects. Subject to the conditions and limitations set forth
below, your local reseller will, at its option, either repair or replace any part of its products that prove defective by reason
of improper workmanship or materials. Repaired parts or replacement products will be provided by your local reseller
on an exchange basis, and will be either new or refurbished to be functionally equivalent to new. The consumer is re
-
sponsible for all shipping costs. Consumable parts not covered by this warranty include but not limited to: Light bulbs,
metal, aluminum and charcoal filters.
Who is Covered:
This warranty is extended to the original purchaser for products purchased for ordinary home use.
This Warranty Will Be Voided When:
Product damaged through negligence, improper installation, accident, abuse, misuse, natural disaster, insufficient or
excessive electrical supply, abnormal mechanical or environmental conditions, or any unauthorized disassembly, repair,
modification, or failure to follow installation instructions. When product is used commercially or other than its intended
purpose. Damaged because of improper connection with equipment of other manufacturers. Repaired or modified by
anyone other than your local reseller’s authorized agents. This limited warranty also does not apply to any product on
which the original identification information has been altered, obliterated or removed, has not been handled or packaged
correctly or has been sold as second-hand.
What is Not Covered:
Consumable parts such as light bulbs, metal and charcoal filters. The natural wear of finish, and wear due to improper
maintenance, use of corrosive and abrasive cleaning products, pads, and oven cleaner products. Chips, dents or cracks
due to abuse, misuse, freight damage, or improper installation. Damage of product caused by accident, fire, floods or
act of God. The manufacturer and/or distributor/reseller is not liable for, and does not cover under warranty, any loss of
properties or any costs associated with removing, servicing, installing, or determining the source of problems with this
product.
This warranty is valid in the country of the original purchase at retail. It is non-transferable and applies only to the original
purchaser and does not extend to subsequent owners of this product. Any applicable implied warranties, including the war
-
ranty of merchantability, are limited in duration to a period of express warranty as provided herein beginning with the date
of original purchase at retail and, no warranties, whether express or implied, shall apply to this product thereafter.
To obtain warranty service, you may contact your local reseller from which you purchased this product. Please confirm the
terms of your local reseller’s policies prior to contacting. Typically, you must include product identification information,
including model number and serial number with a detailed description of the problem you are experiencing. You must also
include proof of the date of original retail purchase as evidence that the product is within the applicable warranty period.
The information in this document is subject to change without notice, please contact your local reseller for updated details.
Warranty
SAFETY WARNING: Never put your hand into area housing the fan while the fan is operating!
For optimal operation, clean range hood and all baffle/spacer/filter/grease tunnel/oil container regularly. Regular care will
help preserve the appearance of the range hood.
Cleaning Exterior surfaces:
• Clean periodically with hot soapy water and clean cotton cloth. Do not use corrosive or abrasive detergent (e.g. Comet
Power Scruv
®
, EZ-Off
®
oven cleaner), or steel wool/scoring pads, which will scratch and damage the stainless steel
surface. For heavier soil use liquid degrease such as “Forumla 409
®
” or “Fantastic
®
” brand cleaner.
• If hood looks splotchy (stainless steel hood), use a stainless steel cleaner to clean the surface of the hood. Avoid getting
cleaning solution onto or into the control panel. Follow directions of the stainless steel cleaner.
CAUTION: Do not
leave on too long as this may cause damage to hood finish.
Use soft towel to wipe off the cleaning solution, gently
rub off any stubborn spots. Use dry soft towel to dry the hood.
• After cleaning, you may use non abrasive stainless steel polish such as 3M
®
or ZEP
®
, to polish and buff out the stainless
luster and grain. Always scrub lightly, with clean cotton cloth, and with the grain.
•
DO NOT allow deposits to accumulate or remain on the hood.
• DO NOT use ordinary steel wool or steel brushes. Small bits of steel may adhere to the surface and cause rusting.
• DO NOT allow salt solutions, disinfectants, bleaches, or cleaning compounds to remain in contact with stainless steel
for extended periods. Many of these compounds contain chemicals, which may be harmful. Rinse with water after ex
-
posure and wipe dry with a clean cloth.
Cleaning Aluminum Grease Filter / Stainless Steel Filterless Grill:
IMPORTANT:
Drain oil from oil containers before oil and residue overflow!
• The metal filters fitted by the factory are intended to filter out residue and grease from cooking. It need not be replaced
on a regular basis but are required to be kept clean.
• Filters should be cleaned after every 30 hours of use.
• Remove and clean by hand or dishwasher. Spray “Formula 409
®
” or equivalent degreasing detergent and leave to soak
if heavily soiled. Dry filters and re-install before using hood.
Replacing Filters:
• Should filters wear out due to age and prolonged use, please contact your local reseller for replacement filters.
• Note: Also replace damaged filter that has punctured or broken mesh, bent or broken frame.
Replacing the light bulb:
• This range hood uses halogen bulb (please refer to the actual specification of the hood purchased):
i.
USA/Canada: 35W Type GU10 120V
ii.
Europe and other Countries: 35W Type GU10 220V
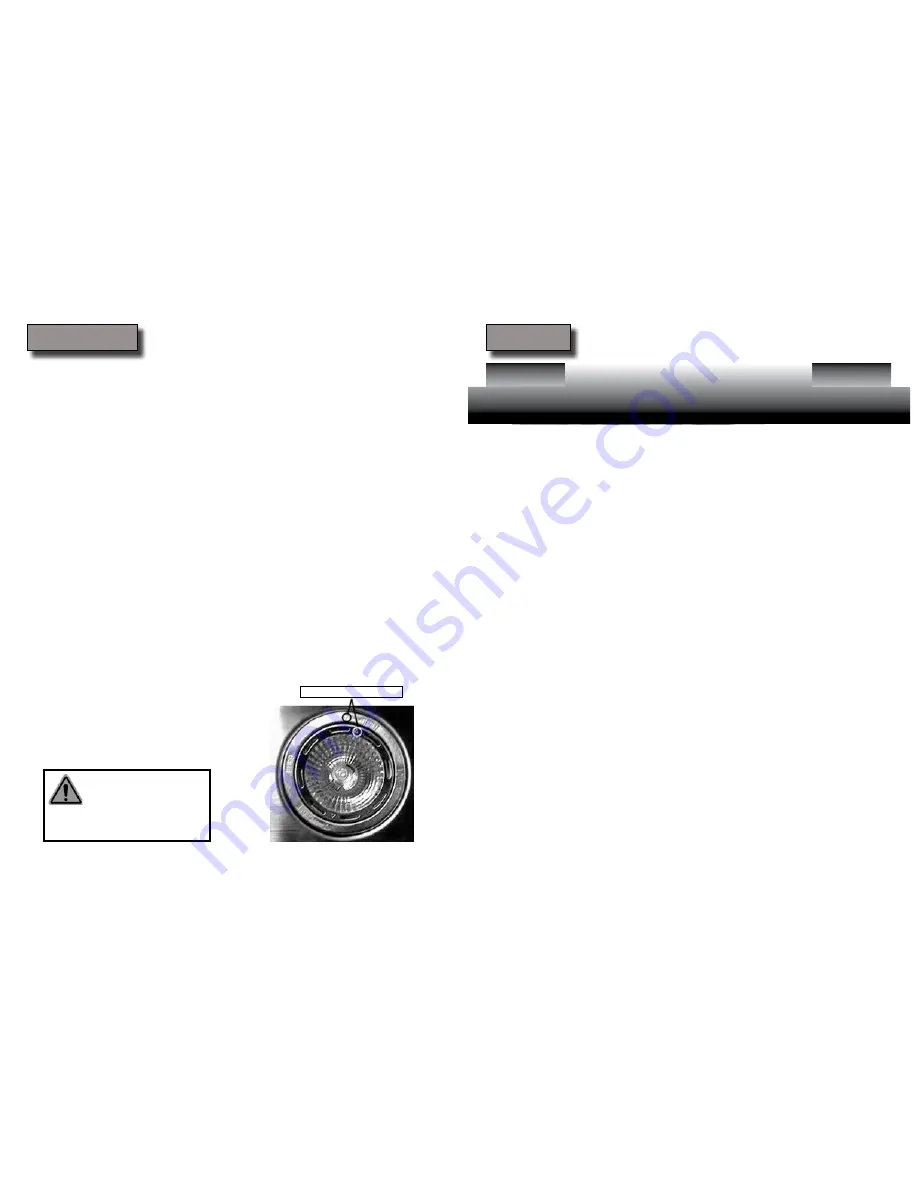
• Make sure the range hood is unplugged or turn OFF breaker.
• Make sure the lights are cool to touch, carefully align the arrow on
the inner ring with the arrow on the outer ring where it says OPEN.
The inner ring will loosen and the light bulb will be available for re
-
moval. Install a new halogen light bulb and reverse the steps.
• Turn ON breaker and range hood to test for operation.
WARNING
Hazard of Burns!
Light bulb become extremely hot when turned on.
DO NOT touch bulb until switched off and cooled.
Touching hot bulbs could cause serious burns.
Align arrows on both rings
Maintenance


