background image

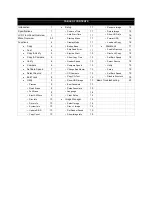
TABLE OF CONTENTS 

Introduction 1 

 Setup 

11 

o

 Rename Image 

15 

Specifications 1 

o

 Power on Time 

11


o

 Delete Image 

15 

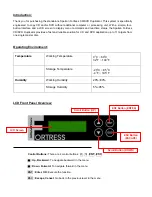
LCD Front Panel Overview 

o

  Auto Start Time 

11


o

  Show HDD Info 

16 

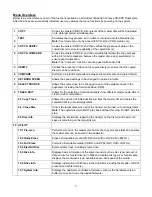
Menu Overview 

2-3 

o

 Start-up Menu 

11


o

 Format HDD 

16 

Functions 4 

o

 Display Mode 

11


o

  Load and Copy 

16 

 Copy 

o

 Button Beep 

11


 DisckLock 

17 

 Test 

o

  Skip Read Error 

11


o

 Enable DiscLock 

17 


Copy & Verify 

o

  Eject on Start 

12 

o

 DiscLock Copy 

18 


Copy & Compare 

o

  Show Copy Time 

12


o

  Set Burn Speed 

18 

 Verify 

o

 Reader Speed 

12


o

 Select Source 

18 

 Compare 

o

 Compare Speed 

12


o

 Utility 

19 


Set Burn Speed 

o

  Change Bad Master 

12


o

 Setup 

19 

 Select 

Source 

o


CD Overburn


12


o

  Set Burn Speed 

19 

 Edit 

Track 

o

 Copy CD-Text 

13


o

 Disable DiscLock 

19 

 Utility 

o

  Show HDD Image 

13


Basic Troubleshooting 

20 

o

 Prescan 

o

 Boot Password 

13


o

 Quick Erase 

9


o

 Setup Password 

13  


o

 Full Erase 

9


o

 Language 

14 


o

  Eject All Discs 

9


o

 Clear Setup 

14  


o

 Disc Info 

10


 Image 

Manager 

14  


o

 Drive Info 

10


o

 Select Image 

14


o

 System Info 

10


o

  Disc => Image 

14


o

 Update BIOS 

10


o

  Set Reader Speed 

15 


o

 Copy Count 

10 

o

  Show Image Info 

15  


Summary of Contents for FORTRESS CD/DVD

Page 1: ...FORTRESS CD DVD Duplicator System User Manual Version 1 80...

Page 2: ...w Copy Time 12 o Set Burn Speed 18 Verify 6 o Reader Speed 12 o Select Source 18 Compare 6 o Compare Speed 12 o Utility 19 Set Burn Speed 7 o Change Bad Master 12 o Setup 19 Select Source 7 o CD Overb...

Page 3: ...d DVD duplication up to 11 targets from one single master disc Operating Environment Temperature Working Temperature 0 C 60 C 32 F 140 F Storage Temperature 20 C 85 C 4 F 185 F Humidity Working Humidi...

Page 4: ...ator including the Hard Disk Drive HDD TRACK EDIT Allows for the selection of individual track s from different master audio CDs to create custom compilation 9 1 Copy Track Allows the selection of ind...

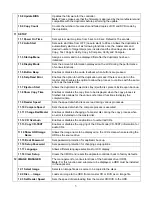
Page 5: ...opy Time Enables or disables the copy time to be displayed when the copy process is finished Also allows for the various other timed functions to display the completion time 11 9 Reader Speed Sets the...

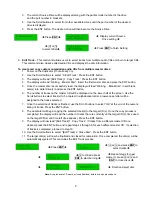
Page 6: ...disc s on the tray s Number of drives used depends on number of copies desired It is not necessary to always use all drives 4 Use the scroll buttons to select the command 1 Copy and press the ENT but...

Page 7: ...se the scroll buttons to select the command 3 Copy Verify and press the ENT button The drives will automatically close trays and begin the copy process 5 Once the copy process is completed the tray s...

Page 8: ...e Drive usually the top The master disc is the original of which copies are made 3 Eject disc tray s of the Writer Drives and place copied disc s to be verified on the tray s Number of drives used dep...

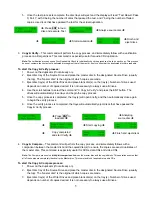
Page 9: ...the Scroll buttons to select 7 Set Burn Speed Press the ENT button 3 The first speed selection is for general CDs Use the Scroll buttons to select the desired burn speed and press the ENT button 4 Th...

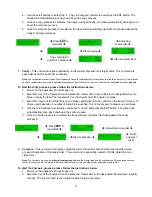
Page 10: ...r CD will be displayed on the lower half of the screen Use the Scroll buttons to select track s to be copied In alphabetical order a lower case letter will be assigned to the tracks selected 7 Once th...

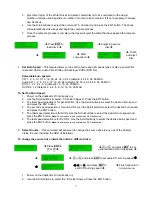
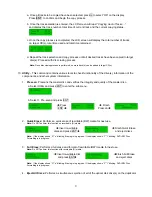
Page 11: ...em information 1 Prescan Prescans the master disc and verifies the integrity and quality of the master disc a Select Utility and press ENT to enter the sub menu b Select 1 Pre scan and press ENT Press...

Page 12: ...ion of the duplicator controller Press ENT 8 Update BIOS Updates the BIOS firmware of the duplicator controller Press ENT Insert update CD and press ENT Update completed and eject disc Re boot system...

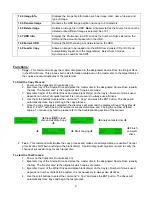
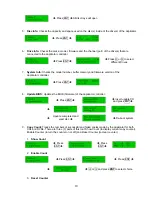
Page 13: ...irst when the duplicator is powered on and initialized All primary commands are available to be set for Start up Copy Test Copy Verify Copy Compare etc Press ENT i or j to select function and press EN...

Page 14: ...MAX Press ENT i or j to select CD Read and press ENT i or j to select DVD read speed and press ENT to finish 10 Compare Speed Sets the speed at which the master disc is compared with the copies disc...

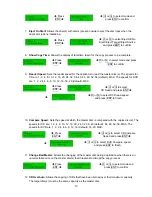
Page 15: ...select mode and press ENT to confirm If Disable is selected no password will be set and the display will direct back to the Setup sub menu If Enable is selected a password must be entered using the f...

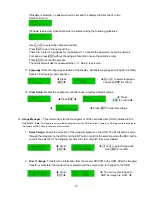
Page 16: ...ontroller back to factory default settings Press ENT Press ENT to confirm Press ENT to clear all settings 12 Image Manager This command is for the management of the hard disk drive HDD installed in th...

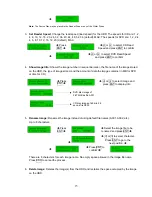
Page 17: ...the type of image stored and the amount of data the image contains in MB for DVD or time for CD Press ENT i or j to select image and press ENT to display info DVD disc image of 3 875GB as file A001 C...

Page 18: ...ad and Copy There are three 3 modes in this function Press ENT i or j to select between OFF Synchronous Load First and press ENT to confirm a Load First Completes loading of the image s to the HDD bef...

Page 19: ...i j to select from main menu Special Feature DiscLock CD DVD duplication The DiscLock feature implements a simple encryption protocol on your copied discs so they cannot be copied in another duplicato...

Page 20: ...Analyzing source disc Start Copying Finished and eject discs 2 Set Burn Speed This feature allows you to set the burn speed of DVD with DiscLock feature implemented 1 2 2 4 4 6 8 12 16 18 20 MAX Press...

Page 21: ...pressing of the buttons Press ENT i or j to select mode and press ENT to confirm 3 Language Sets the language selection of the display Available languages are English default Spanish Portuguese and J...

Page 22: ...copy process will cancel and menu goes back to the last function executed b If the button cancel does not work power cycle the unit power the unit off leave off for five seconds and power the unit bac...

Reviews: