

6
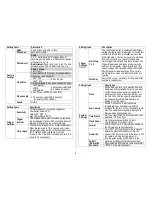
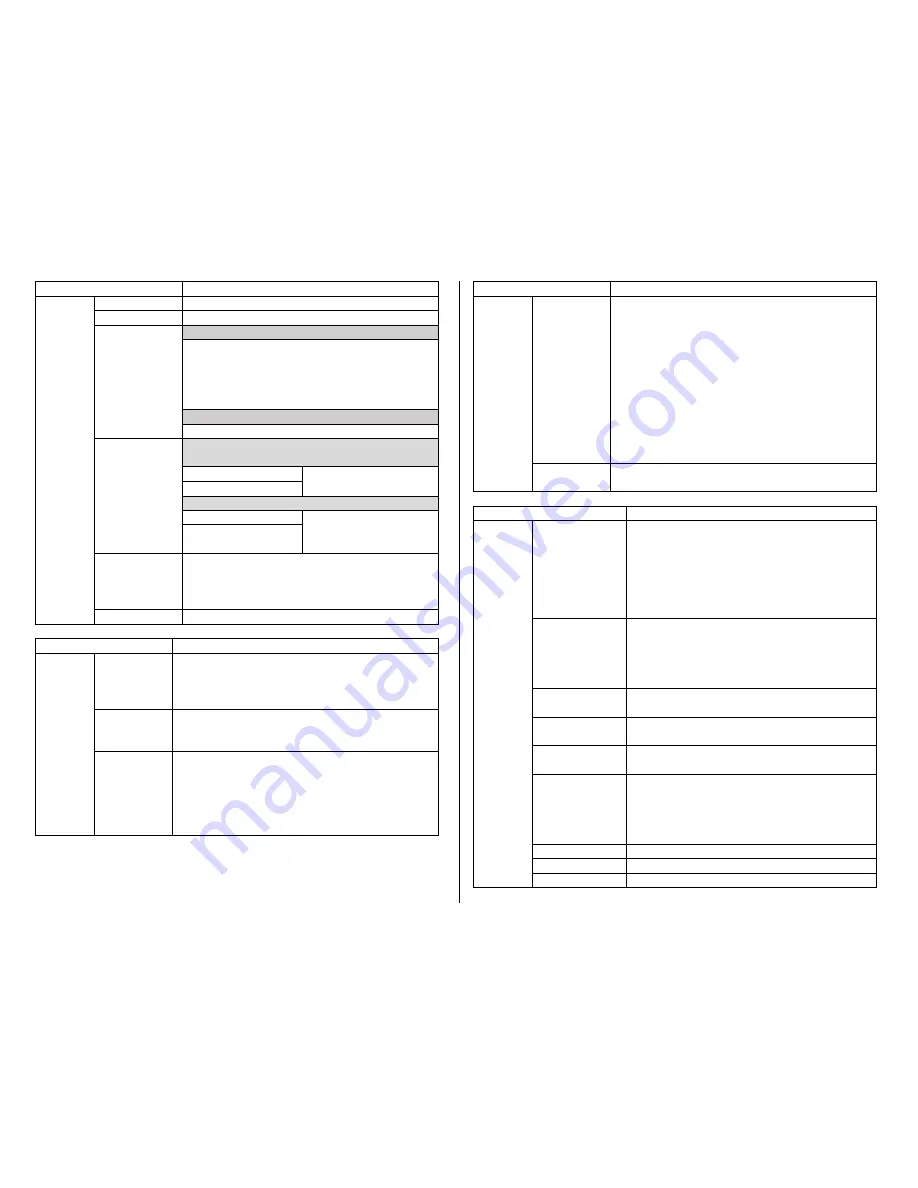
Setting Items
Description
Camera
Settings
Mode
Photo, Video, or Photo + Video.
Photo Size
3MP, 5MP, or 8MP.
Photo Burst
Photo:
1, 2, 3. Set the number of images taken for
each trigger. The camera will transmit all photos
when burst is 2 or 3.
Burst Interval: Short, 1 sec, 2 sec, 3 sec. The time
between photos if Photo Burst is set to 2 or 3.
Photo + Video:
1 photo only
Video Size
Transmittable with Premium, not transmittable
with Auto or with Send OFF
320 * 200
5 Sec, 10 Sec
1024 * 576
Not transmittable in any mode (Send OFF only)
720P (native)
1-30 seconds, selectable
in 1-second increments.
1080P
(interpolated
Video Length
5 sec, 10 sec (320*200 or 1024*576)
1-30 seconds, selectable in 1-second
increments (720P, 1080P).
Sound
On/Off
Setting Items
Description
Trigger
Settings
Sensitivity
Off (time lapse only, not motion-triggered)
Low (temps below 10
°
F.)
Normal (10
°
F-80
°
F)
High (temps above 80
°
F).
Trigger
Interval
Time between when a photo is sent and the next photo
can be triggered. Options: 0-55 seconds in 5-second
intervals, 1-60 minutes in 1-minute intervals.
Time Lapse
The camera will take pictures at specified intervals.
When the camera is in Time Lapse mode, it also
will be triggered by motion unless Sensitivity is set
to Off. Options: 30-55 seconds in 5-second
intervals, 1-59 minutes in 1-minutes intervals, 1-8
hours in 1-hour intervals.
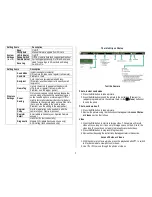
Setting Items
Description
Trigger
Settings
(cont’d)
Start-Stop
1 & 2
The camera can be set to operate using different
settings during specific time periods. To enable this
function, select On then press OK to access the
Start-Stop menu. You can set one or two start/stop
intervals. For each, you can set start and stop
times, trigger interval, and time lapse interval. The
trigger intervals and time lapse intervals are the
same as for the regular Trigger Interval and Time
Lapse settings. The start-stop setting will override
all other general camera settings. If you set two
start/stop times, make sure that the times do not
overlap.
Work Day
Select All or one or more days of the week for the
camera to take photos.
Setting Items
Description
System
Settings
Clock
Set the date and time. If you want the photos to
be date and time stamped correctly, you must
set the clock when using Auto or regular trail
camera mode. If you are using Premium, set
the time zone from the app or web portal and
the camera will maintain date and time by
getting it from the server.
Arm Camera
Yes/No. Choose Yes to arm the camera
immediately if you don’t want to wait three
minutes after you turn it on for the camera to arm
itself. You can also arm by long pressing
in
Preview mode and choosing Yes.
Time Stamp
On if you want the photo info strip to show the
date/time, Off if you don’t.
Flash Power
High (distances greater than 15 feet)
Low (distances of 15 feet or less)
Format
Format the SD card. (This will erase all data on
the SD card and cannot be undone.)
Overwrite
On or Off. The On setting sets the camera to
delete the oldest photo/video to write the
newest if the SD card is full. If this is set to Off,
the camera will stop taking pictures or
recording videos when the SD card is full.
Default
Restore all settings to factory default values.
Information
Show hardware and firmware versions and IMEI.
Password
Off/On. Set a 6-digit password.