background image

13 


630359_5 


3.2 INSTALLATION - OVERVIEW 


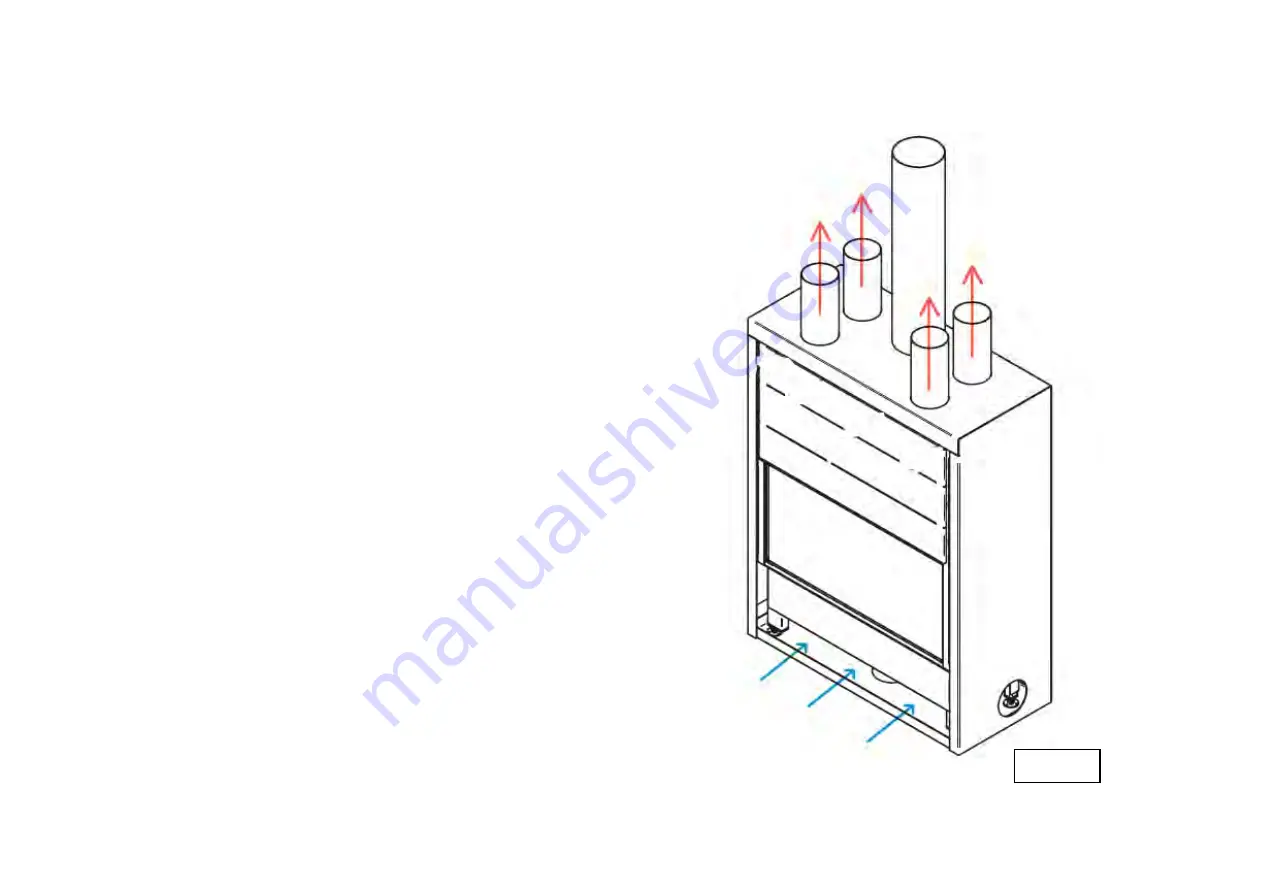
CONVECTION 
 

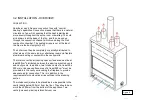
Spartherm wood fires are convection fires with “central 
heating” capabilities. Convection means that there is a natural 
circulation of air, which ensures that the heat is distributed 
more evenly throughout the entire room or dwelling. The cold 
air is drawn in at the base of the fire, and then moved up 
through the convection channel, which runs along the fire’s 
combustion chamber. The heated air pours out at the top of 
the fire via the duct spigots (4 off).  
 
The hot air can then be completely or partially distributed to 
other areas of the same room or alternative rooms via flexible 
aluminium ducting or vents within the cavity walls.  
 
The total convection air venting open surface area must be at 
least 880 cm

distributed between the aluminium ducted vents 

and cavity vents. In addition, two ‘intake’ vents of at least 90 x 
300 mm or an open surface area of at least 540 cm

must be 

provided into the cavity surrounding the fireplace to provide 
adequate air for convection. This is in addition to the 
requirements for combustion air as outlined in the planning 
section. 
 
The intake vent(s) should be placed as low as possible in the 
cavity ideally below 300 mm from the floor. They should be no 
more than 300mm from the bottom of the appliance. Two 
vents (one each side) is preferential over one. 


Figure 8 

Summary of Contents for Varia 2L 80h-P7

Page 1: ...1 630359_5 NEW ZEALAND Single XL Varia Bh P7 Single large lift door Varia ASh P8 Double sided Varia A FDh P8 Corner Varia 2L 80h P7 Varia 2R 80h P7 ...

Page 2: ...Installation 17 3 5 Safety Clearances 20 3 6 Installing the Flue 24 3 7 Example of Cavity Construction 26 3 8 Finishing the Enclosure 27 4 0 Bricks and Baffles Installation 28 5 0 Operation 31 5 1 Use of the Flue Damper 35 5 2 Fuel 36 5 3 Smoking 37 5 4 Ash Removal Procedure 38 5 5 Creosote Formation Removal 38 5 6 Chimney Cleaning 39 5 7 Do s and Don ts 40 6 0 Servicing and Maintenance 41 6 1 Car...

Page 3: ... in section 9 and retained by the owner Any modification of the appliance that has not been approved in writing by the testing authority is considered to be in breach of any approval granted for compliance with AS NZS 4012 2014 AS NZS 4013 2014 This appliance must be installed by a Spartherm trained and approved installer The appliance should be turned off and cooled before servicing Do not operat...

Page 4: ... means of a dedicated vent adventitious venting or directly to the unit through a 150mm diameter pipe recommended method Failure to provide this may starve other fuel burning appliances from an adequate air supply or impede the performance of this unit Make sure not to create negative pressure in the installation room e g by means of an exhaust fan or similar mechanical blower as this could affect...

Page 5: ...5 630359_5 2 0 PRODUCT DIMENSIONS 2 1 2 2 Figure 1 Figure 2 ...

Page 6: ...6 630359_5 2 3 Figure 3 ...

Page 7: ...7 630359_5 2 4 Figure 4 ...

Page 8: ...8 630359_5 2 5 Figure 5 ...

Page 9: ...Door Height A B C D Varia ASh P8 370 372 432 729 789 Varia Bh P7 523 525 585 1003 1063 Varia A FDh P8 438 440 500 878 938 Model Door Height A B C D Varia 2L 80h P7 512 1098 514 508 98 Varia 2R 80h P7 512 898 514 508 98 Figure 6 Figure 7 ...

Page 10: ... N A 16 0 65 3 200 0 92 398 Single Large Lift Door Varia ASh P8 Lift Door Yes Yes Variable 8 3 14 1 67 6 150 0 99 264 Double Sided Varia A FDh P8 1 Swing Door 1 Lift Door Yes Yes one side only Variable 15 5 19 6 65 6 200 1 41 365 Corner L H Varia 2L 80h P7 Lift Door Yes Yes Fixed N A 14 5 65 9 150 0 96 312 Corner R H Varia 2R 80h P7 Lift Door Yes Yes Fixed N A 14 5 65 9 150 0 96 312 Dependent on f...

Page 11: ...as the paint will become soft as the appliance heats up and will harden as the appliance cures To cure the paint on your appliance burn your appliance moderately hot during the first few fires To keep the door gasket from sticking to the appliance as the paint is curing periodically open the fireplace s door For the first two weeks use generous amounts of fuel and burn the appliance with the air c...

Page 12: ...RE TO DO SO MAY RESULT IN A FIRE ESPECIALLY IF COMBUSTIBLES ARE TOO CLOSE TO THE APPLIANCE OR CHIMNEY AND AIR SPACES ARE BLOCKED PREVENTING THE FREE MOVEMENT OF COOLING AIR DO NOT DRAW OUTSIDE AIR FROM GARAGE SPACES EXHAUST PRODUCTS OF GASOLINE ENGINES ARE HAZARDOUS DO NOT INSTALL OUTSIDE AIR DUCTS SUCH THAT THE AIR MAY BE DRAWN FROM ATTIC SPACES BASEMENTS OR ABOVE THE ROOFING WHERE OTHER HEATING ...

Page 13: ...r areas of the same room or alternative rooms via flexible aluminium ducting or vents within the cavity walls The total convection air venting open surface area must be at least 880 cm2 distributed between the aluminium ducted vents and cavity vents In addition two intake vents of at least 90 x 300 mm or an open surface area of at least 540 cm2 must be provided into the cavity surrounding the fire...

Page 14: ...ire in place and remove door transit screws 7 Secure fireplace legs X4 to non combustible floor 8 Fit flue with drop box and closure plate Seal around interface with cavity 9 Fit lower flue pipes and casings seal and secure in place 10 Fit remainder of flue system to comply with AS NZS 2918 2001 11 Fit cavity sidewalls and flue damper control shaft knob Use flashings for sides 12 Fit vent ducting ...

Page 15: ...gile and should be handled with care In areas that are likely to become hot above the fireplace door etc then an approved adhesive with a higher operating temperature is required For these areas you must use skamo enclosure glue Recommended screws are 10g x 75mm on 200mm to 300mm centres Where a skamo enclosure board will have glue applied i e joints back blocking double layers flashing areas etc ...

Page 16: ... lieu of 90 bends and restrict the total number of bends to 2 If the pipe is in an area where condensate may form on the outside then adequate provision for lagging insulation of the pipe outer should be planned Varia Bh P7 inlet Varia ASh P8 A FDh P8 A FDh P8 2L R 80h P7 inlet It is also advised to make provision for periodic cleaning of the pipe inner by providing a rodding eye or other means of...

Page 17: ... if a 150mm outside combustion air kit is connected This vent should be connected into the cavity at a level below 300 mm from the floor Intake vents must be constructed entirely of non combustible materials and must not be able to be closed or easily obstructed 3 4 DUCTING INSTALLATION CONVECTION AIR Plan your use of the insert optimally By installing hot air vents and flexible aluminium hoses av...

Page 18: ...he appliance required for the length of horizontal ducting to be used Any horizontal elements should have a rise of at least 3 towards the outlet to encourage and maintain thermal syphoning Ensure that the ducting is well supported throughout its length and that no downwards direction or dips in the ducting are present as this will prevent or impede air flow THE VENT DISCHARGE AIR MAY BE VERY HOT ...

Page 19: ...cm2 X 4 704cm2 0 176cm2 X 5 880cm2 THE AIR EXPELLED FROM THE DUCTING VENTS IS HOT AND MAY PRESENT A RISK OF BURNS OR HEAT DAMAGE When placing outlets in rooms other than the room the appliance is installed it is important to allow for return air to equalise pressure between the rooms There may be discoloration of the wall above the fire doors and the convection outlet vents holes Only suitably rat...

Page 20: ...ny wall support elements structure made of combustible materials immediately adjacent the vent should be protected from heat by the use of skamo enclosure board sheets as shown The discharge vent must be no closer than 400mm to a heat sensitive ceiling or overhead projection Escea accepts no liability for improper installation or consequential damages PROVISION MUST ALWAYS BE MADE FOR RETURN AIR F...

Page 21: ...stible wall material The air gap should be vented top and bottom to allow for cooling air circulation The vent holes must NOT be open to or take air from the fireplace cavity as this area becomes very hot during use The potential to transfer hot air from within the cavity into the air gap should be avoided under all circumstances Wherever there are joins between the double layer sheets of skamo en...

Page 22: ...B sides C D E Placed centrally Single XL Varia Bh P7 30 30 700 650 1570 Single Large Varia ASh P8 50 35 475 425 1360 Corner L R Varia 2L 2R 80h P7 50 30 560 D1 450 D2 300 E1 260 E2 260 Double Sided Varia A FDh P8 N A 35 630 450 1280 Single Sided XL L Varia Bh P7 Varia ASh P8 Figure 22 ...

Page 23: ...23 630359_5 Corner L R Varia 2L 2R 80h P7 Double Sided Varia A FDh P8 Figure 23 Figure 24 ...

Page 24: ...um flue height of 4 2m above the top of the appliance is recommended A flue drop box kit specifically designed for this appliance providing a means to incorporate a triple skinned flue installation is available from your authorised dealer or distributor The drop box must also form a means to seal the appliance cavity from the rest of the dwelling thus retaining the hot air within the cavity The dr...

Page 25: ...protect the drop box against undesired ingress of debris or rodents birds ensure that the supplied grilles are fitted as shown in the following image A 25MM CLEARANCE TO COMBUSTIBLES MUST BE MAINTAINED FOR ALL FLUE COMPONENTS ENSURE THAT ANY CHIMNEY CHASE OR DEAD AIR SPACE ADJACENT TO THE FLUE LINERS IS ADEQUATELY VENTILATED BY PROVISION OF DEDICATED VENT S TO THE BUILDING EXTERIOR OR VENTILATION ...

Page 26: ...26 630359_5 3 7 EXAMPLE OF CAVITY CONSTRUCTION Figure 30 Figure 31 ...

Page 27: ...reas and fibreglass mesh tape and plaster in areas that may get hot Butt joints between sheets should be fully glued At these joints the boards need to be primed with either Mapei Primer G or Skamol Enclosure Primer prior to gluing Wherever practical butt joints between sheets should be reinforced at the rear inside the enclosure with a strip or plank 200mm of skamo enclosure board Try to overlap ...

Page 28: ...ese affected surfaces may be required The enclosure must be clad in a suitable material that is not combustible or sensitive to heat Such materials may include but are not necessarily limited to stone ceramic tiles steel metal etc The enclosure should NOT be finished with or clad in materials that are combustible or sensitive to heat Materials such as wall paper paper faced plaster board plastic o...

Page 29: ...29 630359_5 Single Sided XL Varia Bh P7 Chamotte must be assembled in numerical order Single Sided Large Varia ASh P8 Chamotte must be assembled in numerical order Figure 33 Figure 34 ...

Page 30: ...30 630359_5 Corner Fireplace Left Varia 2L 80h P7 Chamotte must be assembled in numerical order Corner Fireplace Right Varia 2R 80h P7 Chamotte must be assembled in numerical order Figure 35 Figure 36 ...

Page 31: ...ABLE WOOD COULD FALL OUT OF THE FIRE CHAMBER CREATING A FIRE HAZARD TO YOUR HOME NEVER EVER NOT EVEN FOR A BRIEF MOMENT LEAVE CHILDREN UNATTENDED WHEN THERE IS A FIRE BURNING IN THE APPLIANCE NEVER USE GASOLINE GASOLINE TYPE LANTERN FUEL KEROSENE CHARCOAL LIGHTER FLUID OR SIMILAR LIQUIDS TO START OR FRESHEN UP A FIRE IN THIS APPLIANCE KEEP ALL SUCH LIQUIDS WELL AWAY FROM THE APPLIANCE WHILE IT IS ...

Page 32: ... to cure Do not be alarmed if small hairline cracks develop in the firebrick This is a normal occurrence and does not pose a safety hazard The paint may also smell for the first few fires as it cures and it is recommended to open a door or window to alleviate the smell Traditional Method of Lighting a Fire Bottom Up To start a brisk fire is required Place loosely crumpled paper on the floor of the...

Page 33: ...t it will burn very efficiently with little smoke from the chimney There will be a bed of orange embers in the firebox and secondary flames flickering just below the top firebrick You can safely fill the firebox with wood up to the air inlet on the backside of the firebox or any other MAX mark indicated On the Double Sided Fire A FDh P8 there is a line about two thirds of the way up the side vermi...

Page 34: ...kes the first wood load last longer What you will need 3 or 4 larger logs of wood dry 8 to 12 pieces of kindling sticks Firelighters Matches Step1 Ensure that all air controls in the fireplace are open if available Put the logs on the bottom of the fireplace It is important that the wood is cleft and dry The logs may be as thick as a fist or thicker Step 2 Add a layer of small logs of about 4 cm a...

Page 35: ...ing Use more kindling and paper Assuming the chimney and vent are sized correctly and there is sufficient combustion air the lack of sufficiently dry quantities of small kindling may be the problem Thumb size is a good gauge for small kindling diameter Can t get heat out of the appliance One of two things may have happened The appliance door may have been closed prematurely and the appliance itsel...

Page 36: ...BURN TREATED WOOD COAL CHARCOAL COLOURED PAPER CARDBOARD SOLVENTS OR GARBAGE HIGHER EFFICIENCIES AND LOWER EMISSIONS GENERALLY RESULT WHEN BURNING AIR DRIED SEASONED WOOD AS COMPARED TO GREEN OR FRESHLY CUT WOOD DO NOT BURN GREEN OR FRESHLY CUT WOOD BURNING WET UNSEASONED WOOD CAN CAUSE EXCESSIVE CREOSOTE ACCUMULATION WHEN IGNITED IT CAN CAUSE A CHIMNEY FIRE THAT MAY RESULT IN A SERIOUS HOUSE FIRE...

Page 37: ...at is given off and the more creosote is produced Dry firewood has cracks in the end of the grain Firewood should be split stacked in a manner that air can get to all parts of it and covered in early spring to be ready for burning the following autumn Cut the wood so that it will fit horizontally side to side 5 3 SMOKING A properly installed appliance should not smoke If yours does check the follo...

Page 38: ...l bed Shovel some ashes out through the door into a metal container with a tight fitting lid Leave an ash bed approximately 1 25mm deep on the firebox bottom to help maintain a hot charcoal bed Keep the closed container on a non combustible floor or ground well away from all combustible materials The ashes should be retained in the closed container until all cinders have thoroughly cooled Cold woo...

Page 39: ...local fire department Have a fire extinguisher handy Contact local authorities for further information on how to handle a chimney fire After the chimney fire is out clean and inspect the chimney for stress and cracks prior to lighting another fire Also check combustibles around the chimney and the roof 5 6 CHIMNEY CLEANING Both the chimney and the appliance must be inspected and cleaned at least o...

Page 40: ...Use only dry wood Several pieces of medium sized wood are better than a few big pieces Refuel frequently using medium sized wood Clean chimney regularly at least once a year Fine Tune the air settings if available for optimum performance DON T Take ash out immediately Let it accumulate to a depth of at least one inch A good ash layer provides for a longer lasting and better burning fire Burn wet w...

Page 41: ...e most common reasons for dirty glass include not using sufficient fuel to get the appliance thoroughly hot using green or wet wood or closing the draft so far that there is insufficient air for complete combustion If it is necessary to clean the glass buff lightly with a clean dry cloth and non abrasive cleaner DO NOT CLEAN GLASS WHEN HOT Clean the glass after the first 10 hours of operation with...

Page 42: ...the door to open Using one hand tilt the door open up to its end stop CORNER BAY DOOR 1 Slide down the glass door fully 2 Using the operational tool twist open the catch for the sliding rail locking mechanism located above the fire compartment door right and left The door is now locked in bottom position Another locking bolt is located on the opposite side 3 Release the lateral door catches by han...

Page 43: ...plated parts is best removed when the assembly is at room temperature but this can be improved if the assembly is warmed using a hair dryer or similar heat source 6 4 GLASS REPLACEMENT DO NOT USE SUBSTITUTE MATERIALS GLASS MAY BE HOT DO NOT TOUCH GLASS UNTIL COOLED CARE MUST BE TAKEN WHEN REMOVING AND DISPOSING OF ANY BROKEN DOOR GLASS OR DAMAGED COMPONENTS BE SURE TO VACUUM UP ANY BROKEN GLASS FR...

Page 44: ... WARRANTY REPLACEMENT PARTS A PHOTOCOPY OF THE ORIGINAL INVOICE WILL BE REQUIRED TO HONOUR THE CLAIM When ordering replacement parts always give the following information Model Serial Number of appliance Installation date of appliance Part number Description of part Finish FAILURE TO POSITION THE PARTS IN ACCORDANCE WITH THIS MANUAL OR FAILURE TO USE ONLY PARTS SPECIFICALLY APPROVED WITH THIS APPL...

Page 45: ...f paper to establish a draft Insufficient draft Add more flue pipe Let air stabilize before opening door Ensure baffles are positioned correctly Negative pressure Open a window near the appliance Appliance emits odour Paint curing See GENERAL INSTRUCTIONS section Fire doesn t burn hot enough Wood is too wet Insufficient draft Add more flue pipe Not enough air Ensure air control is fully open Also ...

Page 46: ...nt as Escea The warranty applies from the date of purchase from or through an authorised Spartherm fire dealer 1 Nature of Warranty 1 1Subject to the exclusions in section 2 3 Escea undertake to put right any defects in the Spartherm products supplied by Escea for the periods specified below Parts Parts and Labour Warranty Basic firebox parts of the fireplace including inserts stoves cassettes and...

Page 47: ... or damage or other events which have occurred since the product left the control of Escea 2 1 5 Any scratches dints finger print marks and melted items that occurred after the arrival of the product to the Spartherm Dealer 2 1 6 Discolouration of the enamel galvanized surfaces or glass caused by soiling by soot or built in residues of burnt materials as well as visibly changed colour or other asp...

Page 48: ...ept liability for consequential damage or any incidental expenses resulting directly or indirectly from any defect or breach of warranty claims for damage to building or any other consequential loss 3 0 Other Spartherm Warranty Conditions 3 1 No dealer distributor or similar person has the authority to warrant Spartherm products beyond the terms contained in this warranty 3 2 This warranty is auto...

Page 49: ...he fire as soon as you first become aware of the breakdown The Spartherm Dealer will then follow Escea s warranty claim process 5 1 2 Provide the Spartherm product serial number 5 1 3 Provide reasonable proof of purchase for the Spartherm product 5 1 4 If required provide access to the premises at which the Spartherm product is located so it can be inspected This document contains technical data s...

Page 50: ...50 630359_5 9 0 SERVICE HISTORY DATA PLATE The appliance must be serviced at least annually and possibly more frequently dependant on usage Date Dealer name Service Technician Service performed Notes ...

Page 51: ...51 630359_5 ...

Page 52: ...52 630359_5 Data Plate Installer Adhere duplicate data plate here ...

Page 53: ...53 630359_5 Distributed in New Zealand by Escea Ltd 17 Carnforth Street Dunedin 9058 Ph 0800 173 000 ...

Reviews: