36
630359_5
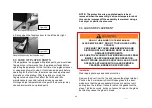
Whenever you refuel the appliance it is advised that you
adhere to the following procedure:
•
Open the flue damper to its most unrestrictive (open)
position (TURN FULLY ANTI-CLOCKWISE).
•
Wait a few moments for the appliance to react to this
new position and settle down.
•
Open the fuel loading door and refuel the appliance in
accordance with section 5.0.
•
Close the fuel loading door.
•
Wait a few moments for the new fuel to ignite.
•
Close the flue damper to its closed (default) position
(TURN FULLY CLOCKWISE).
Following this procedure should ensure that smoke spillage
into the immediate room is minimised during refuelling.
5.2 FUEL
THIS APPLIANCE IS DESIGNED TO BURN NATURAL
SOFTWOOD WITH A MOISTURE CONTENT OF LESS
THAN 25% ONLY. DO NOT BURN TREATED WOOD,
COAL, CHARCOAL, COLOURED PAPER, CARDBOARD,
SOLVENTS OR GARBAGE.
HIGHER EFFICIENCIES AND LOWER EMISSIONS
GENERALLY RESULT WHEN BURNING AIR DRIED
SEASONED WOOD, AS COMPARED TO GREEN OR
FRESHLY CUT WOOD.
DO NOT BURN GREEN OR FRESHLY CUT WOOD.
BURNING WET UNSEASONED WOOD CAN CAUSE
EXCESSIVE CREOSOTE ACCUMULATION. WHEN
IGNITED IT CAN CAUSE A CHIMNEY FIRE THAT MAY
RESULT IN A SERIOUS HOUSE FIRE.
DO NOT STORE FUEL WITHIN THE CLEARANCE TO
COMBUSTIBLES ZONE, OR IN THE SPACE REQUIRED
FOR RE-FUELING AND ASH REMOVAL.
NEVER STORE WOOD IN THE ASH PAN COMPARTMENT
(if applicable).
When loading the appliance, ensure that the upper fibre
baffles are not forced out of position. For maximum efficiency,
when the appliance is thoroughly hot, load it fully to the line of
air inlet nozzles at the backside of the firebox or, if not
present, to 50% of the fireboxes backside height and burn at a
medium-low setting. The whiteness of the bricks and the
Summary of Contents for Varia 2L 80h-P7
Page 5: ...5 630359_5 2 0 PRODUCT DIMENSIONS 2 1 2 2 Figure 1 Figure 2 ...
Page 6: ...6 630359_5 2 3 Figure 3 ...
Page 7: ...7 630359_5 2 4 Figure 4 ...
Page 8: ...8 630359_5 2 5 Figure 5 ...
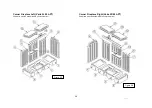
Page 23: ...23 630359_5 Corner L R Varia 2L 2R 80h P7 Double Sided Varia A FDh P8 Figure 23 Figure 24 ...
Page 26: ...26 630359_5 3 7 EXAMPLE OF CAVITY CONSTRUCTION Figure 30 Figure 31 ...
Page 51: ...51 630359_5 ...
Page 52: ...52 630359_5 Data Plate Installer Adhere duplicate data plate here ...


