38
630359_5
5.4 ASH REMOVAL PROCEDURES
IMPROPER DISPOSAL OF ASHES MAY RESULT IN
FIRES.
DO NOT DISCARD ASHES IN CARDBOARD BOXES,
DISCARD IN BACK YARDS, OR STORE IN GARAGES.
IF USING A VACUUM TO CLEAN UP ASHES, BE SURE
THE ASHES ARE ENTIRELY COOLED. USING A VACUUM
TO CLEAN UP WARM ASHES COULD CAUSE A FIRE
INSIDE THE VACUUM.
NEVER OPERATE YOUR APPLIANCE WITH THE ASH
PLUG (IF APPLICABLE) REMOVED.
FAILURE TO ACHIEVE A GOOD SEAL BETWEEN THE
ASH OPENING, ASH PLUG OR ASH WELL DOOR MAY
RESULT IN AN OVER FIRE CONDITION THAT COULD
CAUSE DAMAGE TO THE APPLIANCE AND/OR
SURROUNDINGS.
Allow the ashes in your firebox to accumulate to a depth of 50
TO 75mm; they tend to burn themselves up.
When the fire has burned down and cooled, remove any
excess ashes but leave an ash bed approximately
25mm deep on the firebox bottom to help maintain a hot
charcoal bed.
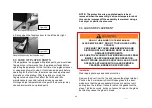
Shovel some ashes out through the door into a metal
container with a tight fitting lid. Leave an ash bed
approximately 1” (25mm) deep on the firebox bottom to help
maintain a hot charcoal bed. Keep the closed container on a
non-combustible floor or ground, well away from all
combustible materials.
The ashes should be retained in the closed container until all
cinders have thoroughly cooled. Cold wood ashes can be
used on the garden or in compost.
5.5 CREOSOTE FORMATION & REMOVAL
When wood is burned slowly, it produces tar and other
organic vapours, which combine with expelled moisture to
form creosote. The creosote vapours condense in the
relatively cooler chimney flue of a slow-burning fire.
As a result, creosote residue accumulates on the flue lining.
When ignited this creosote makes an extremely hot fire. The
chimney connector and chimney should be inspected
regularly during the heating season to determine if a creosote
build-up has occurred. If creosote has accumulated it should
be removed to reduce the risk of a chimney fire.
Summary of Contents for Varia 2L 80h-P7
Page 5: ...5 630359_5 2 0 PRODUCT DIMENSIONS 2 1 2 2 Figure 1 Figure 2 ...
Page 6: ...6 630359_5 2 3 Figure 3 ...
Page 7: ...7 630359_5 2 4 Figure 4 ...
Page 8: ...8 630359_5 2 5 Figure 5 ...
Page 23: ...23 630359_5 Corner L R Varia 2L 2R 80h P7 Double Sided Varia A FDh P8 Figure 23 Figure 24 ...
Page 26: ...26 630359_5 3 7 EXAMPLE OF CAVITY CONSTRUCTION Figure 30 Figure 31 ...
Page 51: ...51 630359_5 ...
Page 52: ...52 630359_5 Data Plate Installer Adhere duplicate data plate here ...


