KolibriSensor
V2.0 | June 17, 2014
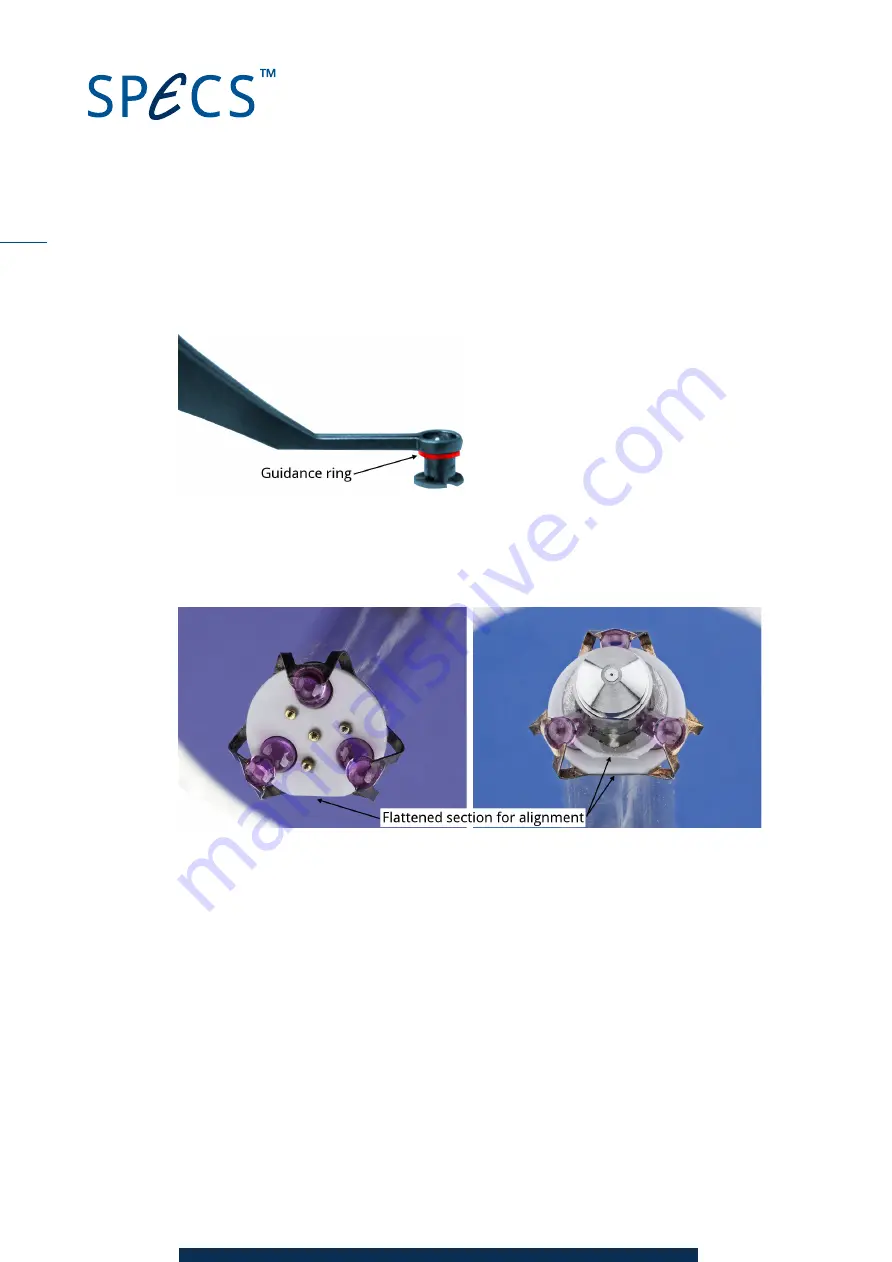
6. Now grip the sensor above the guidance ring using the special tweezers. Ensure that the
sensor does not slip away—there is a risk that the tip pointing out of the metal case will
break or bend.
Figure 4: Holding the sensor ready for insertion into the receptor
7. Align the sensor onto the KolibriReceptor so that the flattened cutaway sections on both
parts match, as shown in Figure 5.
Figure 5: Aligning the sensor into the receptor
8. Push the sensor gently into the receptor. The sensor will slide into the correct position. The
sensor is now in place and ready for measurements.
9. Fit the transport hood back onto the test stage. This provides mechanical protection and
electromagnetic shielding.
3.2
Setting Up Oscillation Parameters
The following procedure describes the normal operation of a KolibriSensor using the Starter Kit
and the Nanonis Oscillation Controller. The resonant frequency and Q factor of the sensor are
measured. The Nanonis Oscillation Controller is set up using typical oscillation parameters to
drive the sensor oscillation at the resonant frequency with controlled amplitude.
6


