Spare Parts
●
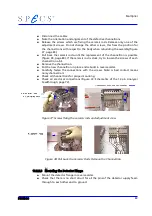
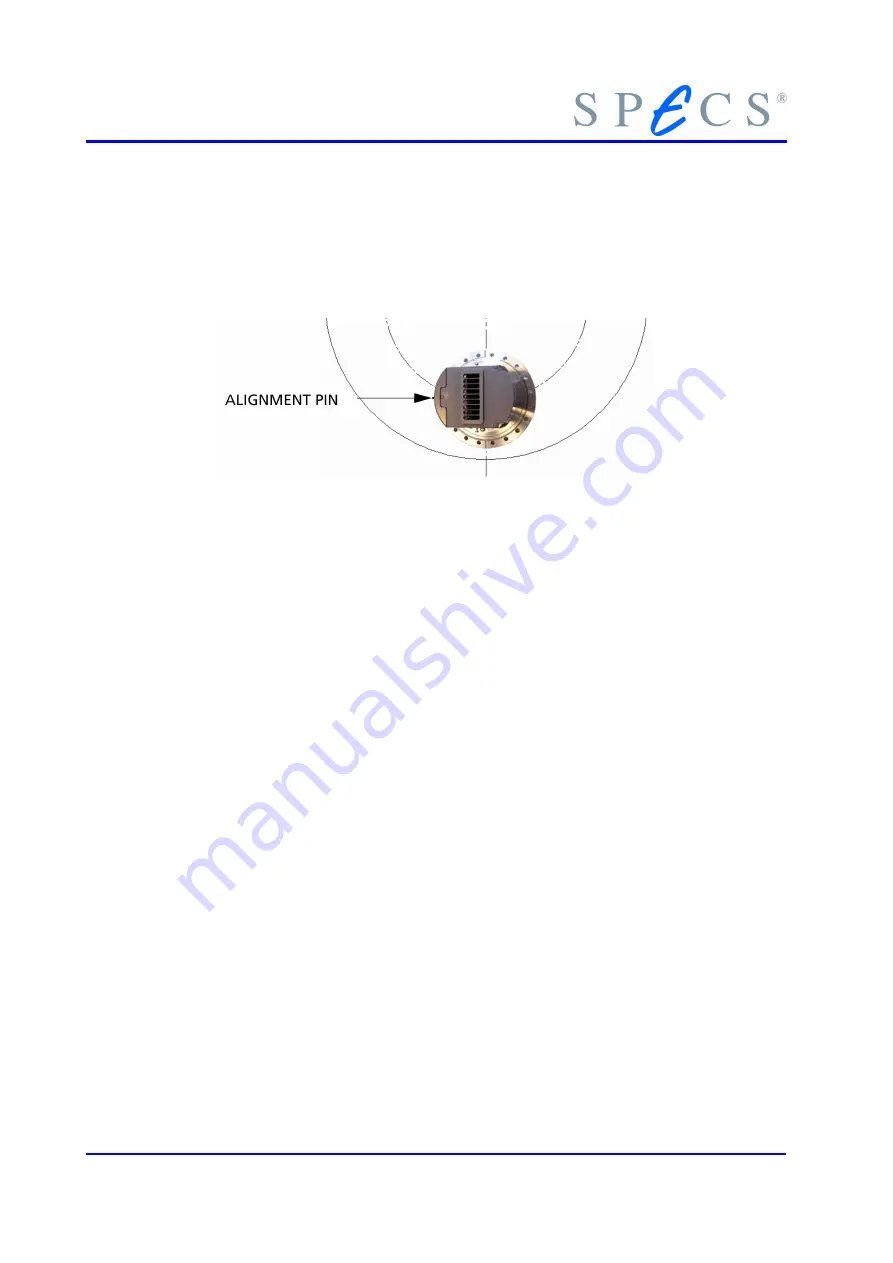
Looking into the opened detector flange from the bottom side you can locate a
'alignment hole' which corresponds to the part at the detector assembly (figure
39).
●
Align the pin with the hole in the ground plate. Be sure that the detector is
nearly parallel to the ground plate and push the detector carefully into its seat.
Figure 39: Alignment Pin
●
Pump down.
●
Detector must be baked out at a vacuum pressure lower than 1
⋅
10
-6
mbar. It is
bakeable up to 200° C
●
Check the detector according to section 8.3. (see Figure 15: Detector Sweep,
Count rate vs. Voltage page 29); checking the single channels in the acquisition
software may be enough.
84
Summary of Contents for PHOIBOS 100
Page 1: ...PHOIBOS Hemispherical Energy Analyzer Series PHOIBOS 100 PHOIBOS 150 3 1...
Page 6: ...Table of Contents PHOIBOS...
Page 10: ...Introduction 4 PHOIBOS...
Page 13: ...Electrical Connections Figure 2 Connection Scheme PHOIBOS 7...
Page 14: ...Components and Connections Figure 3 Analyzer Housing PHOIBOS100 8 PHOIBOS...
Page 15: ...Electrical Connections Figure 4 Analyzer Housing PHOIBOS150 PHOIBOS 9...
Page 42: ......
Page 51: ...SpecsLab Hardware and Software Installation PHOIBOS 45...
Page 52: ......
Page 62: ......
Page 78: ...Analyzer Checks Figure 33 Schematics of the 12 pin Analyzer Feedthrough 72 PHOIBOS...
Page 80: ......
Page 86: ......
Page 92: ...List of Figures Figure 39 Alignment Pin 84 II PHOIBOS...
Page 93: ...List of Figures PHOIBOS III...
Page 94: ......
Page 96: ......
Page 98: ...Index PHOIBOS...


