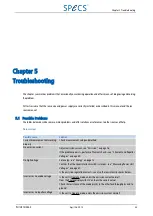
Chapter 5 Troubleshooting
4. Adjust the Energy to 100 V.
5. The DVM (1 : 1000) should show the value of 0.100 V (± 0.001 V).
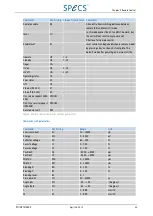
5.3.3 Focus 1
Focus 1 is the first focusing electrode in the source.
Do not continue with this procedure until you have performed all of the preparatory steps and safety checks described in
"Measuring Power Unit Voltages" on page 37.
To check Focus 1:
1. Connect the HVP with the DVM (range 20 V) to connector .
2. Adjust the Focus 1 to 5000 V on the front panel. Press the Operate button. This will switch on the high voltage
(the flashing warning message “check filament” has no meaning in this case).
3. The DVM (1:1000) should show the value of 5.000 V (± 0.001 V).
4. Adjust the Energy to 100 V.
5. The DVM (1 : 1000) should show the value of 0.100 V (± 0.001 V).
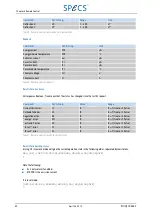
5.3.4 Focus 2
Focus 2 is the second focusing electrode in the source.
Do not continue with this procedure until you have performed all of the preparatory steps and safety checks described in
"Measuring Power Unit Voltages" on page 37.
To check Focus 2:
1. Connect the HVP with the DVM (range 20 V) to connector .
2. Adjust the Focus 2 to 5000 V on the front panel. Press the Operate button. This will switch on the high voltage
(the flashing warning message “check filament” has no meaning in this case).
3. The DVM (1:1000) should show the value of 5.000 V (± 0.001 V).
4. Adjust the Energy to 100 V.
5. The DVM (1 : 1000) should show the value of 0.100 V (± 0.001 V).
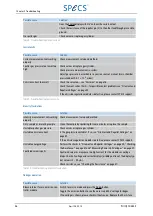
5.3.5 Deflection X1, X2, Y1, Y2
The deflectors steer the beam.
Do not continue with this procedure until you have performed all of the preparatory steps and safety checks described in
"Measuring Power Unit Voltages" on page 37.
To check the deflector voltages:
1. Load the factory setting of the machine data (section 4.1.3.8 ).
2. Adjust the angles theta and phi to 0 ° (section 4.1.4.6 .).
3. Set Width X = 0.00 mm, Width Y = 0.00 mm, Energy = 5000 V.
4. Switch Operate and HV on. This will switch on the high voltage (the flashing warning message “check fil-
ament” has no meaning in this case).
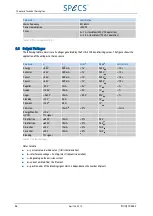
5. Set POSition X and POSition Y on the values listed in the table below.
PU IQE 12/383.0
April 26, 2013
39

