29
XR 50
V3.1 | May 02, 2016
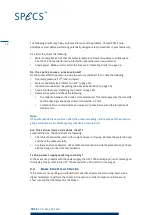
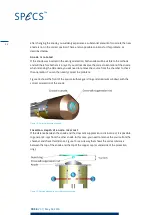
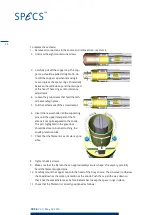
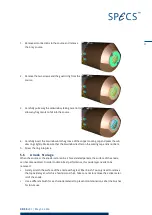
Measure the resistance between the filament pin and ground. This should be infinite.
We recommend that you use an audible contact checker with crocodile clips for this
check.
While measuring, rotate the copper cap through 360º. Confirm that there is no contact
between filament and ground while turning.
If there is a short circuit while rotating the cap, remove it and correct the position of
the filament, or bend it inward.
12. Tighten the grub screws.
13. Once again, check that none of the filament pins have a short to ground. Also check that
the filaments are not broken. See Figure 12 on page 21 for the pin assignment of the fil-
ament feedthrough.
Before first use of the filament, degas the filament and both anodes. See "Anode and Filament
Conditioning" on page 12. This procedure ramps up the filament current so that the filament is
not deformed in its first use.
Note
If you are using a filament from another manufacturer, it may be necessary to adjust the
standby current and current limit setting. See the UXC 1000 manual for instructions.
5.4
Replacing the Water Inlet
Electrochemical effects make the anode water cooling system susceptible to corrosion. As long
as the anode water cooling connectors are smooth, there is no problem. However, if they show
significant signs of corrosion (deep pits on the connectors), or you experience water leaks, you
should change the water inlet.
In the procedure for replacing the anode, the first part to be removed is the water inlet. See
"Replacing the Anode" on page 26 for more information. Note also the following points:
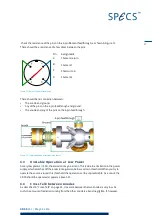
Make sure to note the orientation of the anode before starting.
Even if you do not need to remove the anode, it is a good idea to do so—it will give you the
opportunity to check the condition of the anode.
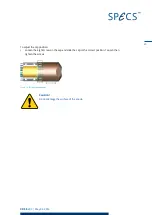
The length of the cooling tube should fit exactly—you should not need to force the tube
into place.
Summary of Contents for XR 50
Page 1: ...XR 50 XR 50 NAP X Ray Source User Manual V3 1 May 02 2016...
Page 6: ...XR 50 V3 1 May 02 2016 This page intentionally left vi...
Page 20: ...XR 50 V3 1 May 02 2016 This page intentionally left 14...
Page 30: ...XR 50 V3 1 May 02 2016 This page intentionally left 24...
Page 38: ...XR 50 V3 1 May 02 2016 This page intentionally left 32...
Page 46: ...XR 50 V3 1 May 02 2016 This page intentionally left 40...
Page 58: ......

