11. Accessories: UL Certified Micro-USB/USB re-charging cable & metal carabiner
Water & Dust-Resistance level of IP65: No ingress of dust; complete protection against contact. Protected from
low pressure water jets from any direction (subjected to all 3 charging ports are fully covered & sealed)
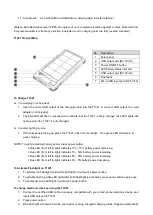
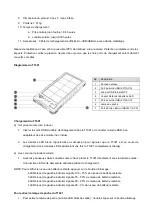
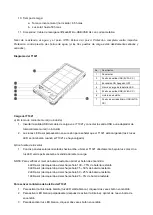
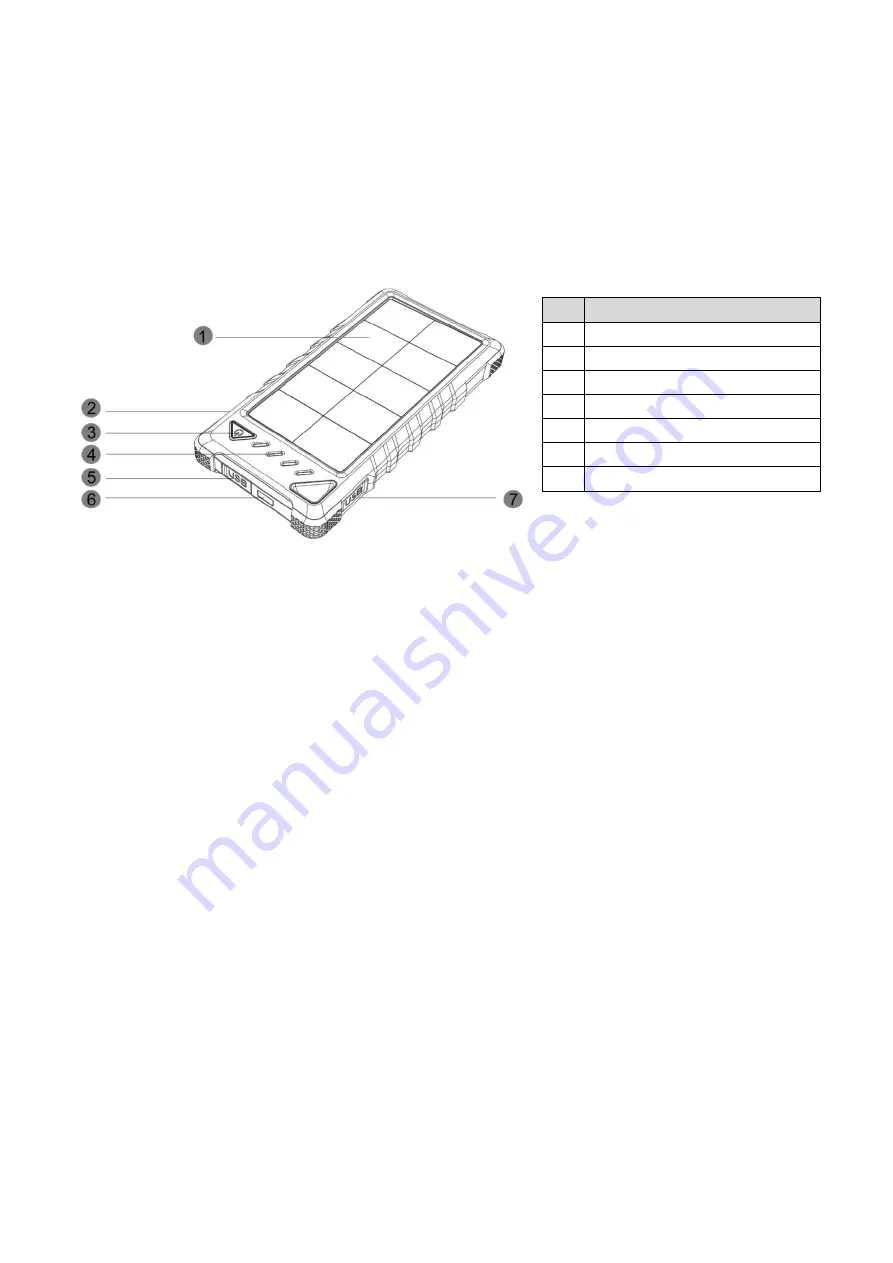
T1021 Product Map
To Charge T1021
a) Via wall plug (not included)
1. Insert the micro USB output of the charging cable into the T1021
& connect USB output to a wall
adapter (not included).
2. The blue LED will flash in succession to indicate that the T1021 is being charged (all 4 LED lights will
light up when the T1021 is fully charged)
b) Via solar lighting source
1. With solar panels facing up, place the T1021 under direct sunlight. One green LED will remain lit
while charging
NOTE: To verify remaining battery power, press power button:
4 blue LED (from left to right) indicates 100
– 75% battery power remaining
3 blue LED (from left to right) indicates 75
– 50% battery power remaining
2 blue LED (from left to right) indicates 50
– 25% battery power remaining
1 blue LED (from left to right) indicates 25
– 0% battery power remaining
To Activate Flashlight on T1021
1. To activate the flashlight (solid white LED light): double-click power button
2. To activate flashing white LED light (after solid flashlight is activated): press power button again once
3. To deactivate white LED light, double-click power button
To charge electronic devices using the T1021
1. Connect the certified USB cable accessory compatible with your smart phone/electronic device and
insert USB output into T1021
2. Press power button
3. Blue LED light will remain lit while your device is being charged (charging will be stopped automatically
No.
Description
1
Solar panel
2
USB output port (DC 5V/1A)
3
Power ON/OFF button
4
LED battery status indicator
5
USB output port (DC 5V/2A)
6
Flashlight
7
Micro-USB input port (DC 5V/1A)

