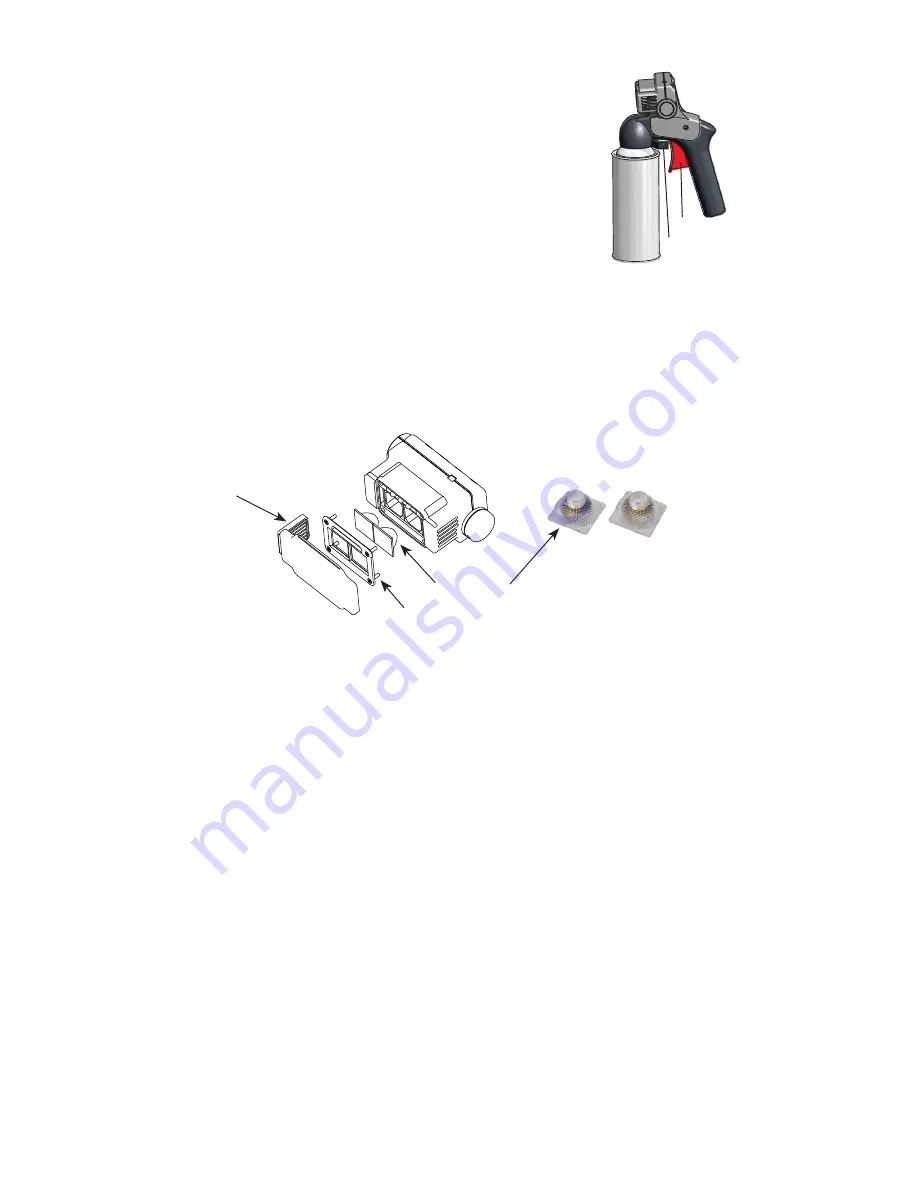
USING THE LAMP MOUNT/SPRAYER
• To attach the lamp, pull back the metal clip at the top of the
sprayer, slide the lamp onto the mounting bracket and release
the
clip.
• Remove the cap from the penetrant can. Place the jaws of the
sprayer above and behind the opening on the can. Squeeze
the tabs to attach the sprayer under the
fi
rst ridge on the can.
Do not touch the sprayer’s lever until you are ready to spray.
• When the lamp mount/sprayer is attached to an aerosol can,
use both hands when shaking to mix contents.
REPLACING THE SPLASH GUARD
The EagleEye EE-365 lamp comes equipped with three splash guards that are also
available in replacement packs. They protect the LEDs from penetrant. In addition, one side
of the guard is
fi
tted with a particulate
fi
lter that protects the internal fan from foreign matter.
To replace, hold the lamp
fi
rmly in one hand and gently pull the splash guard from the top
with the
fi
ngers of the other hand. Align a new one with the indicators on top next to the
white LEDs and press into place.
REPLACING THE UV LENSES
• The UV lenses that cover the two UV-A LEDs must be replaced periodically, since they
will grow cloudy (solarize) over time from repeated use.
• Remove the splash guard and set it aside.
• Remove the four Phillips screws in the faceplate and retain them. Remove and set aside
the
faceplate.
• Replace the solarized lenses with new ones. Reattach the faceplate with the four screws.
• Replace the splash guard.
5
UV-A Lens
Faceplate
Splash Guard
with Integral
Particulate Filter
Tab
Sprayer’s Lever


