background image

9B

Flush the Faucet


Enjuague el grifo 
Vidanger l’robinet

9

9A

9C

Remove Aerator

Retire el aereador

Retirez l'aérateur 

Reinstall Aerator

Reinstale el aereador

Réinstallez l’aérateur 

Hand Tighten

Apriete con la mano

Serrez manuellement

8A

Turn On Water & Confirm Proper Installation
Active el suministro de agua y confirme que la instalación está adecuadamente efectuada
Ouvrez l’eau et confirmez que l’installation est correcte

8

Open Slowly

Abra lentamente
Ouvrez lentement

Turn On Faucet

Active el grifo
Ouvrez le robinet 

Hot

Hot

Caliente

Caliente

Chaud

Chaud

Cold

Cold

Fría

Fría

Froid

Froid

Hot

Caliente

Chaud

Cold

Fría

Froid

Allow hot & cold water to run for at least 15 seconds each.

Deje correr el agua caliente y fría durante al menos 15 segundos 
cada una.
Laissez couler l’eau chaude et l’eau froide pendant au moins 
15 secondes.

15

sec

Open

Open

Abierta

Abierta

Ouverte

Ouverte

For Additional Installation Help:

Para la instalación adicionales de ayuda:

Pour les aides supplémentaires à l’installation:

1-800-PFAUCET (732-8238)

pfisterfaucets.com

Open

Open

Abierta

Abierta

Ouverte

Ouverte

Check for leaks above and below the sink.

Revise si hay fugas encima y debajo del fregadero

Assurez-vous qu’il n’y a pas de fuite au dessus ou au dessous du lavabo

SAMPLE 

COPY

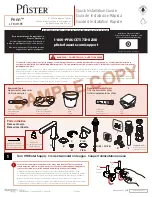
Summary of Contents for Pfister Penn LF-049-PE

Page 1: ...an debajo del fregadero o cerca del medidor de agua Si se trata de un reemplazo de grifo quite el grifo viejo y limpie completamente la superficie del fregadero Recherchez les entr es d approvisionnem...

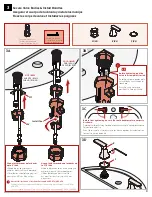
Page 2: ...Required for This Step No se necesitan herramientas para este paso Pas d outil n cessaire pour cette tape 2B Position valve arrow to point to sink this ensures handle will be aligned Posicione las fl...

Page 3: ...crou avec filetage pour les ponts jusqu 51mm d paisseur Use nut with threads down for decks up to 1 1 2 thick Utilice la tuerca con rosca hacia abajo para cubiertas de hasta 38mm de espesor Utiliser...

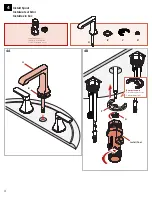
Page 4: ...Install Spout Instale el surtidor Installez le bec Bumps face up Protuberancias arriba Cogne r cepteur Supplied Install Tool Instalar la herramienta Outil d installation fourni Install Tool F G B3 B...

Page 5: ...hors du tube la connexion est s curis e Top Cap Tapa superior Bouchon sup rieur Click Click Cliquez Check that connections are secure by pulling down on the tubes while avoiding levers They should not...

Page 6: ...J Flush Lines Enjuagar las L neas Rincer les Lignes Water Supply Lines not included Please consult manufacturer and or its instructions for the correct method of installation of supply lines fittings...

Page 7: ...Branchez au drainage Push To Activate Eempuje Para Activar Poussez Pour Activer Drain Desag e Drainage Save Components Reserve los componentes Conservez les composants Partially thread drain body to...

Page 8: ...Caliente Caliente Chaud Chaud Cold Cold Fr a Fr a Froid Froid Hot Caliente Chaud Cold Fr a Froid Allow hot cold water to run for at least 15 seconds each Deje correr el agua caliente y fr a durante al...

Reviews: