background image

Step 1:  Assemble the New Sensor & 
Shield Plate


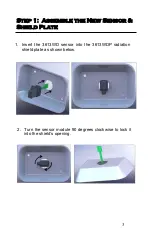
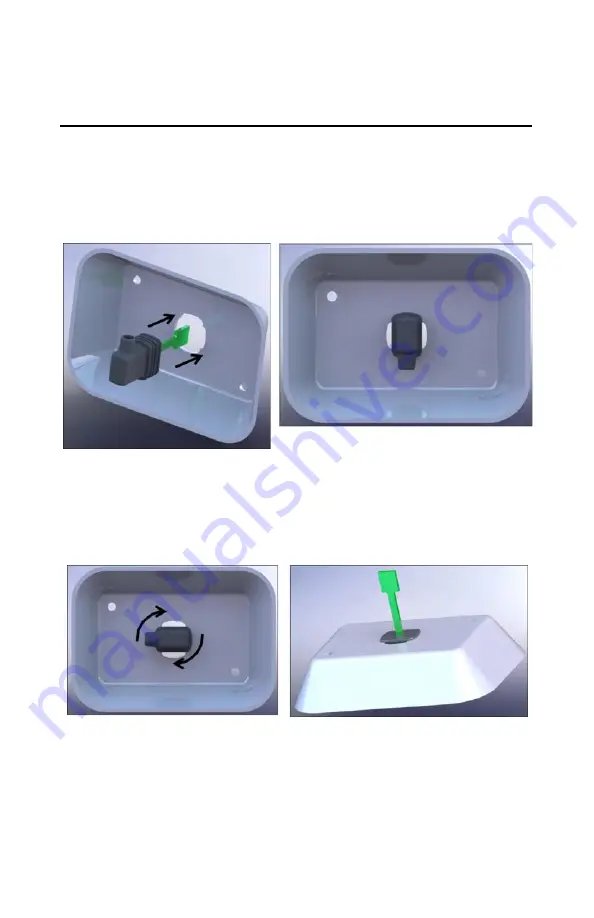
1.  Insert  the  3613WD  sensor  into  the  3613WDP  radiation 

shield plate as shown below. 

2.  Turn the sensor module 90  degrees  clockwise to lock  it 

into the shield’s opening. 

Summary of Contents for WatchDog 2000 Series

Page 1: ...1 2000 Series Weather Stations Analog Temperature RH Sensor Upgrade Kit PRODUCT MANUAL KIT 3613WDU ...

Page 2: ...e 3613WDU Analog Temperature RH Sensor Upgrade Kit is used to upgrade Watchdog 2000 Series Weather Station models 2900ET 2700 and 2550 to use the 3613WD Temper ature Humidity Sensor This manual provides instructions on upgrading a Watchdog 2000 Series Weather Station with a new Analog Temperature RH Sensor Specifications Temperature Range 40 to 257 o F 40 to 125 o C Accuracy typical 40 to 185 o F ...

Page 3: ...ep 1 Assemble the New Sensor Shield Plate 1 Insert the 3613WD sensor into the 3613WDP radiation shield plate as shown below 2 Turn the sensor module 90 degrees clockwise to lock it into the shield s opening ...

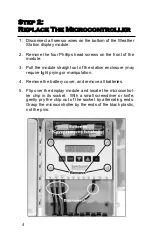
Page 4: ...tation enclosure may require light prying or manipulation 4 Remove the battery cover and remove all batteries 5 Flip over the display module and locate the microcontrol ler chip in its socket With a small screwdriver or knife gently pry the chip out of the socket by alternating ends Grasp the microcontroller by the ends of the black plastic not the pins Step 2 Replace The Microcontroller ...

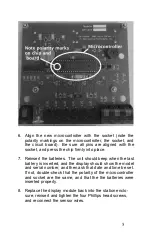
Page 5: ...teries The unit should beep when the last battery is inserted and the display should show the model and serial number and then ask that date and time be set If not double check that the polarity of the microcontroller and socket are the same and that the the batteries were inserted properly 8 Replace the display module back into the station enclo sure reinsert and tighten the four Phillips head sc...

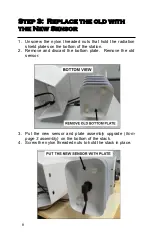
Page 6: ...that hold the radiation shield plates on the bottom of the station 2 Remove and discard the bottom plate Remove the old sensor 3 Put the new sensor and plate assembly upgrade from page 3 assembly on the bottom of the stack 4 Screw the nylon threaded nuts to hold the stack in place ...

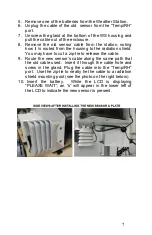
Page 7: ...to the radiation shield You may have to cut a zip tie to release the cable 9 Route the new sensor s cable along the same path that the old cable used Insert it through the cable hole and screw in the gland Plug the cable into the Temp RH port Use the zip tie to neatly tie the cable to a radiation shield mounting post see the photo on the right below 10 Insert the battery While the LCD is displayin...

Page 8: ...o improper installation or use lightning negligence accident or un authorized modifications or to incidental or consequential damages beyond the Spectrum product Before returning a failed unit you must obtain a Returned Materials Authorization RMA from Spec trum Spectrum is not responsible for any package that is returned Spectrum Technologies Inc 3600 Thayer Court Aurora IL 60504 800 248 8873 or ...

Reviews: