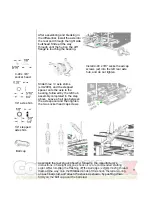
5
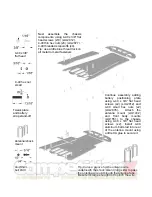
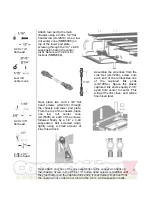
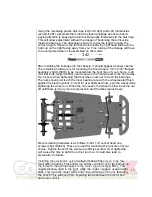
Attach rear pod to the main
chassis using a 4-40 x 1/2” flat
head screw (smr2014). Use a low
roll center cone (SMR5008) on
top of the lower pod plate,
screwing through the 1/4” x 4-40
suspension ball in the center
pivot. Secure with 4-40 mini-
locknut (SMR2080).
Assemble the side links from the
Link Set (smr1264), screw onto
each end of the turnbuckles one
of the captured link ends
(smr1265-s). Space the plastic
captured link ends equally 2-1/8”
apart from center to center. This
will get the link close, and will be
fine-tuned later.
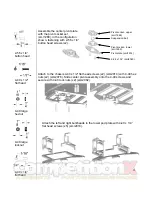
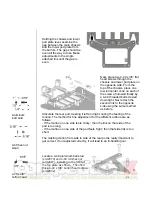
Next, place two 4-40 x 3/8” flat
head screws (smr2012) through
the chassis and lower pod plate.
From the top of the chassis, place
one low roll center cone
(smr5008) on each of the screws,
followed finally by a 1/4” x 4-40
suspension ball screwed down
tightly using a small amount of
blue thread lock.
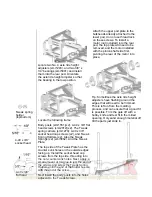
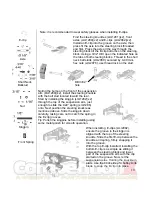
Next, attach only one of the link assemblies to the suspension balls on
the chassis. Screw in the 2-56 x 1/4” button head screws (smr2060) until
they just bottom on the captured link ends. It is extremely important that
the captured link ends do not bind on the 1/4” x 4-40 suspension balls.
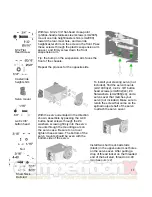
4-40 x 1/2”
flat head
Low roll
center cone
4-40 x 3/8”
flat head
2-56 x 1/4”
button head

