Preparing a New Sprayer
If this unit is new, it is shipped with test fluid in the fluid section
to prevent corrosion during shipment and storage. This fluid
must be thoroughly cleaned out of the system with mineral
spirits before you begin spraying.
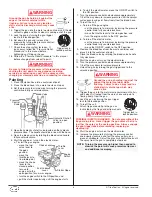
Always keep the trigger lock on the spray gun in the
locked position while preparing the system.
1. Place the siphon hose into a container of mineral spirits.
2. Place the bleed hose into a metal waste container.
3. Set the pressure to minimum by turning the pressure
control knob fully counterclockwise.
4. Open the hydraulic shut-off valve located on the hydraulic
pressure hose. The handle should be in line with the hose.
5. Open the bleed valve by rotating the bleed valve handle
fully counterclockwise.
6. Start the engine or turn on the electric motor.
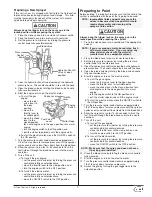
a. To start the gas
engine,
• move the fuel
valve lever to
the open
position,
• move the
throttle lever to
its middle point,
• move the choke
lever to the
closed position
for a cold engine or to the open position for a warm
engine,
• turn the engine switch to the ON position, and
• pull the starter rope briskly until the engine starts.
b. To start the electric motor, move the ON/OFF switch to
the ON position.
7. Turn the pressure control knob clockwise approximately
1/3 of the way down to increase pressure until the sprayer
cycles evenly and solvent flows freely from the bleed hose.
8. Allow the sprayer to run for 15–30 seconds to flush the
test fluid out through the bleed hose and into the waste
container.
9. Turn off the unit.
a. To turn off the gas engine,
• set the pressure to minimum by turning the pressure
control knob fully counterclockwise,
• move the throttle lever to the slow position, and
• turn the engine switch to the OFF position.
b. To turn off the electric motor,
• set the pressure to minimum by turning the pressure
control knob fully counterclockwise,
• move the ON/OFF switch to the OFF position.
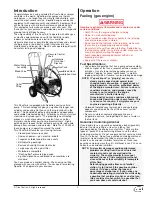
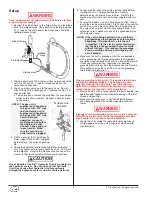
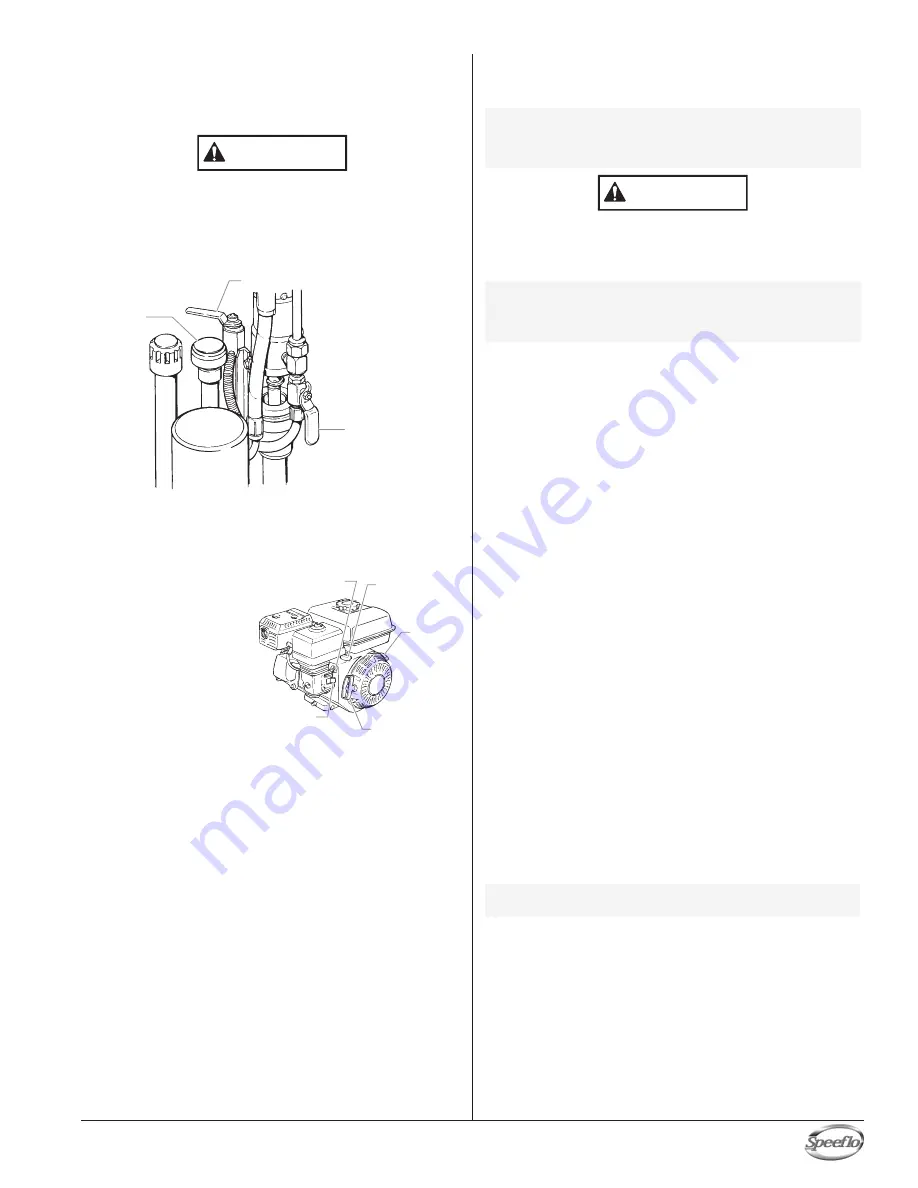
Fuel Valve
Lever
Choke Lever
Engine
Switch
Throttle
Lever
Starter Rope
Pressure
Control
Knob
Bleed Valve
Hydraulic Shut-off
Valve (in open
position)
CAUTION
Preparing to Paint
Before painting, it is important to make sure that the fluid in the
system is compatible with the paint that is going to be used.
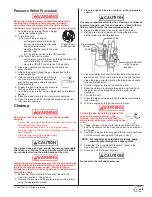
Always keep the trigger lock on the spray gun in the
locked position while preparing the system.
1. Place the siphon hose into a container of the appropriate
solvent.
2. Place the bleed hose into a metal waste container.
3. Set the pressure to minimum by turning the pressure
control knob fully counterclockwise.
4. Open the hydraulic shut-off valve located on the hydraulic
pressure hose. The handle should be in line with the hose.
5. Open the bleed valve by rotating the bleed valve handle
fully counterclockwise.
6. Start the engine or turn on the electric motor.
a. To start the gas engine,
• move the fuel valve lever to the open position,
• move the throttle lever to its middle point,
• move the choke lever to the closed position for a
cold engine or to the open position for a warm
engine,
• turn the engine switch to the ON position, and
• pull the starter rope briskly until the engine starts.
b. To start the electric motor, move the ON/OFF switch to
the ON position.
7. Turn the pressure control knob clockwise approximately
1/3 of the way down to increase pressure until the sprayer
cycles evenly and solvent flows freely from the bleed hose.
8. Allow the sprayer to run for 15–30 seconds to flush the
test fluid out through the bleed hose and into the waste
container.
9. Turn off the unit.
a. To turn off the gas engine,
• set the pressure to minimum by turning the pressure
control knob fully counterclockwise,
• move the throttle lever to the slow position, and
• turn the engine switch to the OFF position.
b. To turn off the electric motor,
• set the pressure to minimum by turning the pressure
control knob fully counterclockwise,
• move the ON/OFF switch to the OFF position.
10. Close the bleed valve by rotating the bleed valve handle
fully clockwise.
11. Start the engine or turn on the electric motor.
12. Turn the pressure control knob clockwise approximately
1/3 of the way down to increase pressure.
13. Unlock the gun by turning the gun trigger lock to the
unlocked position.
NOTE: Make sure that the spray gun does not have a
tip or tip guard installed.
NOTE: If you are spraying a water-based latex, flush
with warm, clean water. If you are using any
other material, check with the material
manufacturer for a compatible solvent.
CAUTION
NOTE: Incompatible fluids and paint may cause the
valves to become stuck closed, which would
require disassembly and cleaning of the
sprayer’s fluid section.
© Titan Tool Inc. All rights reserved.
7
English

