S4H-RE-00, S4H-RE-10
6
3.4. Wi-Fi relay initiation
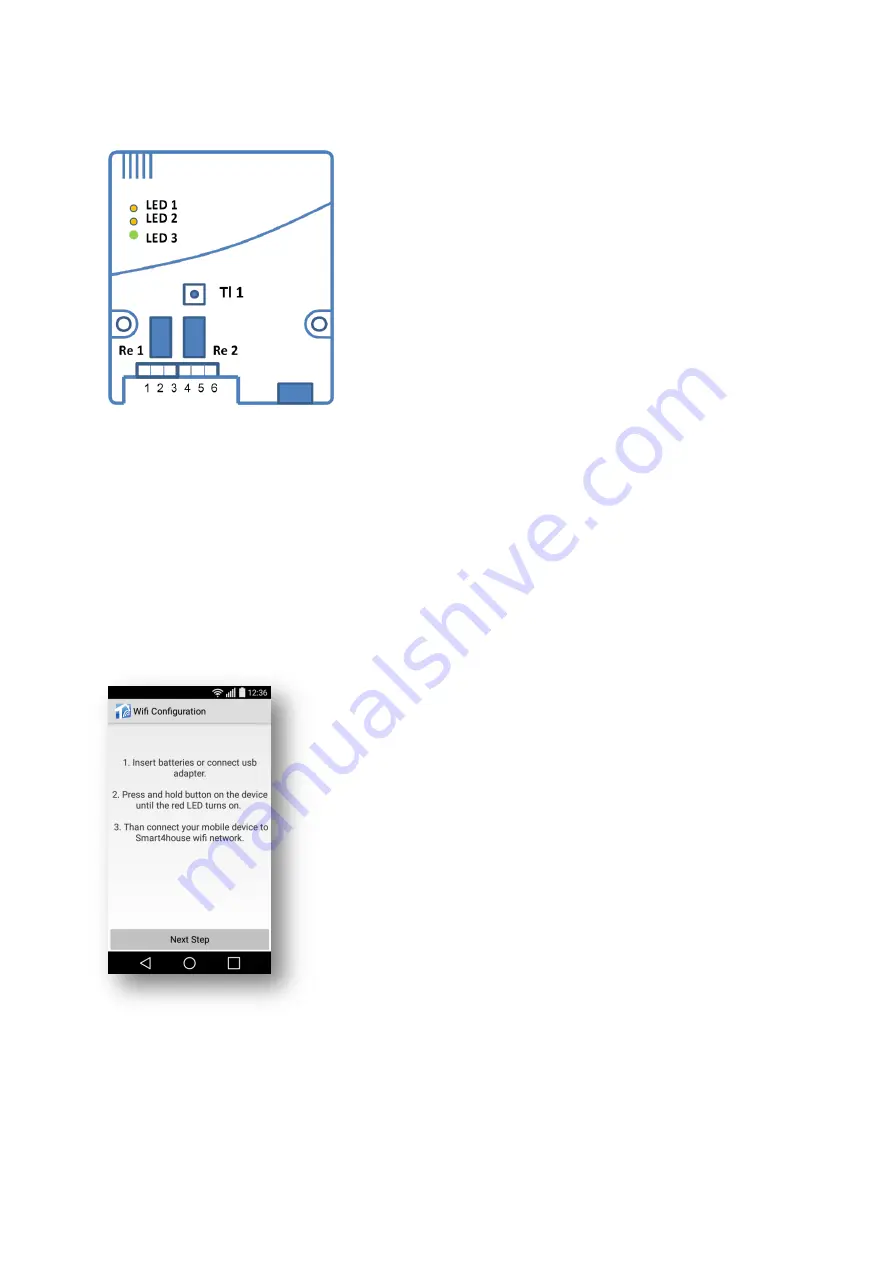
LED 1
– orange, indicates closing of Re1 (first relay)
LED 2
– orange, indicates closing of Re2 (second relay)
LED 3
– multicolour (red, orange, green), its illumination/colour
indicate the relay initialisation steps and Wi-Fi relay connection
status during use
Tl 1
– Wi-Fi relay initialisation button
Procedure:
1.
Power the Wi-Fi relay up (connect the USB connector and connect the source to the grid
or connect the 12
– 24 V power supply). LED 3 will illuminate orange.
2.
Press button Tl 1 in the Wi-Fi relay and hold it depressed for about 3 - 5 seconds until
LED 3 turns red. Once LED 3 illuminates red, the button may be released. The light of this LED
indicates creation of the AP mode in the relay (the Wi-Fi relay has created a provisional Wi-Fi
network named Smart4house). The AP mode duration is limited to 3 minutes, during which you
must connect your Smartphone/tablet to the provisional Smart4house network.
3.4.a. Press
Next Step
to get to the screen where the
initialisation procedure will be completed.
3.
After creating the AP mode, exit the application and go to the screen for WiFi setting and
connect your Smartphone/Tablet to the "Smart4house" network.
4.
Now get back to the Smart4house application.


