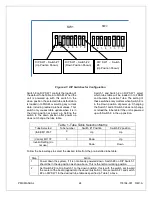
PMX MANUAL
25
118164-001 REV. A
3.
Turn on the power to the PMX unit, and wait for 10 seconds. This will reload the selected
default table in to the FRAM.
4.
After the 10 seconds has elapsed, turn the power off, and return Switch 8 to the Up
position. The tables have been reloaded and the system is ready to use. Make sure to
leave Switch 8 in the Up position.
4.3
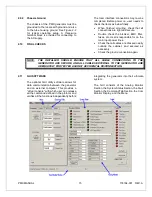
FILAMENT AUTO-CALIBRATION
The calibration function automatically
establishes calibration curves relating
filament current to tube current (mA) at three
or four kV settings, depending on generator
type. This allows the generator to predict the
filament temperature (filament current) that
will be required for any mA value over the full
kV operating range.
It is recommended that the X-Ray tube be
seasoned before attempting auto calibration,
particularly if the tube has not been used for
some time. Refer to tube datasheet for
seasoning operation.
There are two different modes for user
selection to calibrate filament. User can
calibrate the large filament and small filament
separately or calibrate both large filament
and small filament at one time. Sending “Set
Calibration Mode” command (command
number 28) with different argument will enter
different calibration mode (Refer to protocol
specification document for details).
Use these steps to perform the X-Ray tube
auto calibration function:
Step
Action
1.
Entering calibration mode
Sending a “Set Calibration Mode” command (command number 28) with an argument of
1 or 2 or 3 with Prep and Exposure control in the OFF state. Generator will enter
calibration mode but in ‘pause’ state as the Prep and Exposure is inactive.
2.
Enable Prep and Exposure to start calibration
Calibration will be starting if both Prep and Exposure are activated. Once the sequence
has started the generator will automatically cycle through the exposure settings as long
as the Prep and Exposure control are ON until it either finishes calibration or there is an
exposure fault.
An exposure fault will cause the calibration routine to abort, and the unit to exit
calibration mode. If the user removes Prep and / or Exposure control during the
sequence, the calibration routine will enter a “Paused” state. It will not exit calibration
mode, but it will stop doing exposures and wait until Prep and Exposure control are both
returned to the ON state. If the user returns Prep and Exposure control ON, the PMX will
continue the calibration. Usually it will continue from where it was when the sequence
was paused, but depending on what it was doing when the calibration sequence was
interrupted it may go back and repeat a previous step.
The user may cancel calibration at any time by first setting Prep and / or exposure
control off, and then sending a “Set Calibration Mode” Command with an argument of 0.
Sending this command resets the calibration sequence. The next time calibration is
started it will go back to the beginning. Once calibration is started previous values for
preheat will be overwritten. Stopping calibration in the middle will result in some points
being calibrated and others not being calibrated. This may result in poor or inconsistent
preheat adjustment.
If user chooses to calibrate large and small filaments separately, only the chosen
filament will be affected. For example if small filament is calibrated and you attempt to


