Index:
Erstellt: 06/17
2017-07-03 installation instructions rudder angle indication systems.docx
Page 12
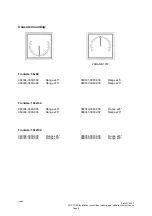
Zero adjustment:
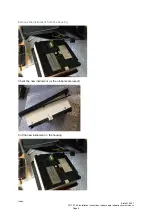
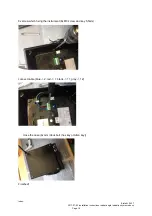
Remove the plate with the dimmer potentiometer
Turn gently with a well-fitting screwdriver the potentiometer “ZERO”
to left or right to adjust the pointer to zero on the scale.
The instrument must be supplied with 24V!
And the input to be set to zero
Span adjustment
:
Remove the plate with the dimmer potentiometer
Turn gently with a well-fitting screwdriver the potentiometer
“SPAN1” (for PORT side) or “SPAN2” (for STBD side)
to left or right to adjust the pointer to zero on the scale.
The instrument must be supplied with 24V!
For span adjust PORT side apply full scale input as on label (e.g. -12V)
For span adjust STBD side apply full scale input as on label (e.g. +12V)
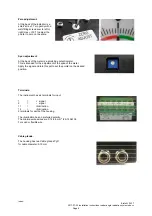
Terminals:
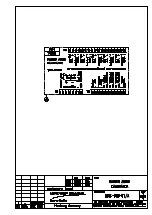
The instrument has six terminals for input
1
=
+ signal
2
=
- signal
11 = illumination
12 =
illumination.
21
=
+ supply 24V
22
=
- supply 24V.
The illumination has no preferred polarity.
The min/max wires sizes are 0,14-2.5 mm
2
(26-14 AWG).
For solid or flexible wire.
Cable glands:
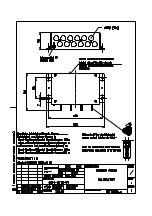
The housing has two Cable glands Pg11
for cable diameter: 5-10mm
Additional 1 place for a third Pg11
Summary of Contents for Rudder Angle Indicator System
Page 18: ...056357 B RAIS 1 10 Declaration of Conformity...
Page 20: ...056357 B RAIS 2 2 Normal Operational Mode...
Page 26: ...056357 B RAIS 3 6 Viewing RAC Errors through SUSI...
Page 28: ...056357 B RAIS 4 2 Maintenance by Service Personnel...
Page 58: ...056357 B RAIS 7 4 General Troubleshooting Instructions...
Page 64: ...056357 B RAIS 8 6 Replacing Alarm Output Relays...
Page 95: ......
Page 96: ......
Page 97: ......
Page 98: ......
Page 99: ......
Page 100: ......
Page 101: ......
Page 102: ......
Page 103: ......
Page 104: ......
Page 105: ......
Page 106: ......
Page 107: ......
Page 108: ......
Page 109: ......
Page 110: ......
Page 111: ......
Page 112: ......
Page 113: ......
Page 114: ......
Page 115: ......

