background image

05

SPEX MEDIAL THIGH SUPPORT USER MANUAL

7

WWW.SPEXSEATING.COM

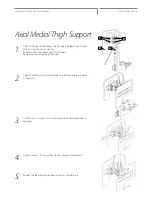
Adjust the height of the Medial Thigh Support by loosening the front 
fasteners (A) with a 4mm Hex Key. 
Retighten once the correct height is achieved.
Remove cover and padding if needed. 

Adjust the Medial Thigh Support plate (B) width and angle and depth 
as necessary.

2.

Tighten nuts (C) using a 10mm spanner once the correct position is 
achieved.

3.

Tighten fasteners (D) using 4mm Hex Key to prevent movement. 

Replace the foam padding and cover and zip up before use. 

4.

1.

Axial Medial Thigh Support

5.

A

B

C

D

Summary of Contents for Pommel

Page 1: ...ORMATION NOTICE This manual contains important instructions that must be passed on to the user of this product Please do not remove this user manual before delivery to the end user SUPPLIER This manua...

Page 2: ...AS NZS 3744 1 In rare cases the Neoprene and Lycra fabric may cause a skin irritation for people with sensitive skin If you experi ence any reddening or itching of the skin consult with your health ca...

Page 3: ...ing at all times If it stops locking do not use the equipment 12 A medial thigh support is not a device used to prevent the user sliding forward in the seating 13 Never use the medial thigh support wi...

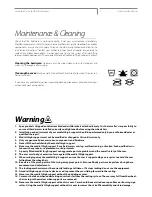
Page 4: ...rrosion degradation to the functionality of your Medial Thigh Support or potential failure If your Medial Thigh Support becomes damp or wet thoroughly wipe with a dry cloth as soon as possible Do not...

Page 5: ...holes as shown Offset if necessary Use the supplied washer C and M6 nuts D to fasten the block securely in place A Mounting Block B Threaded Fixing Studs C Washer D M6 nuts E Seat pan A B C D 1 2 3 4...

Page 6: ...hown to pre vent the medial thigh support from being removed 9 10 1 Adjust the height of the Medial Knee Support by loosening the front fasteners A with a 4mm Hex Key Retighten once the correct height...

Page 7: ...the correct height is achieved Remove cover and padding if needed Adjust the Medial Thigh Support plate B width and angle and depth as necessary 2 Tighten nuts C using a 10mm spanner once the correct...

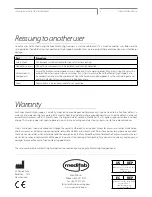
Page 8: ...excluded There are not warranties which extend beyond the description on the face hereof Remedies for breach of express warranties herein are limited to repair or replacement of the goods In no event...

Reviews: