background image


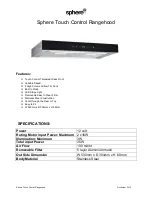
Sphere Touch Control Rangehood 


November 2013 


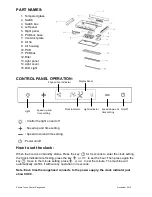
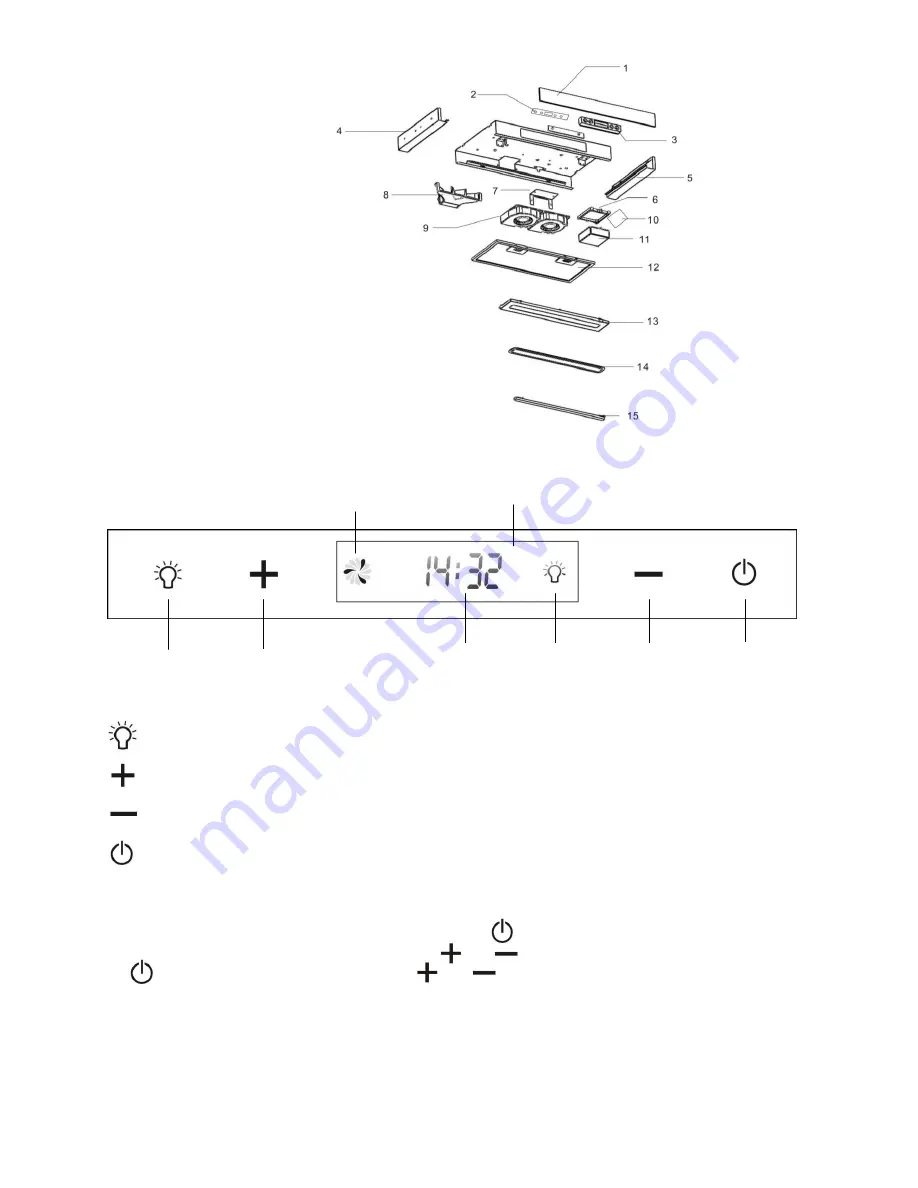
PART NAMES: 

1.  Tempered glass 


2.  Switch 
3.  Switch box 
4.  Left panel 
5.  Right panel 
6.  PCB box base 
7.  Vent duct plate 
8.  Air flu 
9.  Air housing 
10. PCB 
11. PCB box 
12. Filter 
13. Light panel 
14. Light cover 
15. LED Light 


CONTROL PANEL OPERATION: 


           : Control the light on and off 
 
           : Speed up and time setting 
              
           : Speed down and time setting 

 
  : Power on/off 
 

How to set the clock: 

When the hood is on standby status, Press the key        for 3 seconds to enter the clock setting, 
the Clock indicator are flicking, press the key        or         to set the hour. Then press again the 
key        move to the minute setting, press        or         to set the minute. The machine will 
automatically confirm if without any operation in 3 seconds. 
 

Note: Each time the rangehood connects to the power supply, the clock indicator just 
show 00:00. 

Display Panel 

3 Speed Fan Indicator 

Light 

Speed up and 
time setting 

Clock indicator 

Light indicator  Speed down and 

time setting 

On/off 

Summary of Contents for TCR-001

Page 1: ...Sphere Touch Control Rangehood Model No TCR 001 Please read and save the instruction ...

Page 2: ...ripe Light Removable Easy to Clean Filter Stainless Steel Construction Vents through the Rear or Top Easy to Fit W 530mm x D 304mm x H 60mm SPECIFICATIONS Power 12 volt Rating Motor input Power Maximum 2 x16W Illumination Maximum 3W Total input Power 35W Air Flow 100 m3 hr Removable Filter 5 layer Aluminium mesh Out Side Dimension W 530mm x D 304mm x H 60mm Body Material Stainless Steel ...

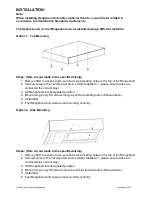
Page 3: ...please ensure wires are connected the correct way 3 Lift Rangehood into designated position 4 Mount using 4 only SS screws into pre punched locating holes Shown above 5 Install filter 6 Test Rangehood and ensure unit is working correctly Option 2 Side Mounting Steps Hole cut out made to the specified sizing 1 Remove filter to access to pre punched screw locating holes in the top of the Rangehood 2...

Page 4: ... off How to set the clock When the hood is on standby status Press the key for 3 seconds to enter the clock setting the Clock indicator are flicking press the key or to set the hour Then press again the key move to the minute setting press or to set the minute The machine will automatically confirm if without any operation in 3 seconds Note Each time the rangehood connects to the power supply the ...

Page 5: ...YOU HAVE A PRODUCT PROBLEM First If your Sphere TCR 001 Rangehood is factory fitted as part of your NEW RV Please Contact the OEM Manufacture of the RV or refer to the OEM RV User and Warranty handbook for further information Second Service Contact Coast RV Pty Ltd trading as Coast to Coast RV Services ABN 49 097 104 492 ACN 101 461 330 PO Box 415 Regents Park NSW 2143 AUSTRALIA Ph 02 9645 7600 Fa...

Page 6: ...cable evidence of maintenance performed in accordance with the relevant maintenance schedules 3 2 The claim listed in clause 3 1 may be made in person or the claim may be sent to the address listed on this form including the particulars required under clauses 3 1 i and 3 1 ii 3 3 The appropriate form for making a claim for warranty is as attached 4 DURATION OF WARRANTY 4 1 This warranty will cease...

Page 7: ... fit maintain service or use the Goods in accordance with the specifications and instructions provided by the Manufacturer including a failure to comply with the relevant maintenance schedule where applicable ii the Supplier cannot establish any Defect in the Goods after testing iii the Goods have been used other than for the purpose for which they were designed iv the Goods have been subject to a...

Page 8: ...provided Receipt enclosed tick box Yes No Receipt No Description of defects Give as much detail as possible Use a separate page if required Date of purchase services provided I hereby declare that the information provided above is true and correct and to the best of my knowledge and belief and I have complied with all the conditions of the warranty Signed Name please print Dated Please note the is...

Reviews: