background image

4.


INSTALLATION – ELETTRICAL CONNECTION


4


a-   The connection to the electrical power supply 

system must be done according to the standard  
in force. 

b- 

 Before connecting the appliance,  make 

yourself sure that the voltage and the frequency 
correspond to those stated on the data plate of 
the appliance. 

c-   The appliance  must be placed so that the 

connection plug to the network can be easily 
reached. 

d-   Place  an  omni-polar  switch between  the 

appliance  and the network. The omni-polar 
switch must have the following characteristics: 

must be easily reached after the installation; 

the contacts of the switch must have a minimum 

opening distance of 3 mm; 

must have an appropriate input (for example, 

magneto-thermal switch. 

When the appliance is working the power supply  
voltage must not diverge from the value of the  
nominal voltage, written on the technical data  
plate, by more than ± 10%. 

b- The appliance must be connected to the ground  

line of the network. 
Moreover, the appliance must be included in 
equipotential system whose efficiency must be 
properly checked according to the 
current law. This connection must 
be done between the different 
appliances using the terminal 
marked with the symbol:  

The equipotential conductor must have  
a minimum section of 10 mm

2

.  

ENGLISH  

5. 

REVERSAL OF THE DOOR


To meet the customers’  need, the appliance 


is equipped  with a reversible door. With this 


characteristics, the user can choose, at any time, on  
which direction he/she wants to open the door. 

Needed equipment: 

•   Medium size screwdriver with Philips driver; 
•    Small size screwdriver with Slotted driver 

Procedure: 

1.

      Disconnect the appliance from the electrical power  

supply and wait for the appliance to cool down. 

2.     Remove eventual trays containing food from the  

cavity. 

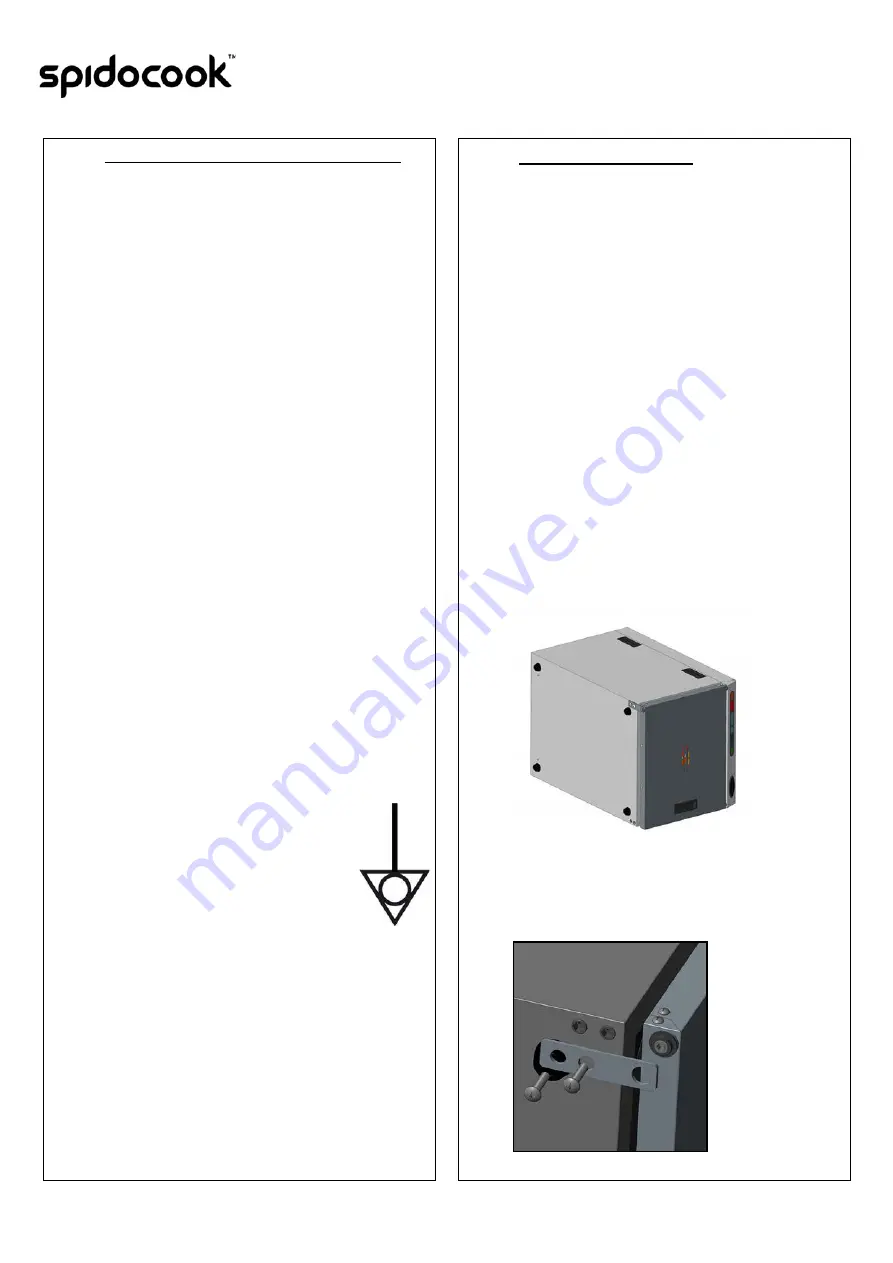
3.   Lay the oven on the side so that the fulcrum of 

the door is  on the top  (see following picture).  

4. With the  screwdriver with Philips driver, unscrew  

anticlockwise both the screws that fix the stirrup 

(see following picture).  

ENGLISH  

Summary of Contents for CALDOLUX SCH 030

Page 1: ...OVEN FOR COOK HOLD FOUR COOK SCH 030 ENGLISH INSTRUCTION MANUAL AND TECHNICAL DATAS 07 2018 ...

Page 2: ...THE DIGITAL 3 3 3 3 3 3 3 4 4 5 5 5 6 6 CONTROL PANEL 6 4 MAINTENANCE CLEANING OF THE APPLIANCE 7 4 1 FIRST USE OF THE OVEN 7 4 2 CAVITY CLEANING 7 4 3 CLEANING OF THE EXTERNAL PART OF THE OVEN 7 5 TURNING OFF IN CASE OF BREAKING 7 COOKING VARIABLES 1 TEMPERATURE 2 TIME 3 QUANTITY OF FOOD 4 USE OF TRAYS WIRE GRIDS IV MAINTENANCE 1 ORDINARY MAINTENANCE 2 SPECIAL MAINTENANCE 3 MORE FREQUENT BREAKING...

Page 3: ...al connections looking at the pictures on the attached file TECHNICAL DATA 3 2 POSITIONING Place the appliance respecting the safety standards in force that you find here following described 1 Place the appliance so that its back and sides can be easily reached in order to make electrical connections and provide the needed service 2 The appliance is not suitable for built in installation and side ...

Page 4: ...ce must be connected to the ground line of the network Moreover the appliance must be included in equipotential system whose efficiency must be properly checked according to the current law This connection must be done between the different appliances using the terminal marked with the symbol The equipotential conductor must have a minimum section of 10 mm2 ENGLISH 5 REVERSAL OF THE DOOR To meet t...

Page 5: ...ust be used by qualified personnel only 1 INSTRUCTIONS FOR THE OPERATOR 2 WARNING Carefully read this user manual before starting to operate with the appliance as it gives you important information regarding safety during installation use and maintenance of the appliance itself Keep the manual in a safe place where the different operators that work with the appliance can easily find and read it Fo...

Page 6: ...he baking Using the core probe the phase of baking COOK ends when the temperature measured by the core probe reaches the set up value Using the time you have to set up the wanted duration of the baking in hours and minutes The two functions are mutually exclusive if the core probe is used you cannot set up the time and vice versa setting up the time the core probe cannot be set up By pressing the ...

Page 7: ...done only by qualified personnel Before starting any maintenance operation you need to disconnect the appliance from the electrical power supply and wait for the appliance to cool down 4 1 4 2 FIRST USE Before using the appliance for the first time it is necessary to clean up the metal baking chamber with hot water and soap and then rinse it Never wash the baking chamber with acids or aggressive d...

Page 8: ...an the proper ones cause the burning of the food surface FOOD QUANTITY The quantity of food affects the cooking time A bigger quantity of food needs a longer cooking time and vice versa 4 USE OF PANS AND GRIDS It is recommended to use Stainless steel pans first courses meat fish and potatoes Grids meat to be browned like steaks hot dogs sausage frozen bread and frozen pizza 8 ENGLISH IV MAINNANCE ...

Page 9: ... for reparation Damaged electronic control Contact a specialized technician for reparation On the temperature display you can read S01 The wires that connect the temperature chamber probe are not connected to the power board Control the connection Damaged chamber probe Contact a specialized technician for reparation Damaged electronic control Contact a specialized technician for reparation On the ...

Page 10: ...ture during the maintenance LED indicating the time Button to select the modality Button and LED for START STOP Button and LED for switching on 10 ENGLISH DIGITAL CONTROL PANEL LED indicating the product s core temperature ENGLISH Button to reduce the established data Button to increase the established data ...

Page 11: ...R ENGLISH NOTES ENGLISH 11 ...

Page 12: ...ER FREQUENCY POWER SUPPLY CABLE TYPE POWER SUPPLY CABLE EXTERNAL Ø VOLTAGE CABLE SECTION MAX FOOD LOAD NOISE LEVEL TECHNICAL DATA kW 0 76 50 Hz H07RNF 10 16 mm 230 V 3G x 1 5 mm2 Kg 15 70 db A SCH 030 07 2018 TECHNICAL DATA ...

Page 13: ...Spazio etichetta ...

Reviews: