Musixel Usage Guide
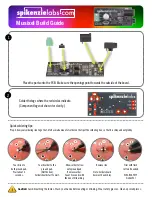
Connecting the LED strip
1
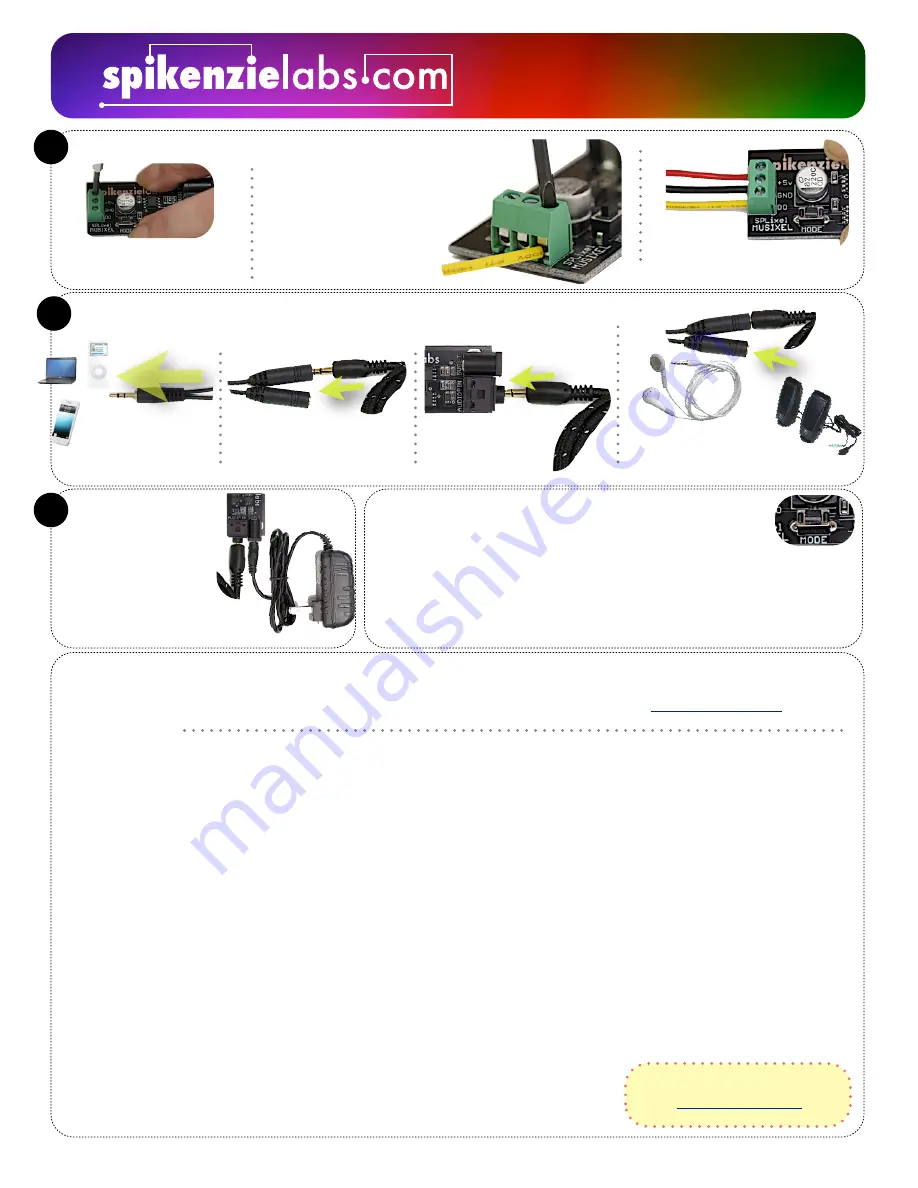
Loosen the screw terminals a little to
allow the wires to slide in. ~ 3 turns
Place the
yellow
wire in the spot
marked
DO
. (DO stands for data out
to the LED strip.
Screw the wire down and repeat:
Red
wire to the spot marked
+5v
Black
wire to the spot marked
GND
Once complete, your Musixel
connections should look like this.
Or
Connecting to your music
2
Using a combination of the included audio splitter wire, extension cable and your own headphones or powered speakers.
To your audio source
Plug the male end of the
splitter to your audio source
of choice.
Plug one end of the Male-Male
extension wire into one of the
female ends on the splitter.
Plug the other end of the M-M
extension wire into the audio
jack on the Musixel.
Plug your headphones or a set of
powered speakers to the other
female end of the the splitter.
In here
Power up the Musixel
3
Plug the 5v AC adapter in
to the wall outlet, then
plug the AC adapter into
the Musixel
Usage
1. Turn on the audio source, plug in the Musixel’s AC adapter.
2. Turn on the powered speakers, or put on your headphones.
3. Adjust the volume of the audio source to produce the ideal amount of color and brightness.
4. If powered speakers are used, adjust their volume to the desired listening volume.
5. Optional: Press the MODE button to change the visual effects displayed by the Musixel. Each press
brings the Musixel to the next mode. The current mode is indicated by the number of orange LEDs lit.
The adapter that comes bundled with the
Musixel will light up to 64 LEDs
Musixel
Modes
[Mode 1]
All On
-- In this mode all of the LEDs display the same color. The color is based on frequencies of the audio. Low tones are Reds at 63 to 160hz, Greens are
1000-2500hz and Blues (the highest notes) are 6250 to 16000hz. If there is more than one frequency being sensed at the same time, then a mix of colors will appear. The
brightness of a color is based on the volume of the frequency being sensed. So, louder music will be brighter. Will work with any number of LEDs up to 64.
[Mode 2]
Confetti
-- In this mode the very first LED color is controlled by the audio. This color is then shifted down the LED strip as new frequencies are sensed at the first
LED. Will work with any number of LEDs up to 64.
[Mode 3]
Color Graphic Equalizer (16 LEDs)
-- In this mode from 0 to 16 LEDs are lit depending on the volume of the music. The color is the same for all lit LEDs and this
color is based on the interpretation of low notes as red, mid as green and high notes as blue.
[Mode 4]
Rainbow Graphic Equalizer (16 LEDs)
-- The colors light in a rainbow arrangement and the hight (from 0 to 16 LEDs) is based on the volume.
[Mode 5]
Traditional Graphic Equalizer (16 LEDs)
--The colors in this mode are based on a traditional style EQ level and the hight (from 0 to 16 LEDs) is based on the
volume.
[Mode 6]
Rainbow Graphic Equalizer (64 LEDs)
-- This mode is designed for use with an optional 64 LED panel (or LED strips cut into sets of 8 and re-wired). Each set of 8
LEDs is assigned a single frequency of 63, 160, 400, 1000, 1750, 2500, 6250, 16000hz. As the LEDs light the panel will be filled with a rainbow pattern of colors. The height of
each set of 8 LEDs is based on the volume of that frequency being sensed.
[Mode 7]
Basic Blue Graphic Equalizer (64 LEDs)
-- Similar to mode 6, but with a solid single color of blue.
[Mode 8]
Basic Red Graphic Equalizer (64 LEDs)
-- Similar to mode 6, but with a solid single color of red.
[Mode 9]
Basic Green Graphic Equalizer (64 LEDs)
-- Similar to mode 6, but with a solid single color of green.
The Standard Musixel Kit comes with a 16 LED (WS2812B) strip. Every Musixel comes pre-programmed with nine modes. Some modes are designed
for 16 LEDs, and some for an optional strip of 64 LEDs. There are four modes [6-9] that are best viewed on a 8x8 matrix, with each strip starting on
the same side. We encourage you to experiment and hack your own matrix. Send photos of your hacks to
Having trouble? Need some help? We are here:
Don’t place the Musixel on a conductive surface. Eg: Keys / Change / Metal table


