background image

8


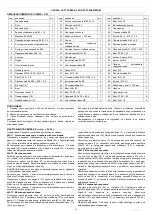
SOLVING PROBLEMS 
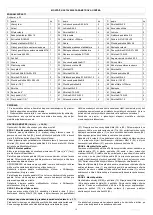
Problem: The display does not work 

Solution:  1.  Dismantle  the  counter  and  check  if  all  cables  are  properly 
connected.  
2. Check if batteries have been inserted correctly  
3. The batteries might be used up. Try using new batteries. 
 

Problem: The bike is wobbling during exercise 

Solution: Use the rear stabiliser plugs to properly level the device. 

Problem: Squeaks or creaking can are heard during workout

Solution:  The  bolts  might  be  loosened.  Check  all  bolts  carefully  and,  if 
necessary, tighten them using the keys included in the kit. 


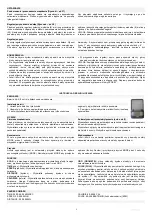
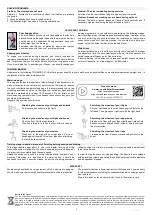
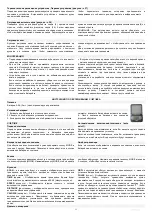
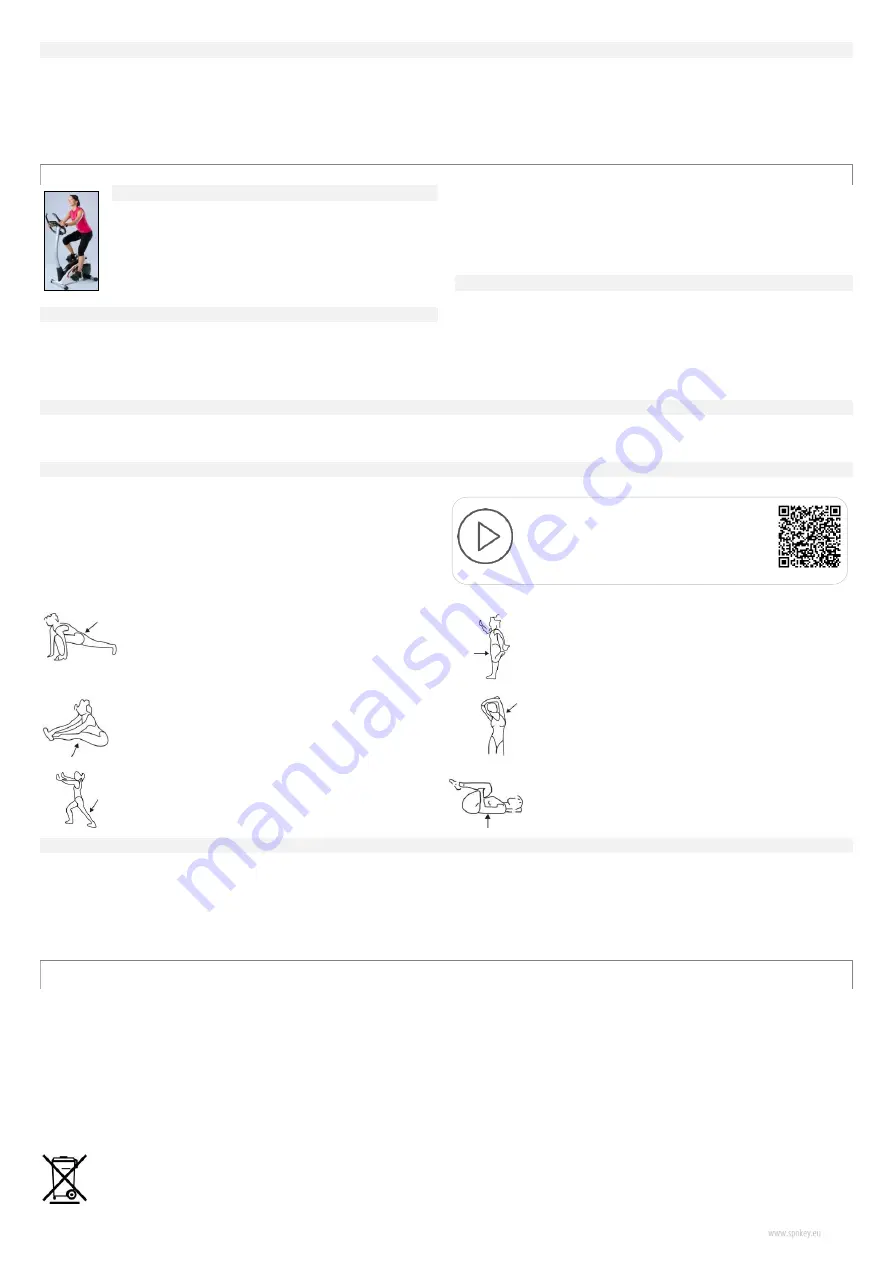
Your body position 

Sit on the saddle, put your feet in the pedals so that they are 
blocked between the pedal base and the protective belt, put 
your  hands  on  the  handlebar.  During  exercises,  keep  your 
back straight (see the drawing). 
Exercises  with  the  use  of  stationary  bicycle  can  replace 
exercises done with the use of an ordinary bicycle. 
 

Shaping your muscles 

To  shape  your  muscles  during  exercises,  you  should  increase  the 
resistance substantially. This will bring about the increased muscle tension 
and it may mean that you will not be able to train for as long as you want. 
If  you  would  also  like  to  exercise  your  fitness,  you  should  change  your 

training programme. You should exercise practising the following stages: 
warm-up stage, proper training stage and relaxation stage. However, at the 
end of your training, you should increase the resistance, so that you can 
enhance  the  workout  of  your  leg  muscles.  You  should  also  reduce  your 
speed, so that the pulse remains at the indicated level. 
 

Weight loss 

An important factor here is the effort you put into your exercises. The longer 
and harder you train, the more calories you will burn. It will be a success to 
obtain the same efficiency as for fitness training.  
Intensive training, which helps you to lose your weight, should be carried 
out more frequently, for at least approx.: 45-50 minutes 

 
TRAINING MANUAL 

Adherence to the following TRAINING CYCLE will bring many benefits to your health, such as physical fitness, muscle development and weight loss - in 
conjunction with the calorie intake control. 
 

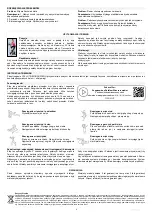
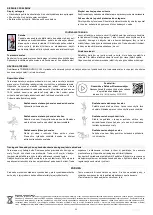
Warm-up stage 

This step guarantees a proper flow of blood through the body systems, as 
well as it ensures the correct work of your muscles. Warming up reduces 
the risk of contraction and muscle damage. It is recommended to do a few 
stretching exercises as set out in the figures set out below. Each position 
should  be  maintained  for  about  10-15  seconds.  Do  not  strain  or  pull 
muscles during your exercises. If you happen to experience any pain, you 
should stop immediately.  
Repeat every exercise several times. 


Stretching the muscles of your thighs and buttock 

Do the exercise as shown in the figure.  


Stretching the muscles of your thighs 

Put your right hand on the wall. Grasp your left foot with the 
left hand. Then grasp your right foot with the right hand. 


Stretching the muscles of your thighs and knees 

Sit on the floor. Pull the legs forward. 
Then  bend  forward  to  touch  the  feet  with  your  hands. 


Stretching the muscles of your upper body  

Stand on the floor with your legs slightly apart, place both 
hands over your head (as shown in figure), and then stretch 
the arm muscles.  


Stretching the muscles of your calves 

Stand  next  to  the  wall  with  your  legs  apart.  Put  your 
hands against the wall. Throw your legs back alternately 
to stretch the leg muscles.  


Stretching the muscles of your legs 

Lie down on the floor. Bend your knees and pull them to the 
chest. 


Training stage, relaxation, manner of finishing training session and braking 

This  stage  requires  your  effort.  In  time,  with  regular  training,  your  leg 
muscles become more flexible. You should exercise at your own pace, but 
it is important to constantly keep the same speed. 
Relaxation 

allows you to restore a normal heartbeat and “cool down” your 

muscles.  This  stage  is  a  repetition  of  the  warm-up  and  it  should  be 
continued  for  about  5  minutes.  Please  repeat  the  stretching  exercises, 

remembering not to strain your muscles. It is recommended to train at least 
three times a week. 
 
In order to stop the exerciser, stop pedalling. The bicycle is not equipped 
with a blocking system and a safety brake. Braking system is not adjustable 
and independent of speed. 


We place high demands on our equipment, which is why we are doing our 
best to make sure that only high quality materials are used in production.  
 

The present model has a 5 year warranty for the frame and 3 year warranty 
for other components, excluding the subassemblies which undergo normal 
wear and tear.  
More information on the warranty can be found in the warranty card.  


USAGE AND TRAINING

WARRANTY 

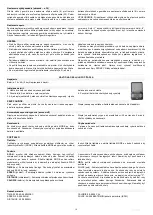
Refers to the meter


The equipment label depicting a crossed-out wheeled bin symbol informs that it is forbidden to dispose of waste electrical and electronic equipment together with other types of 
waste. In accordance with the WEE directive on waste electrical and electronic equipment, separate waste management processes should be applied for this type of equipment. 
The user who intends to dispose of such a product is obliged to return it to an electronic equipment collection point thanks to which they can contribute to its re-use, recycling, 
and  recovery  and,  in  this  way,  protect  the  environment.  To  do  this,  contact  the  sales  point  where  the  equipment  was  purchased  or  a  representative  of  the  local  authorities. 
Hazardous substances included in electronic equipment can have negative long-term influence on the natural environment and they can also have negative effect on human 
health. 
 

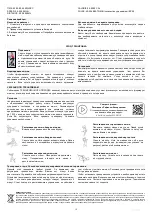
Watch the movie: 

A warm-

up with Rafał Wieczorowski. 

Scan the presented code 

or type the address into your web browser:


http://bit.ly/spokey-WARMUP


Summary of Contents for 924422

Page 1: ...LITY PL ROWER MAGNETYCZNY 1 EN MAGNETIC BIKE 5 RU 9 CZ MAGNETICK ROTOPED 13 SK MAGNETICK BICYKEL 17 LT MAGNETINIS DVIRATIS 21 LV MAGN TISKS VELOTRENA IERIS 25 DE HEIMTRAINER 29 SCHEMAT DIAGRAM SCH MA...

Page 2: ...o sprz tu mo e by zagwarantowane tylko wtedy je eli b dzie on poddawany regularnym przegl dom i kontrolom Nale y zawsze u ywa sprz tu zgodnie z jego przeznaczeniem Je eli podczas monta u lub u ytkowan...

Page 3: ...ewego 20 przez gwintowany otw r w korbie peda u lewego Nast pnie przekr o peda u w stron przeciwn do ruchu wskaz wek zegara aby zamocowa peda w miejscu UWAGA przekr cenie osi peda u zgodnie z ruchem w...

Page 4: ...urz dzenia na w asn r k Naprawy powinien dokona wykwalifikowany pracownik firmy SPOKEY ZASILANIE Baterie AAA 2 szt nie do czone do urz dzenia Instalacja baterii 1 Umie dwie baterie z ty u licznika 2...

Page 5: ...stop Rozci ganie mi ni ud i kolan Usi d na pod odze Wyci gnij nogi przed siebie Nast pnie zr b sk on staraj c si dotkn d o mi st p Rozci ganie g rnych partii cia a Sta na pod odze w lekkim rozkroku u...

Page 6: ...t the most An appropriate safety level of this device may by guaranteed only if it is subject to regular service and inspection The device should be always used in accordance with its purpose Should d...

Page 7: ...Knobs and other components are marked with R right and L left letters to make their identification easy Pass the left step axle 20 through the threaded hole in the left step crank Then tighten the st...

Page 8: ...f damage the device should not be used Never repair the device on your own Repairs should be made by a qualified SPOKEY s company employee POWER SUPPLY Batteries AAA 2 pieces not supplied with the bic...

Page 9: ...your thighs Put your right hand on the wall Grasp your left foot with the left hand Then grasp your right foot with the right hand Stretching the muscles of your thighs and knees Sit on the floor Pull...

Page 10: ...9 17 8 3 5 5 Optimized Power 81 x 127 x 52 120 2 a 120 H C RU...

Page 11: ...3 2 12 1 33 6 1 54 1 13 1 34 M10 4 55 M6 1 14 65Mn 10 50v 1 0 1 35 M10 56 4 56 5 2 15 ST2 9 9 5 2 36 10 20 1 5 4 57 M5 45 1 16 23 35 2 0 1 37 8 6 58 15 16 1 17 7 8 1 38 8 5 59 L 750 1 18 1 39 M8 20 1...

Page 12: ...11 o c 37 o c 38 8 25 8 1 8 AAA 2 1 2 3 4 auto on off 4 MODE 3 a MODE MODE MODE 3 SCAN ODO TIME 99 59 SPEED DISTANCE CALORIE ODO PULSE 5 P...

Page 13: ...12 TIME 00 00 99 59 MIN SEC SPEED 0 0 999 9ML H DISTANCE 0 00 9999ML CALORIE 0 0 9999 CAL PULSE 40 206 BEATS MIN BPM 1 2 3 10 15 5 WEE http bit ly spokey WARMUP...

Page 14: ...y rouby a matice jsou d kladn p i roubovan Bezpe nost za zen je zaru ena pouze tehdy bude li toto pravideln udr ov no a kontrolov no Za zen se sm pou vat pouze v souladu s jeho ur en m Pakli e b hem m...

Page 15: ...v pro usnadn n jejich indentifikace P elo te n pravu lev ho ped lu 20 skrz otvor se z vitem v klice lev ho ped lu Pak oto te n pravu ped lu proti sm ru hodinov ch ru i ek pro p ipevn n ped lu na m st...

Page 16: ...lace bateri 1 Vlo te dv baterie na zadn stran po tadla 2 Zkontrolujte zda jsou baterie ve spr vn poloze 3 Pokud je displej ne iteln nebo jsou vid t pouze d l segmenty vyjm te baterie a znovu je vlo te...

Page 17: ...avou rukou chytni prav chodidlo Protahov n svalstva stehenn ch a kolen Sedni si na podlaze Nat hni nohy p ed sebe N sledn se p edklo a zkus se dotknout rukama chodidel Protahov n horn ch st t la Lehce...

Page 18: ...pravidelne kontrolovan jeho technick stav V dy pou vajte zaradenie v s lade s jeho p vodn m ur en m Pokia po as mont e alebo pou vania zariadenia zist te e niektor jeho as je chybn pr padne ak vyd va...

Page 19: ...K uky a in prvky ped lov s ozna en p smenami R prav a L av pre u ah enie ich identifik cie Prelo te n pravu av ho ped lu 20 cez otvor so z vitom v k uke av ho ped la Potom oto te n pravu ped lu proti...

Page 20: ...e displej ne itate n alebo s vidie len iastkov segmenty vyberte bat rie a znova ich vlo te 4 Po vybrat bat ri sa v etky hodnoty vynuluj PRV POU ITIE Pred prv m pou it m sa uistite e v etky k ble boli...

Page 21: ...tehenn ch svalov a kolien Sadnite si na zem Nohy vytiahnite pred seba N sledne urobte klon a sna te sa dotkn dla ami chodidl Roz ahovanie horn ch ast tela Sta te na podlahe v jemnom rozkroku obidve ru...

Page 22: ...ugusieji renginys turi b ti pastatytas ant horizontalaus tvirto pavir iaus apsaugoto kilim liu Saugumo at vilgiu i kiekvienos pus s palikite po 2 m laisvo ploto Prie pradedant pratimus b tina sitikint...

Page 23: ...nin s svirtys ir kiti pedal elementai yra pa enklinti raid mis R de inysis ir L kairysis kad lengviau juos galima b t identifikuoti Perki k kairiojo pedalo 20 a per skyl su sriegiais kairiojo pedalo...

Page 24: ...r ki tuk Gedimo atveju renginio negalima naudoti Niekada neremontuokite renginio savaranki kai Remontus privaloma atlikti kvalifikuotas SPOKEY firmos darbuotojas Niekada netraukite u kabelio Maitinimo...

Page 25: ...raumen Jeigu pajusite kok nors skausm reikia nedelsiant nutraukti treniruot Pakartokite pratim kelis kartus laun ir s dmen raumen i tempimas Atlikite pratim kaip parodyta pie laun raumen i tempimas Pa...

Page 26: ...s un cietas virsmas apdro in tas ar mat tu apdari vai pakl ju Dro bas d apk rt ier ces j paliek pa 2 m br vas telpas katr pus kas vajadz gs dro ai lieto anai Pirms vingrin jumu s k anas j p rliecin s...

Page 27: ...div m skr v m 35 div m lokveida papl ksn m 36 un diviem uzgrie iem 34 Uzgrie us pievelciet ar daudzfunkcion lu atsl gu 2 SOLIS Ped u mont a Kla i un citas ped u deta as ir iez m tas ar R lab un L krei...

Page 28: ...emont jiet ier ci pa roc gi Remonti j veic kvalific tam SPOKEY uz muma darbiniekam Nekad nevelciet aiz vada Str vas padeve Baterijas AAA 2 gab neietilpst komplekt Bateriju uzst d ana 1 Ievietojiet div...

Page 29: ...u k att lots Aug stilbu musku u izstiep ana Nolieciet labo plaukstu pie sienas Ar kreiso plaukstu satveriet kreiso p du P c tam ar labo roku satveriet labo p du Aug stilbu un ce u musku u izstiep ana...

Page 30: ...ist immer gem seiner Bestimmung zu benutzen Sollte sich bei dem Aufbau bzw bei der Benutzung eins der Teile als mangelhaft erweisen oder beunruhigende Ger usche von sich geben ist mit dem Training au...

Page 31: ...chl ssel anziehen SCHRITT 2 Montage von Pedalen Kolben und sonstige Teile von Pedalen sind mit Buchstaben R recht und L links gekennzeichnet um die Identifizierung zu erleichtern F hren Sie die Achse...

Page 32: ...rma SPOKEY durchzuf hren Stromversorgung Batterien AAA 2 Stk nicht im Lieferumfang enthalten Installation der batterie 1 Legen Sie zwei Batterien an der R ckseite des Z hlers ein 2 Vergewissern Sie si...

Page 33: ...oll mehrmals wiederholt werden Dehn bungen Oberschenkel und Po Die bung gem der Abbildung ausf hren Dehn bungen Oberschenkel Rechte Hand auf die Wand legen Mit der linken Hand an dem linken Fu greifen...

Page 34: ...race nebo mohou b t zm n ny pecifik cia tohto produktu sa m e minim lne l i od uvedenej na obr zku alebo pod ahn prav m io produkto specifikacijos gali iek tiek skirtis nuo parodyt arba pasikeisti pro...

Page 35: ...34 1 2 KROK STEP INGSNIS SOLIS SCHRITT 3 KROK STEP INGSNIS SOLIS SCHRITT...

Page 36: ...35 4 KROK STEP INGSNIS SOLIS SCHRITT 5 KROK STEP INGSNIS SOLIS SCHRITT...

Page 37: ...36 5 KROK STEP INGSNIS SOLIS SCHRITT...
Page 38: ...V Paka j stabilizatora tapas DE Endkappen am hinteren Stabilisator PRZENOSZENIE URZ DZENIA MOVING THE DEVICE P EN EN ZA ZEN PREN ANIE ZARIADENIA RENGINIO PERK LIMAS KIT VIET IER CES P RVIETO ANA TRANS...

Page 39: ...LE NASTAVEN SEDLA NASTAVENIE SEDADLA S DYN S REGULIAVIMAS S DEK A REGUL ANA EINSTELLUNG SATTEL PL Ga ka do regulacji EN Knob RU CZ Knofl k pro regulace SK K uka na regulovanie LT Reguliavimo rankut LV...

Page 40: ...z o o al Ro dzie skiego 188c 40 203 Katowice biuro spokey pl office spokey eu CZ Spokey s r o Sadov 618 738 01 Fr dek M stek Czesk republika SK Kanlux s r o M R tef nika 379 19 911 01 Tren n Slovensk...

Reviews: