- 2 -
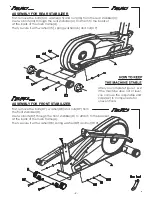
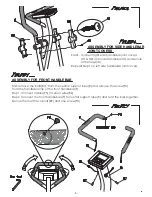
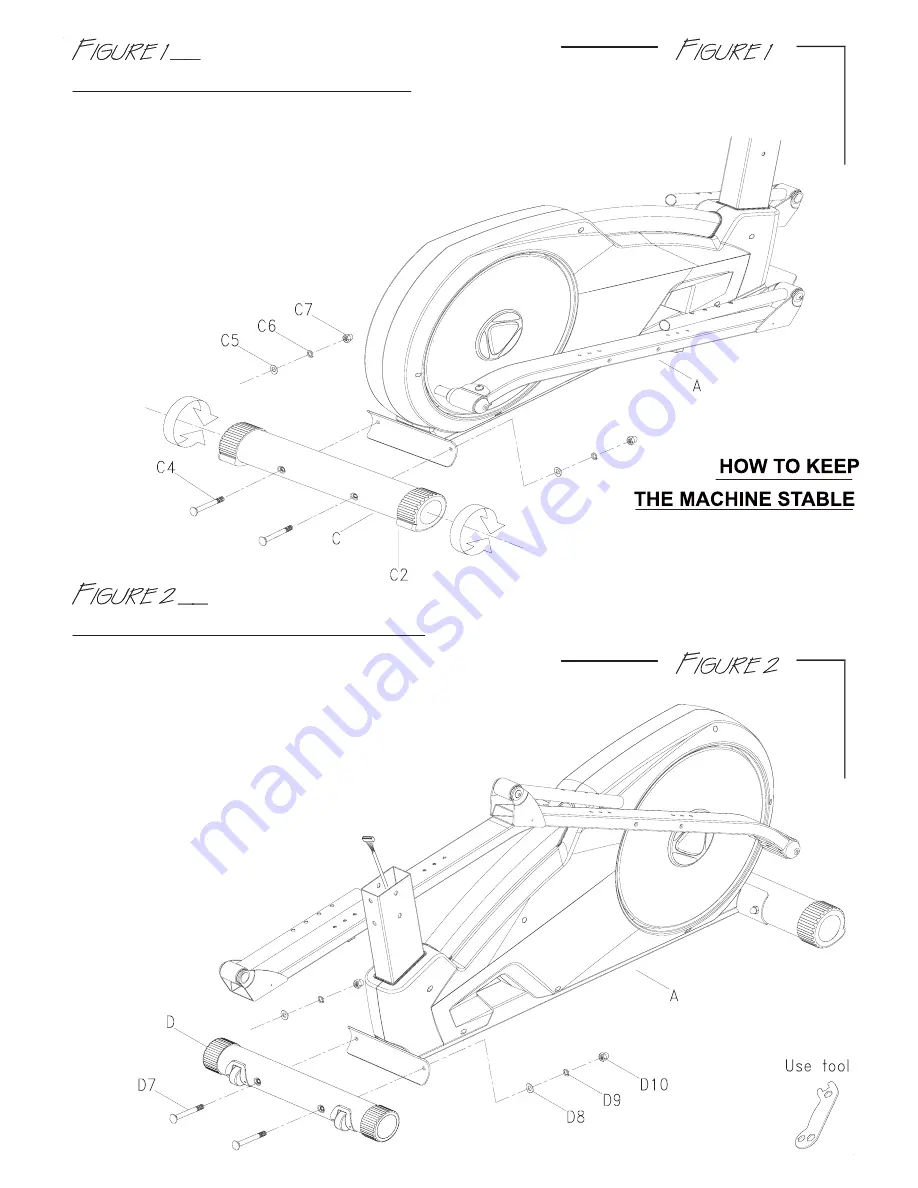
ASSEMBLY FOR REAR STABILIZER
Then, secure it with washer(C5), spring washer(C6) and nut(C7).
After you complete Figure 1 & 2,
if the machine dose not sit level,
you can use the adjustable end
caps(C2) to compensate for
uneven floors.
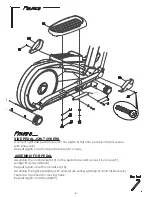
Then, secure it with washer(D8), spring washer(D9) and nut(D10).
ASSEMBLY FOR FRONT STABILIZER
First, remove the bolts(C4), washer(C5) and nuts(C6) from the rear stabilizer(C).
Use two bolts(C4) through the rear stabilizer(C) to attach to the bracket
at the back of the main frame(A).
First, remove the bolts(D7), washer(D8) and nuts(D9) from
the front stabilizer(D).
Use two bolts(D7) through the front stabilizer(D) to attach to the bracket
at the back of the main frame(A).
Summary of Contents for E7000P PLUS
Page 1: ...E7000P PLUS ...
Page 9: ... 8 ...


