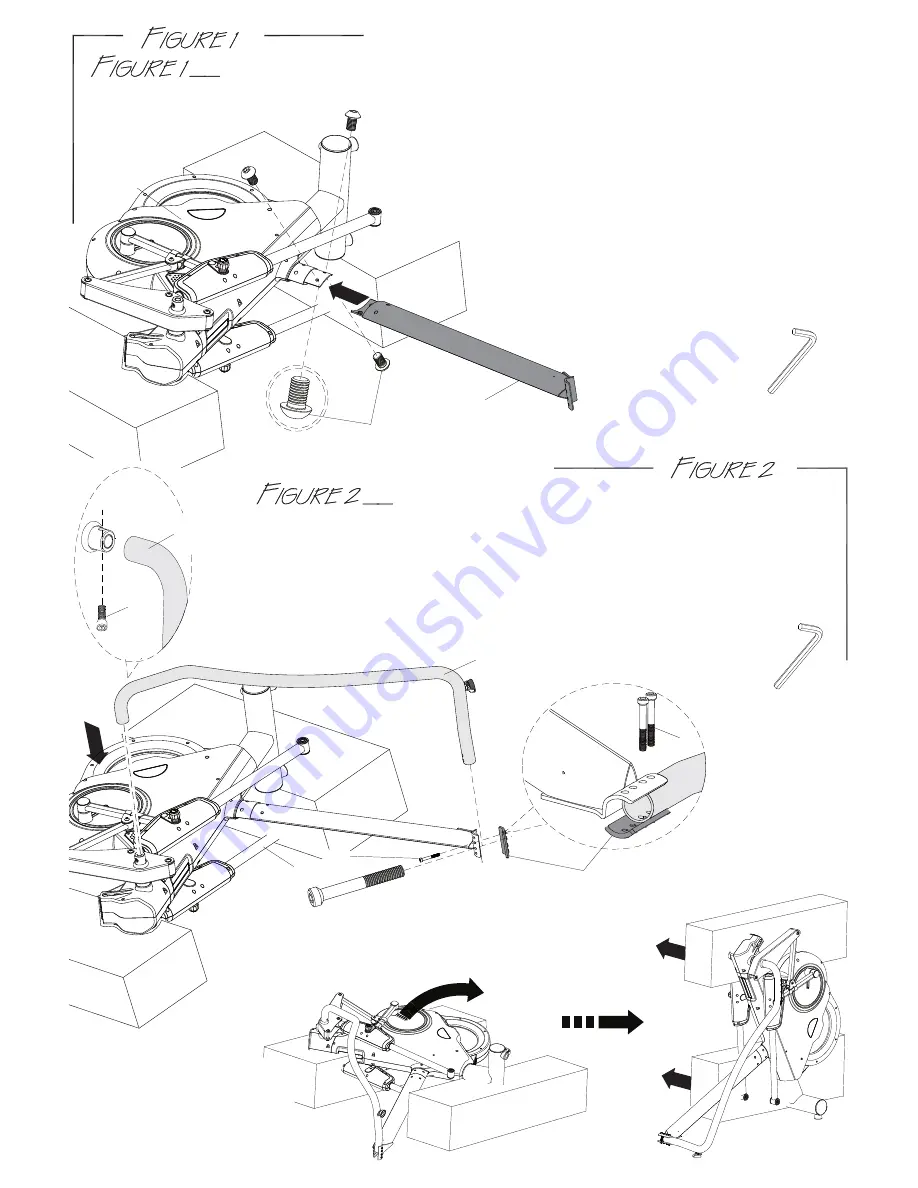
CENTRAL SUPPORTING TUBE (F1) ASSEMBLY
Step 1. Remove the two preassembled screw (F5) from
the main frame(A) and two screws (F5) from the
central supporting tube (F1).
Step 2. Assembly the central tube (F1) onto the main
frame (A) use the previously removed screw
(F5) to attach them.
RIGHT SIDE CONNECTING TUBE ASSEMBLY
Step 1. Refer to the VIEW A, assemble the right side connecting tube (C2)
onto the main frame (A).
Step 2. Use one screw(J8) M8 x 20 to attach the tube to the frame.
Step 3. Refer to the VIEW B, use 2 pieces screw(J2) M8x60 and iron
bracket (F2) to attach the tube to the bottom of the frame
NOTE: Only tight the J8 & J2 screws until the assembly step 3 is
finished completely.
USE TOOL:6m/m
F1
F5
A
USE TOOL:6m/m
VIEW A
J2
F2
C2
Step 4. Raise the main frame (A) by 2 people and then
remove the Styrofoam as diagram shown.
A
NOTE: Please tighten all four screws (F5)
exactly before figure 2.
J8
C2
VIEW B
J2
Note: for safety concern,
more people to help lifting
the main frame assembly to
the upright position may need.
3


