39
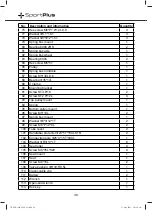
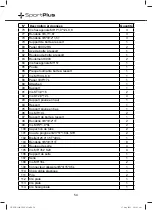
No. Description and information
Quantity
115
Rod
1
116 Cap
2
5. ASSEMBLY INSTRUCTIONS
Step 1
•
Remove the 2 screws (29) and 2 washers (8) from the frame (28).
Step 2
•
Fasten the front stabilizer (73) to the frame (28) with 2 screws (72).
•
Use the previously removed screws (29) and washers (8) to attach the support (27)
to the frame (28).
Step 3
•
Slide the seat (107) onto the aluminum rail (60).
•
Fasten 2 spacers (63) to the aluminum rail (60) with 2 screws (62) each.
•
Fasten the end cap (61) to the aluminum rail (60).
•
Remove the 4 screws (67), 4 spring washers (66), and 4 washers (8) from the
bottom of the aluminum rail (60).
•
Fasten the rear stabilizer (69) to the aluminum rail (60) with 4 screws (67), 4 spring
washers (66), and 4 washers (8).
Step 4
•
Remove the star grip bolt (26) from the aluminum rail (60).
•
Align the aluminum rail (60) to the frame (28).
•
Fasten the aluminum rail (60) to the frame (28) with the screw (52), the nylon
nut (58), the pin (59), and the star grip bolt (26).
•
Connect the cable of the aluminum rail (60) to cable on the frame (28).
Step 5
•
Insert the pedal axle (50) into the opening in the frame (28).
•
Fasten the pedal straps (51) to the pedals (49).
•
Fasten the pedals (49) to the pedal axle (50) with 1 nut (47) and 1 washer (48)
each.
•
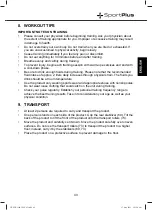
Slide the rod (115) through the tube on the frame (28).
•
Fix 1 cap (116) to each end of the rod (115).
•
Remove the 2 screws (13) from the frame (28).
•
Fasten the tablet holder (14) to the frame (28) with 2 screws (13).
SP-MR-1100-IM-V02.indb 39
SP-MR-1100-IM-V02.indb 39
27 Aug 2021 9:21:30 am
27 Aug 2021 9:21:30 am

