background image

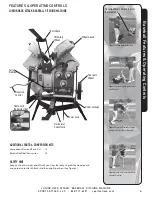
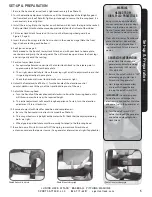
JUNIOR  HACK  ATTACK

 BASEBALL PITCHING MACHINE

SPORTS  ATTACK,  LLC.  

  800-717-4251  

  sportsattack.com

Baseball Batting Pr

actice

NOTE: As wheel speeds are 
changed for different velocities 
and spins, the ball will be pitched 
to differing locations.  
Compensate for these changes  
by turning the elevation control, 
and by moving the rear leg.

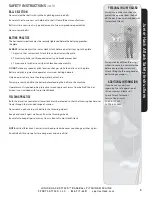
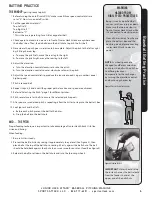
Figure 3


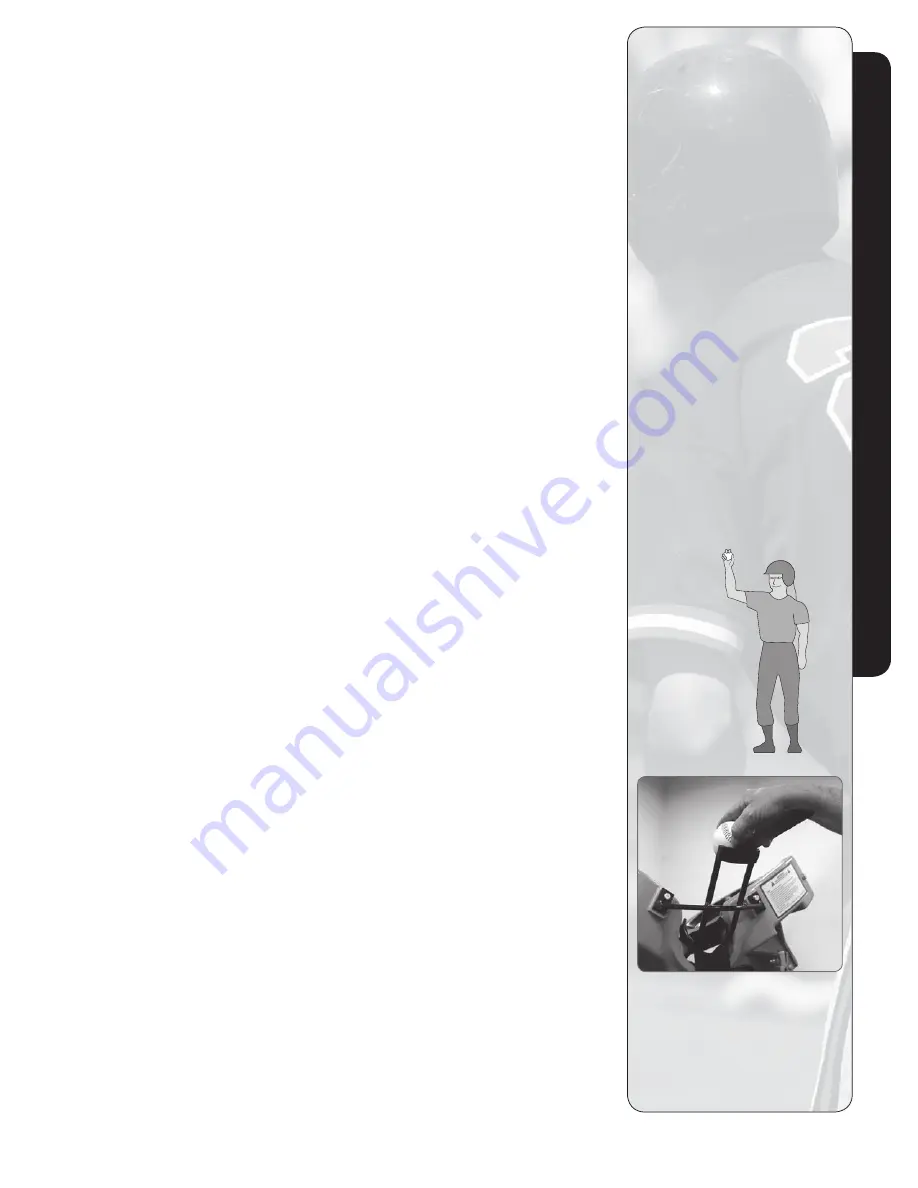
Present the ball to the hitter

Figure 4


Feeding the ball

IMPORTANT: Hitter should stride 
the instant he sees the ball release 
from the feeder’s hand at  the  
upper end of the ball chute.

BATTING PRACTICE

THE WINDUP

 (getting ready to pitch)

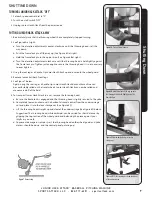
  1.  Before turning the on/off switch “ON,” make sure all three speed control dials are  
  

set at “0.” Now turn on on/off switch.

  2.  Set the speed control dials*:   
  

Top Left to “4” 


Top Right to “4” 


Bottom to “7” 


* This is the average setting for a Little League fastball.

  3.  Check again to make sure no one is in front of Junior Hack Attack or anywhere near  
  

the batter’s box. Then, feed a ball down the ball chute to pitch the first ball. 

   4.  Note where the pitch goes in relation to home plate. Adjust the pitch to the left or right  
  

by shifting the rear leg:


a.  To move the pitch left, move the rear leg to the right.


b.  To move the pitch right, move the rear leg to the left.

  5.  Adjust the elevation:
  

a.  Turn the elevation control clockwise to raise the pitch.


b.  Turn the elevation control counter-clockwise to lower the pitch.

  6.  Adjust the speed control dials to produce the required speed. Larger numbers equal  
  

higher speed.

  7.  Pitch a second ball.

  8.  Repeat steps 4, 5 and 6 until the proper path, elevation and speed are achieved.

  9.  Refer to “Selecting the Pitch,” page 7, for different pitches.

 10.  Pitch several more test balls to ensure the selected pitch repeats.

 11.  After you are sure desired pitch is repeating, allow the hitter to step into the batter’s box. 

 12.  See Figures 3 and 4 at left.
  

a.  Before each pitch present the ball to the hitter.


b.  Drop the ball into the ball chute.  

AND… THE PITCH

Proper feeding technique is important to take advantage of Junior Hack Attack’s life-like  
vision and timing.

When feeding:

1.  Be sure hitter is ready.

2.  Present the ball to hitter by raising it approximately to eye level (See Figure 3), then  


place ball at the top of the ball chute, seating it firmly against the ball chute. The ball  


should be held back against the chute to ensure a smooth consistent feed (See Figure 4).   

  3.  Release the ball to roll down the ball chute and into the throwing wheels.  

WARNING 

HAZARD FROM  

HIGH-SPEED PROJECTILES

Being struck by a pitched ball 
can cause serious injury or death. 
Make sure that no one steps in 
front of Junior Hack Attack while 
it is connected to electric power.

Clear all hitters away from home 
plate, the batter’s box and the 
backstop area before connecting  
Junior Hack Attack to electric 
power.

6

Summary of Contents for Junior Hack Attack

Page 1: ...ING MACHINES REV100814 B A S EB A LL B A S EB A LL INSTRUCTION MANUAL JUNIOR HACK ATTACK PITCHING MACHINE PATENTS APPLIED FOR SPORTS ATTACK LLC 800 717 4251 sportsattack com Includes OPERATION SETUP USE CARE SERVICE ...

Page 2: ...he problem and send replacement part s if necessary An invoice will be sent if any parts need to be exchanged To clear the invoice return prepaid and within 30 days the defective parts as detailed on the invoice to Sports Attack LLC 2805 U S 40 Verdi NV 89439 SHIPPING DAMAGE CLAIMS PROCEDURE NOTE For your protection please note that equipment in this shipment was carefully in spected and packaged ...

Page 3: ...ntenance 10 Component Replacement 11 Component Replacement 13 Exploded View 14 Parts List 15 Conversion Baseball to Softball 16 SPORTS ATTACK Product Line 17 INTRODUCTION Thank You for purchasing this Sports Attack LLC equipment Proper assembly careful operation and consistent maintenance of this equipment will ensure that it gives you the very best performance and a long economical service life T...

Page 4: ...xi ALWAYS set the speed controls to 0 before connecting the machine to power Check that the speed controls are at zero before turning the on off switch ON Do not allow anyone to walk in front of the machine if it is connected to electrical power CAUTION DO NOT plug in or energize this equipment untill all Assembly Instructions and Operation Instructions are read and followed WARNING PERSONAL INJUR...

Page 5: ...achine Always present the ball to the batter before feeding the ball into the machine Operator must stand behind a protective screen to prevent injury from balls off the bat Screen is not included with Junior Hack Attack FIELDING PRACTICE Both the elevation control and swivel lock must be released so that the throwing head moves freely through the intended range of motion Never reach up chute to p...

Page 6: ...r Carriage Travel lock must be secure prior to movement ADDITIONAL PARTS CONVERSION KITS Component View and Parts List 13 Baseball Softball Conversion 16 Figure 1 Position Junior Hack Attack Figure 2 Tip up onto wheel guard Insert two front legs Figure 3 Begin to lift Junior Hack Attack upright See Safety Hint at lower left Figure 4 Carefully tilt Junior Hack Attack up onto its rear legs SAFETY HI...

Page 7: ...way 9 Adjust the throwing head a Turn the handle of the elevation control clockwise Raise the throwing head until it will throw some where near the required height b This initial adjustment will come through experience To start turn the elevation adjustment 10 turns clockwise 10 Examine Junior Hack Attack for condition and completeness a Be sure the horizontal swivel lock is secured See Photo A b ...

Page 8: ...o raise the pitch b Turn the elevation control counter clockwise to lower the pitch 6 Adjust the speed control dials to produce the required speed Larger numbers equal higher speed 7 Pitch a second ball 8 Repeat steps 4 5 and 6 until the proper path elevation and speed are achieved 9 Refer to Selecting the Pitch page 7 for different pitches 10 Pitch several more test balls to ensure the selected p...

Page 9: ...he great amount of hitting they will receive Discard old or soft leather balls from your Junior Hack Attack batting sessions Similarly discard older worn synthetic pitching balls Figure 5 Pitch Selection Chart These settings are provided as general guidelines Adjustments for players of varying skill can be made from these settings WARNING PERSONAL INJURY HAZARD Never reach down near throwing wheel...

Page 10: ...n the chute and through the throwing wheels 4 When defensive work is completed position the through hole directly over the undercarriage nut Screw in the horizontal swivel lock through the through hole and into the undercarriage nut and tighten securely 5 Secure the throwing head with the frame lock Allow all three throwing wheels to come to a complete stop before transporting Junior Hack Attack F...

Page 11: ...g the rear leg as a handle tip Junior Hack Attack back until machine can be comfortably rolled on the travel wheels Junior Hack Attack can now be rolled and maneuvered off of the field 6 To transport Junior Hack Attack in a car remove the throwing head a Be sure the frame lock is engaged and the throwing head is tightly secured to the yoke b Completely loosen and remove the horizontal swivel contr...

Page 12: ... the wheel until the build up is removed For very heavy build up a synthetic scouring pad such as a Scotch Brite scouring pad or medium sandpaper may be used sparingly Methyl Ethyl Ketone M E K may be required to help loosen the build up of dirt or ball residue EXAMINE THE MACHINE Examine Junior Hack Attack for condition and completeness before every use 1 For batting practice be sure the horizont...

Page 13: ... by hand and making sure that it spins freely without wobble before turning the unit ON e Be sure the wheel guard is properly and securely reinstalled MOTOR REPLACEMENT 1 Turn the on off switch OFF and unplug the power cord 2 Remove the throwing wheel see above 3 Remove four screws holding controller into main casting Note the position of the motor wires on the controller then disconnect the wires...

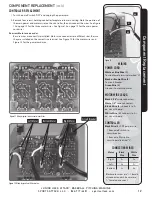
Page 14: ... 10 for the motor wires and Figure 13 for the power cord wire Component Replacement Figure 11 Wiring diagram from the control board side Figure 12 Wiring diagram for all three motors Right Motor Circuit Breaker Bottom Motor Left Motor CONNECTING WIRES Motor Black White Wire Wire Right A A Left A A Bottom A A Black motor wires are 3 16 female disconnect and white wires are 1 4 female disconnect 3 1...

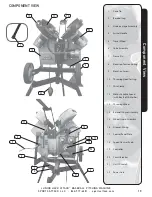
Page 15: ... 6 Yoke Assembly 7 Frame Pin 8 Elevation Tension Spring 9 Elevation Screw 10 Throwing Head Casting 11 Wire Clamp 12 Motor Variable Speed with Key Bolt Washer 13 Throwing Wheel 14 Baseball Chute Assembly 15 Wheel Guard Assembly 16 Gromet Wiring 17 Control Panel Plate 18 Speed Control Knob 19 Controller 20 Circuit Breaker 21 On Off Switch 22 Power Cord 13 14 12 5 7 16 19 18 20 21 2 17 15 10 22 11 8 ...

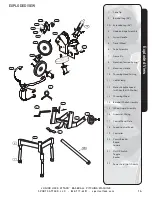
Page 16: ...riage Assembly 4 Swivel Handle 5 Travel Wheel 6 Yoke Assembly 7 Frame Pin 8 Elevation Tension Spring 9 Elevation Handle 10 Throwing Head Casting 11 Cable Clamp 12 Motor Variable Speed with Key Bolt Washer 13 Throwing Wheel 14 Baseball Chute Assembly 15 Wheel Guard Assembly 16 Grommet Wiring 17 Control Panel Plate 18 Speed Control Knob 19 Controller 20 Circuit Breaker Round Square 21 On Off Switch ...

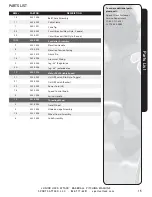
Page 17: ...ing 7 533 1410 Frame Pin 16 280 3006 Grommet Wiring 2 532 0004 leg 36 Regular ea 2A 532 0008 leg 46 extended ea 12 530 1010 Motor 90v Variable Speed 21 223 0002 On Off Switch Old Style Toggle 21 223 0004 On Off Switch Rocker 22 232 0000 Power Cord US 18 280 2003 Speed Control Knob 4 533 1406 Swivel Handle 13 531 0003 Throwing Wheel 5 281 0003 Travel Wheel 3 533 1405 Undercarriage Assembly 15 533 1...

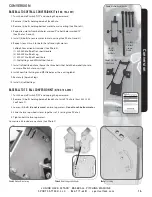
Page 18: ...nstall softball feed chute Reuse the three bolts that held the baseball chute to secure softball chute to casting 8 Install new Dial Settings and MPH label over the existing label 9 Remove 3 baseball legs 10 Install 3 softball legs BASEBALL TO 7 5 BALL CONVERSION KIT KIT NO 102 3002 1 Turn the on off switch OFF and unplug the power cord 2 Remove 3 bolts holding baseball feed chute Install 7 5 chut...

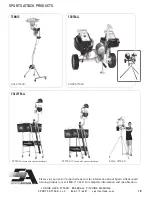
Page 19: ...it our web site sportsattack com for information about Sports Attack sports training products or call 800 717 4251 for complete information and specifications SPORTS ATTACK PRODUCTS SOFTBALL SOCCER CRICKET HACK ATTACK SOFTBALL STRIKE ATTACK JUNIOR HACK ATTACK SOFTBALL shown with optional feeder CRICK ATTACK ...

Page 20: ...web site sportsattack com for information about Sports Attack sports training products or call 800 717 4251 for complete information and specifications SPORTS ATTACK PRODUCTS TENNIS FOOTBALL ACE ATTACK SNAP ATTACK ATTACK shown with optional ball bags SKILL ATTACK VOLLEYBALL ATTACK II shown with optional ball bags ...

Reviews: