background image

D. EXERCISING ON YOUR CYCLE

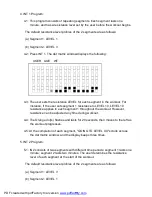
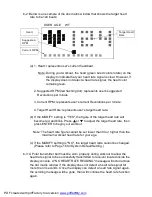
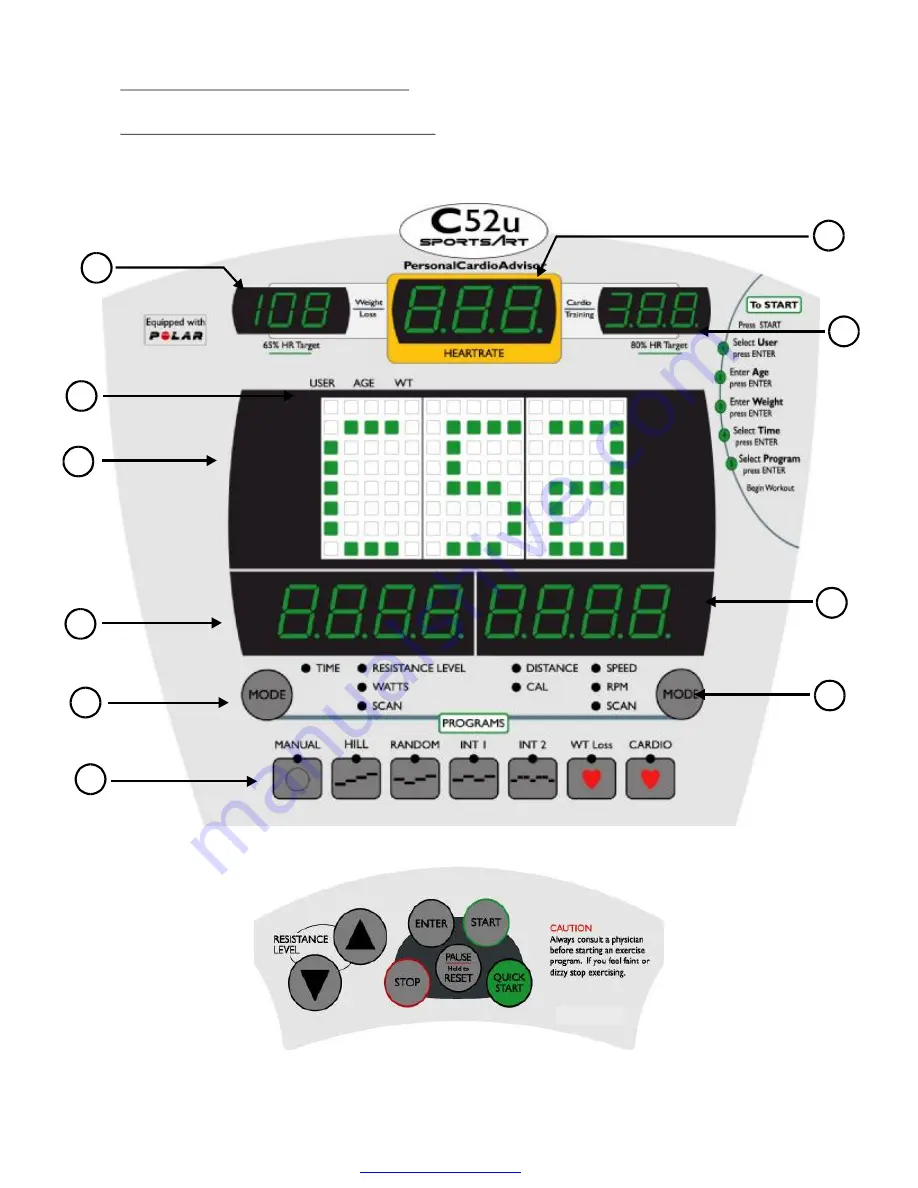
Understanding the Electronics Package

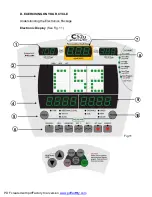
Electronic Display

(See Fig. 11)

10

1

2

3

4

5

6

7

8

10

9

Fig.11

PDF created with pdfFactory trial version 

www.pdffactory.com

Summary of Contents for C52u

Page 1: ...PDF created with FinePrint pdfFactory Pro trial version http www pdffactory com...

Page 2: ...ge Electronic display Terminology Display function Basic operation System default setting E PROGRAMS Manual program Hill program Random program INT1 program INT2 program WT loss HRC 65 Cardio HRC 80 p...

Page 3: ...Keep your hands away from moving parts Wear proper workout clothing Do not wear overly loose clothing Do not wear shoes with leather soles or high heels Tie all long hair back Do not rock the unit fro...

Page 4: ...l Whether you are a first time user of an exercise cycle or a seasoned pro understanding the correct use of the equipment will enhance your ability to achieve your exercise goals safely and successful...

Page 5: ...in the future 1 Four 1 4 x L1 2 bolts Handle Bar Assembly 2 Four 1 4 internal serrated washer Handle Bar Assembly 3 Six 5 16 x L1 2 bolts Rear Cross Frame 4 Five 5 16 x L1 2 bolts Upright Post Assemb...

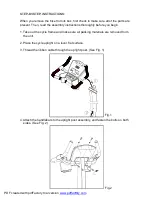
Page 6: ...egin 1 Take out the cycle frame and make sure all packing materials are removed from the unit 2 Place the cycle upright on a level flat surface 3 Thread the ribbon cable through the upright post See F...

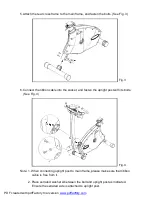
Page 7: ...pright post with its bolts See Fig 4 Note 1 When connecting upright post to main frame please make sure that ribbon cable is free from it 2 Place serrated washer A between the bolt and upright post as...

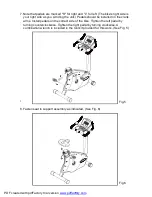
Page 8: ...k arms Install pedals on the correct side of the bike Tighten the left pedal by turning counterclockwise Tighten the right pedal by turning clockwise A combination wrench is included in the tool kit p...

Page 9: ...FLOOR LEVEL ADJUSTMENT Adjust the rear adjustment wheels to steady the bike See Fig 7 7 Fig 7 PDF created with pdfFactory trial version www pdffactory com...

Page 10: ...he desired position Tighten the knob into position to secure the seat See Fig 8 Turn height adjustment knob A counterclockwise until it is loose then pull out the knob to lower seat height to the desi...

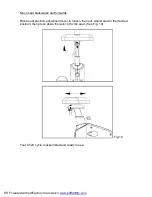
Page 11: ...ition adjustment lever to loosen the seat Adjust seat to the desired position then press down the lever to fix the seat See Fig 10 Your C52U cycle is assembled and ready to use 9 Fig 10 PDF created wi...

Page 12: ...D EXERCISING ON YOUR CYCLE Understanding the Electronics Package Electronic Display See Fig 11 10 1 2 3 4 5 6 7 8 10 9 Fig 11 PDF created with pdfFactory trial version www pdffactory com...

Page 13: ...0 HR Target Using age as a factor the Personal Cardio Advisor automatically calculates your optimal heart rate for cardio conditioning The optimal cardio conditioning workout is 80 of the maximum work...

Page 14: ...OP 1 Press STOP to end your workout Workout data will be displayed 2 When cooling down press STOP to end cool down function E PAUSE RESET 1 Pause Press PAUSE RESET and stop pedaling to retain program...

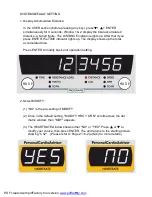
Page 15: ...d STOP buttons for 3 seconds The memory for USER1 will be earsed WEIGHT and TIME will revert to the default setting WEIGHT 75KG or 165 LB TIME 30 minutes 2 4 Memory always reverts to the last user For...

Page 16: ...tor light flashes A starting weight of 75 KG or 165 LB appears in the dot matrix display window Press or to select your weight and press ENTER to confirm your choice The allowable weight range is 20 1...

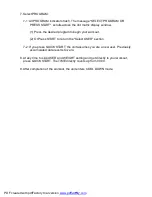
Page 17: ...return the Select USER section 7 2 If you press QUICK START the unit assumes you are a new user Previously accumulated data reverts to zero 8 At any time to skip USER and WEIGHT setting and get direc...

Page 18: ...shows up the total accumulated time Press ENTER to modify basic unit operation setting 2 Select MODIFY 1 NO is the pre setting of MODIFY 2 Once in the default setting MODIFY HRC Y OR N scrolls across...

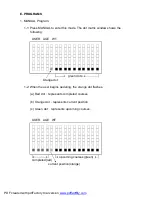
Page 19: ...dots Orange dot 1 2 When the user begins pedaling the orange dot flashes a Red dot represents completed courses b Orange dot represents current position c Green dot represents upcoming courses USER A...

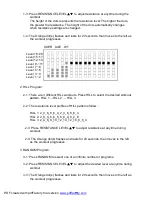
Page 20: ...profiles of HILL patterns follow HILL 1 2_4_6_8_6_4_2_4_6_8_6_4 HILL 2 2_8_4_8_6_8_6_8_4_8_2_8 HILL 3 2_4_6_8_10_12_14_12_10_8_6_4 2 3 Press RESISTANCE LEVEL to adjust resistance at anytime during wo...

Page 21: ...h segment 1 throughout the workout However resistance can be adjusted any time during workout 4 4 The Orange dot s flashes and lasts for 20 seconds then moves to the left as the workout progresses 4 5...

Page 22: ...ol HRC includes two programs one designed for weight loss WT Loss and another designed for an optium cardio workout WT Loss is a low intensity workout whereas CARDIO is a high intensity workout These...

Page 23: ...the target heart rate then press ENTER to begin your workout Note The heart rate figure cannot be set lower than 84 or higher than the maximum workout heart rate for your age c If the MODIFY settting...

Page 24: ...eps once and enters COOL DOWN mode The COOL DOWN program lasts 5 minutes TIME indicator lights In this mode time counts down 7 2 GOING TO COOL DOWN appears onece on the dot matrix window then the unit...

Page 25: ...stance levels f INT2 2 resistance levels 2 When changing programs during a workout a The workout illustraction will change b The completed data will remain and DISTANCE and CAL will continue to accumu...

Page 26: ...your fitness level In general it is recommended that you maintain your heart rate in the training zone for at least 10 minutes to realize an aerobic benefit As your fitness level improves you will be...

Reviews: