background image

All manuals and user guides at all-guides.com

Summary of Contents for E81G

Page 1: ...i i iESlGELLIPTICAL i OWNER S MANUAL F T ESS All manuals and user guides at all guides com a l l g u i d e s c o m...

Page 2: ...Listof parts Stepby StepInstructions 4 E81GDISPLAY DisplayLayout Display Specifications Display Controls Default Value Keypad ProgramOverview Glute WT Loss HRC6s Cardio HRC80 Pause ENDOFWORKOUT 5 Fuse...

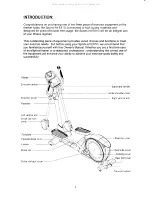
Page 3: ...E81G we recommend that youfamiliarize yourself withthisOwner sManual Whether youarea firsttimeuser of an elliptical traineror a seasonedprofessional understanding thecorrect useof theequipment willenh...

Page 4: ...side andusecarewhenmounting and dismounting theunit Do notuseanyaccessories thataren tspecifically recommended bythe manufacturer Thesemightcauseinjuries or causethe unitto fail Workwithinyourrecomme...

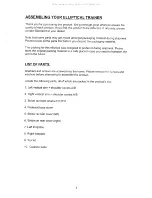
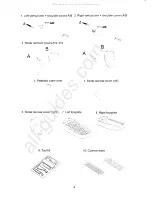
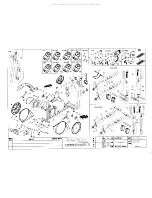
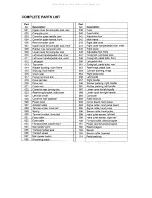
Page 5: ...ct itduring shipment please storetheoriginal packing material in a safeplacein caseyouneedto transport the unitin thefuture LISTOF PARTS Washersandscrewsarescrewedintotheframe Pleaseremovethescrewsand...

Page 6: ...r flH gt 3 Stride railfrontcovers A 2 B 2 R L B A o t t t l i T r t r A t 5 Striderailrearcover left 4 Ped cover estalbase a 7 6 0 Striderailrearcover right 9 Toolkit 10 Cushion pads a 4 2 I 4 B Right...

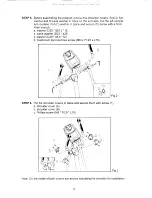
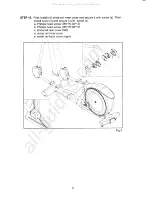
Page 7: ...tsbase Usea 6mmAllen wrench tosecure thescrews andwashers inthefollowing order B then C and D Connect datacables andinsert thecables intothetubeto keepthemsafe STEP2 Slipthepedestal basecover ontothep...

Page 8: ...mm Allenwrench a washer D32 d25 2 t2 b wavewasher D33 d26 c washer D30 d8 5 t2 d mushroom topinnerhexscrew M8x P1 25x L15 Fig 2 STEP6 Puttheshoulder coversin placeandsecurethemwithscrew F a shoulder c...

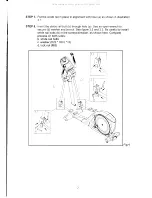
Page 9: ...ilbolt b through hole a Usean openwrench to secure d washerand e nut Seefigure3 2and3 3 Becareful to install stride railbolts b inthecorrect direction as shownhere Complete process on bothsides b stri...

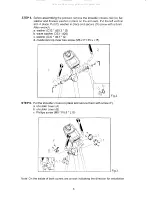
Page 10: ...Allenwrench a washer D32 d25 2 t2 b wavewasher D33 d26 c washer D30 d8 5 t2 d mushroom topinnerhexscrew M8x P1 25x L15 Fig 2 STEP6 Puttheshoulder coversin placeandsecure themwithscrew F a shoulder co...

Page 11: ...en install cover c andsecure itwith screw b a Phillips head screw M5 P0 08 15 b Phillips head screw M5 P0 08 15 c stride railrearcover left d stride railinner cover e stride railbackcover right Fig 7...

Page 12: ...D20 d5 t10 b spring washer M5 c mushroom topinnerhexscrew M5P0 8L10 d footplate left e footplate right f cushion pad Fig B STEP12 Press thecushion padsintothefootplates and position ofarrow mark need...

Page 13: ...ontoftheunit First adjust thefoot A thensecure it in placebytightening washer B against theframe as shown Fig 10 Connectto Power Thepowersocketis at the lowerrearpartof theelliptical trainer Insert th...

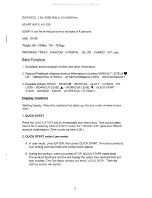
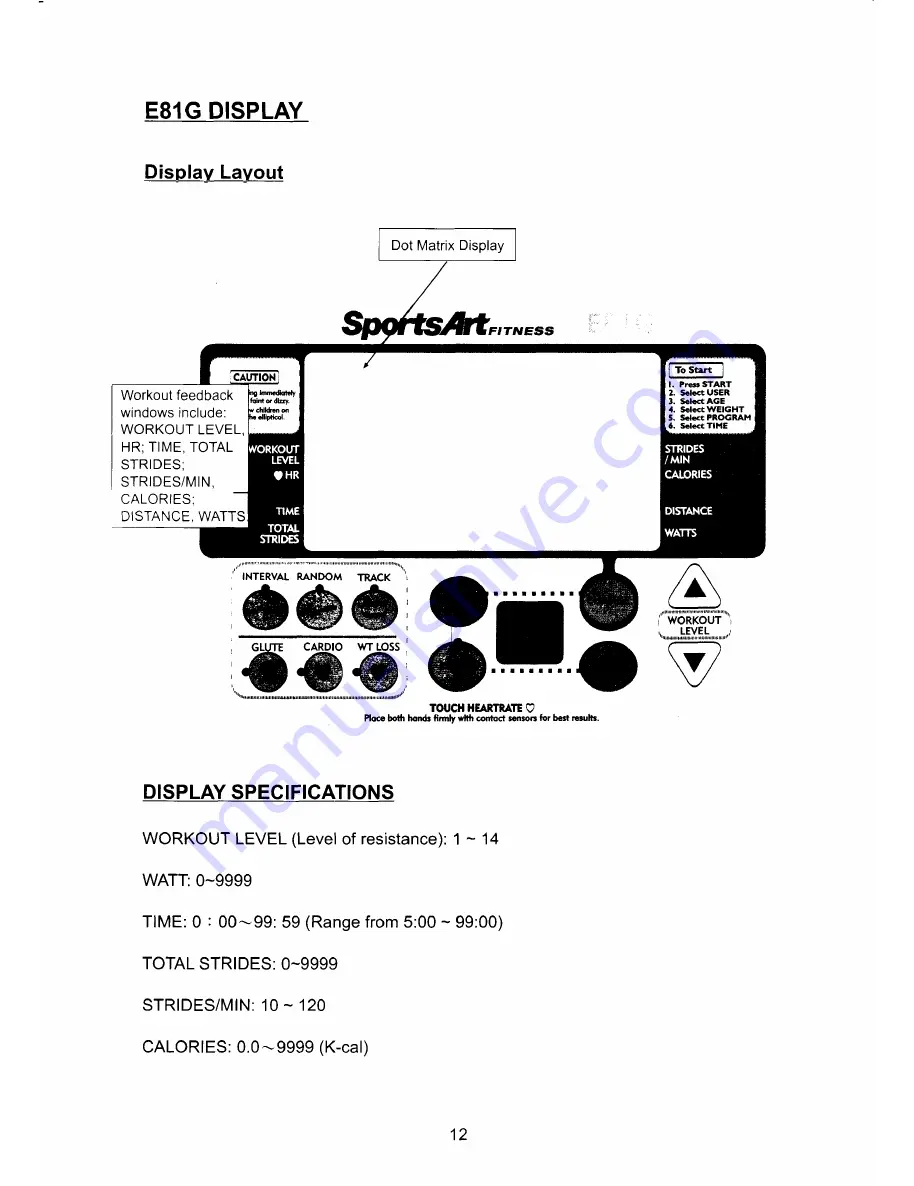
Page 14: ...TE 9 Ploce bothhonds firnly lti contoct sensoo forba rcsults DISPLAY SPECI FICATIONS WORKOUTLEVEL Levelof resistance I 14 WATT 0 9999 TIME 0 00 99 59 Range from5 00 99 00 TOTALSTRIDES 0 9999 STRIDES M...

Page 15: ...E ENTER STOP HOLD TO RESET DisplayControls Starting Display Whenthemachine firststartsup thedoxmatrix windowshows E81 1 QUICKSTART PresstheQUICKSTARTkeyto immediately startexercising Timeaccumulates f...

Page 16: ...STOP ENTERforthreeseconds to delete theUSERRecord Thedisplay willbeep onceandthenshowtheusersetting screen B Age Setting WhentheAGELEDflashes pressAV to inputyourage PressENTERto confirm yourchoice an...

Page 17: ...firm yourchoiceand returnto thestartup screen Keypad 1 WORKOUTLEVEL LIV BasicOperation 1 Inworkout mode press WORKOUT LEVEL IY to adjust workout setting 2 In usersettingmode useWORKOUTLEVELA V to adju...

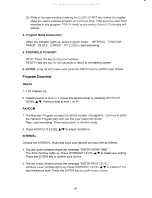
Page 18: ...stance levelis 1 Adjusttheworkoutlevelby pressing WORKOUT LEVELl IY Workout levelisfrom1 to 14 RANDOM 1 TheRandomProgram contains an infinite number of programs Continue to press theRandomProgram keyu...

Page 19: ...automatically changing resistance levelsandthestridespeed 1 TargetHeartRates 1 VVf LOSS 65 Heartrate Control 220 AGE x65 2 CARDIO 80 Heartrate Control 220 AGE x809 o 2 Intheseprograms if no HeartRate...

Page 20: ...activated stopexercising forovertwominutes to returnto starting display ENDOFWORKOUT 1 Whentheworkout timecounts downto 0 andthedisplay beepssoundforthree times every 0 5 second Theinformation display...

Page 21: ...e pushthefusecapin andturncounterclockwise STEP3 Removethedamaged fusefromthefusecap Inserta newfuseintothe fusecap STEP4 To secure thenewfusein place pushin andturnthefusecapclockwise STEP 2 RtI lOVt...

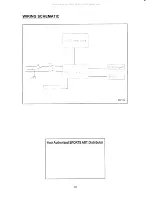
Page 22: ...WIRINGSCHEMATIC i t cl E8lG Your Authorized SPORTS ARTDistributor 20 All manuals and user guides at all guides com...

Page 23: ...r 5 t 4 g 4 dP g l h N 81G HRC HTR E81G HRC P d t HTR ESOG HTR EEOG PR EBO E81 E806 E81G f 9g M p u m tAr 0014 A srrrtts ljl IFIJ 1il ESS t4lnF flft1n fi PF AA 80 80 81 fB1G All manuals and user guid...

Page 24: ...Rioht oedal tube 017 Fixinq nutcrankarm 056 Lefthandle 018 Drivebeltdisc 057 Riohthandle 020 Drivebelt 058 Rubberoaddinq riqhthandle 021 Crank arm 061 Rubberpaddinq lefthandle 022 Coverforrearturninq...

Page 25: ...SportsA IndustriqlCo Ltd TUV CERT ISO9001 9002Certified QuolityProducts 2007 11 All manuals and user guides at all guides com...

Reviews: