


133
Handmatige modus "M"
1. Druk op de START-knop in het hoofdmenu om direct naar de handmatige modus te gaan of
druk op UP of DOWN om "M" op het display te selecteren en bevestig met de ENTER-toets.
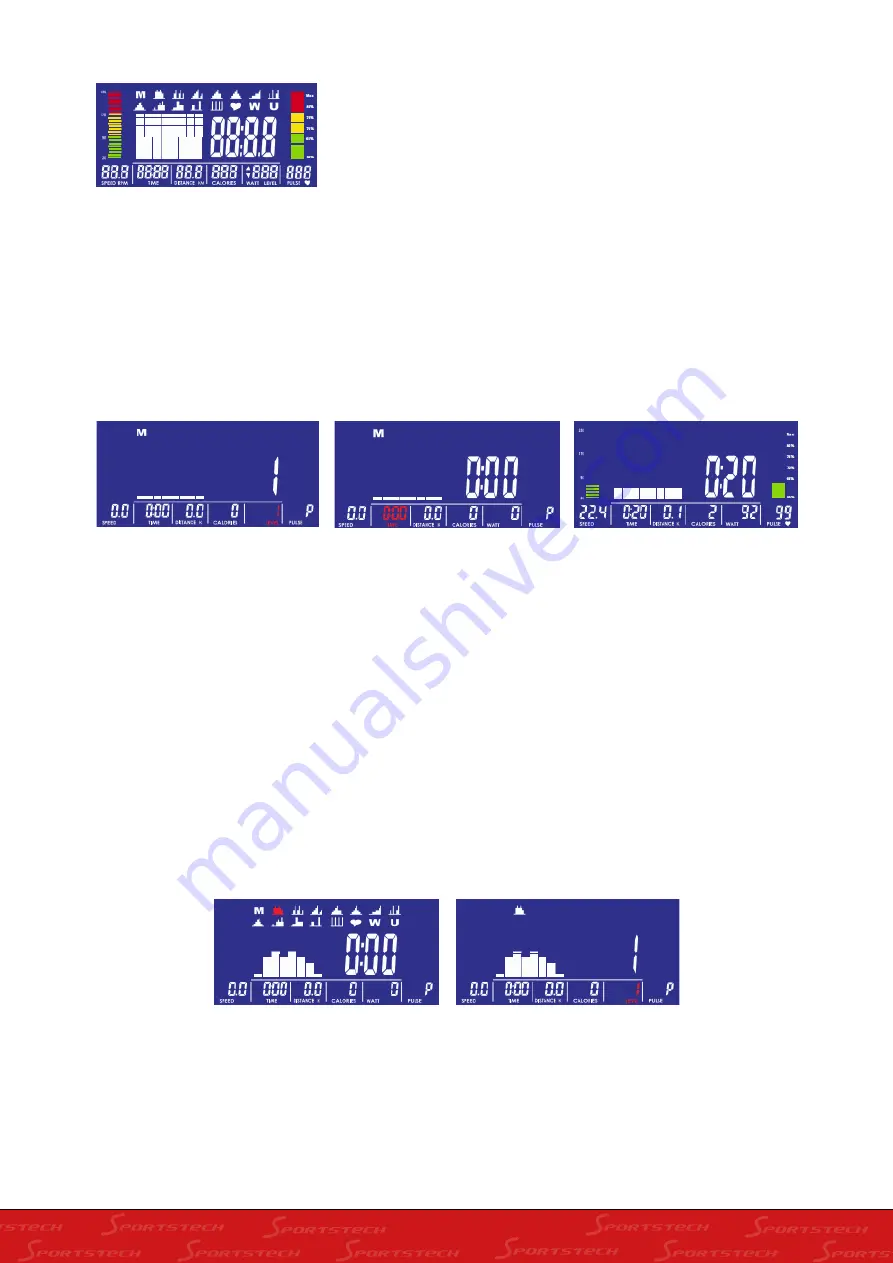
2. Druk op UP of DOWN om de beginwaarde van het belastingniveau in te stellen. (Afbeelding 4)
3. Druk op UP of DOWN en bevestig met ENTER om de volgende instellingen te maken: TIME >
DISTANCE > CALORIES > PULSE. (Afbeelding 5)
4. Druk op START/STOP om de training te starten.
5. Druk tijdens de training op UP of DOWN om het belastingniveau aan te passen. (Afbeelding 6)
6. Het display geeft afwisselend WATT en het belastingniveau weer. De aanpassing van het belas-
tingniveau kan alleen worden uitgevoerd als het display dit gedurende 3 seconden weergeeft.
7. Druk opnieuw op START/STOP om de training te onderbreken. Druk op RESET om terug te
keren naar het hoofdmenu.
Afbeelding 4
Afbeelding 5
Afbeelding 6
Steek de stekker in het stopcontact. Het display toont alle weergavefuncties gedurende 2 sec. (Af-
beelding 1)
Trainingsselectie
- Druk in het hoofdmenu op de UP- of DOWN-selectieknoppen om een trai-
ningsmodus in deze volgorde te selecteren:
MANUAL (handmatig) > BEGINNER > ADVANCED > SPORTY > CARDIO (doel-hartslag | HRC-hart)
> WATT (doel-prestaties). Bevestig je selectie met de ENTER-knop.
Afbeelding 1
Inschakelen
Intervalprogramma's 1-12
1. Druk op UP of DOWN om te kiezen tussen de intervalprogramma's 01-12 en bevestig met de
ENTER-knop. (Afbeelding 7)
2. Druk op UP of DOWN om alle belastingniveaus te verhogen of te verlagen en bevestig met
ENTER. (Afbeelding 8)
3. Druk op UP of DOWN om de tijd in te stellen.
4. Druk op START/STOP om de training te beginnen en op UP of DOWN om het belastingniveau
tijdens de training aan te passen.
Afbeelding 7
Afbeelding 8
Summary of Contents for CX70
Page 1: ...DE EN ES FR IT NL CX70 ...
Page 2: ......
Page 25: ......
Page 39: ...39 14 Screw the bottle holder 17 to the vertical frame 4 with the Phillips screws 39 ...
Page 48: ......
Page 71: ...MANUEL FRANÇAIS ...
Page 85: ...85 14 Visser le porte bouteille 17 sur le cadre vertical 4 à l aide des vis cruciformes 39 ...
Page 94: ...MANUALE D USO ITALIANO ...
Page 108: ...108 14 Fissate il portabottiglie 17 con le viti a croce 39 sul telaio perpendicolare 4 ...
Page 117: ...GEBRUIKSAANWIJZING NEDERLANDS ...
Page 131: ...131 14 Schroef de flessenhouder 17 met de kruisschroeven 39 op het verticale frame 4 ...


