28
5. ASSEMBLY INSTRUCTIONS
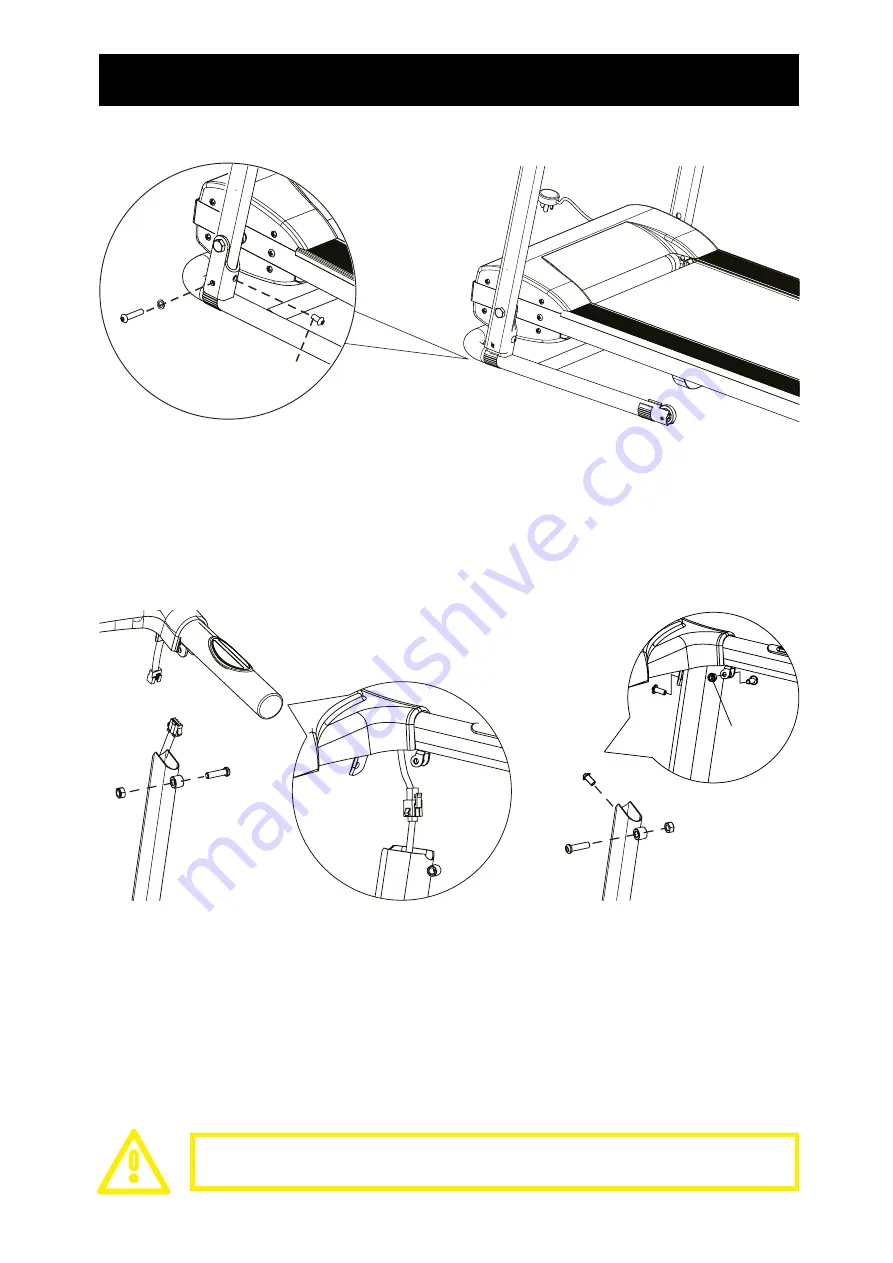
Step 1
Stand the unit upright on a level surface.
NOTE: for this first step, tighten the screws only half-tight until step 2 is complete!
Lift up both side supports (left and right) one at a time and fasten the side supports to the main frame with the screws M8x50
(S1) and the spring washers M8 (S2). Additionally secure the side supports with the screws M8x16 (S3). Use only the Allen key
to tighten the screws half-tight.
It is recommended that a second person help you with the setup.
S1
S2
S3
S3
S4
S5
S3
S4
S5
S3
S4
S5
Step 2
A. Connect the main cable from the right side support to the console cable, then plug the connected cable back into
the frame support frame, making sure the cable is not pinched or compromised.
B. Mount the handle mount on the side supports. Use the M8x16 screws (S3) on the simple bracket. The double
retaining holes are to be aligned with the opening on the side support so that you can insert the M8x30 screw (S4)
and secure it with the M8 nut (S5).
NOTE: Finally, tighten the screws you only tightened half-tight in step 1. "
A
B
Firmly tighten all component parts
and pre-assembled parts!
Summary of Contents for F10
Page 1: ...1 F10 Laufband DE EN ES FR IT NL ...
Page 2: ......
Page 20: ...20 ...
Page 38: ...38 ...
Page 56: ...56 ...
Page 74: ...74 ...
Page 92: ...92 ...
Page 110: ...110 ...


