


3
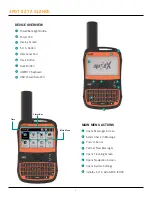
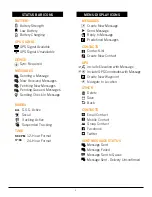
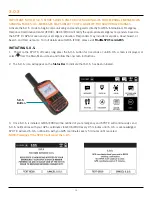
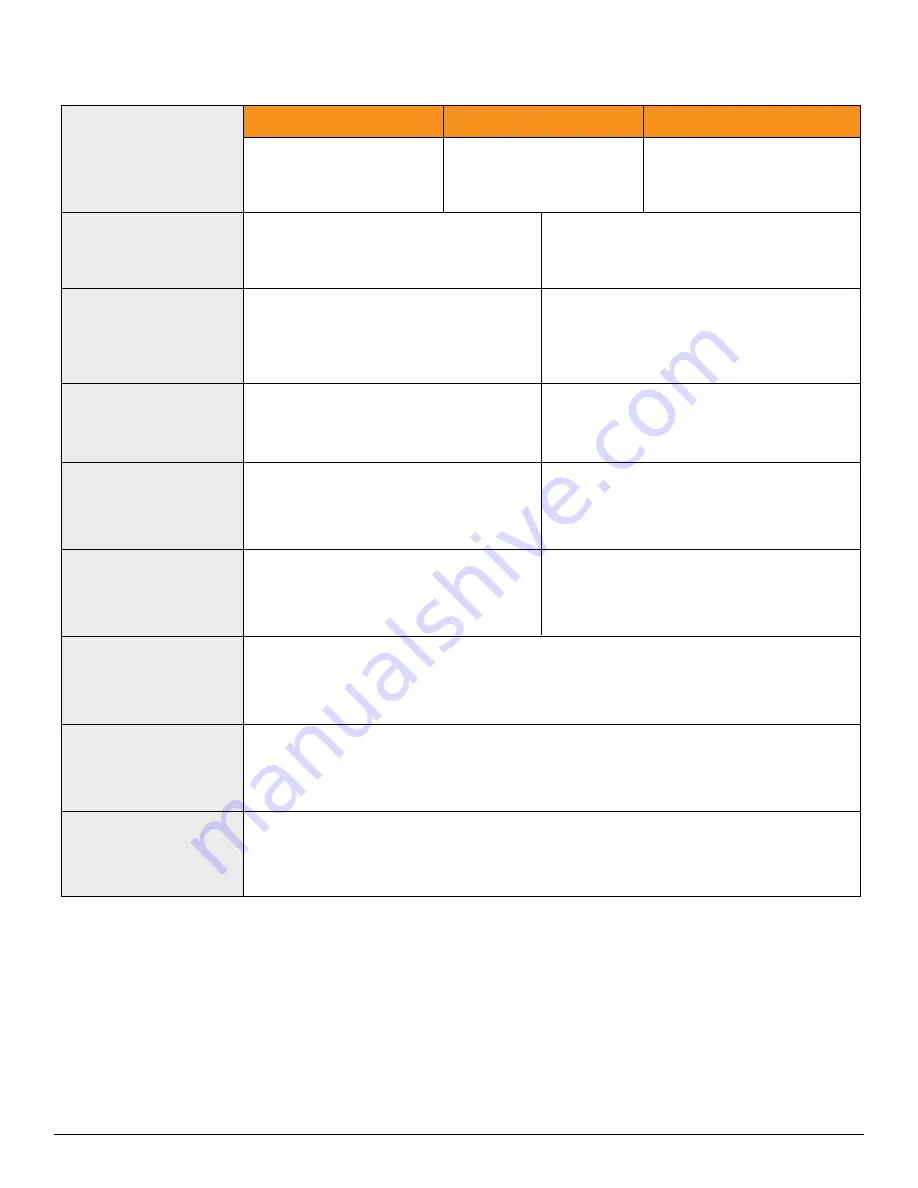
DEVICE OVERVIEW FUNCTIONS
DISPLAY SCREEN
S.O.S. BUTTON
POWER BUTTON
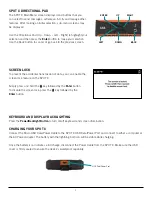
DIRECTIONAL PAD
TRACKING BUTTON
BACK BUTTON
QWERTY KEYPAD
USB POWER/DATA PORT
While the SPOT X is powered ON, quick
press the Power button to toggle the
screen and keyboard backlight on and off.
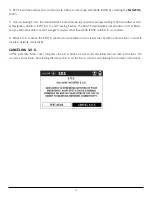
Long press the S.O.S. button for 3
seconds or until S.O.S. screen is
displayed to initiate an S.O.S. with
GEOS IERCC.
While S.O.S. is active, long press the
S.O.S. button for 3 seconds to cancel the
S.O.S. with GEOS IERCC.
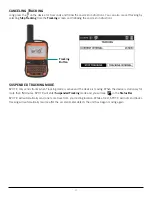
Long press the Track button for 3
seconds to initiate tracking mode at
your set interval rate.
While Tracking Mode is active, long
press the Track button for 3 seconds to
cancel Tracking.
Press up, down, left and right to
navigate to and highlight a section
on the screen.
Quick press the Back button to
navigate to the previous screen.
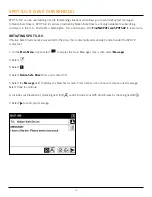
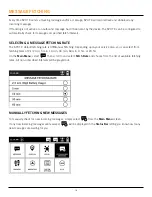
Use the keyboard to create messages, contact names and other manual entries
as required.
The SPOT X Display screen allows for interaction with the Main Menu,
sub-menus, and other onscreen features.
Used to connect a Micro USB Cable to the SPOT X USB Port to charge the
SPOT X device and to sync with
SPOT MY ACCOUNT.
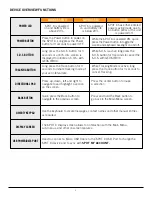
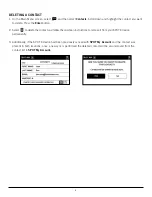
POWER LED
BLINKING GREEN
BLINKING RED
NO LED
SPOT X is powered
on and battery life is
above 20%.
SPOT X is powered
on and battery life
is below 20%.
Press the center button to make
a selection.
Press and hold the Back button to
go back to the Main Menu screen.
Press the Power button to power on
the SPOT X. Long press the Power
button for 3 seconds to power OFF.
SPOT X has either entered
power saving mode due to
no button press or the unit
is powered off.


