4.
Starting operation
4.1
High-pressure hose, spray gun and
separating oil
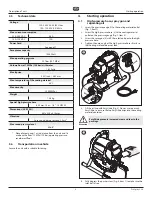
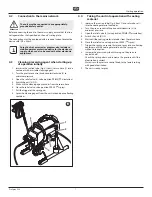
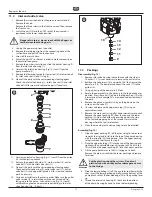
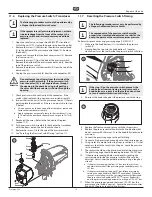
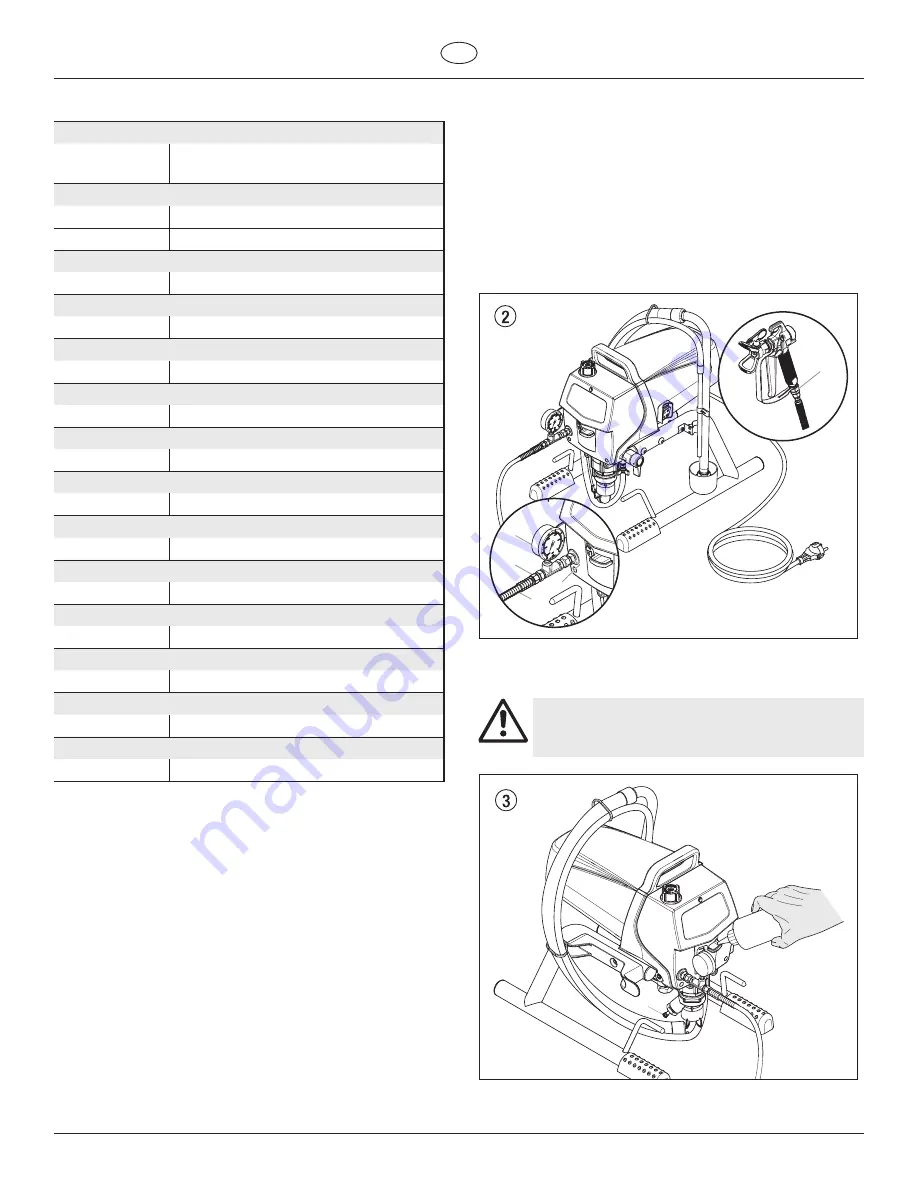
1. Screw the pressure gauge (1) to the coating material outlet
(Fig. 2, Item 2).
2. Screw the high-pressure hose (3) to the coating material
outlet on the pressure gauge (Fig. 2, Item 4).
3. Screw the spray gun (5) with the selected tip onto the high-
pressure hose.
4. Tighten the union nuts at the high-pressure hoses firmly so
that coating material does not leak.
1
4
2
3
5
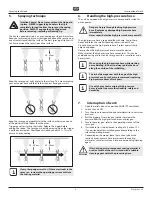
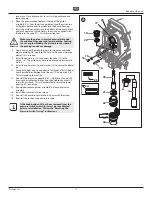
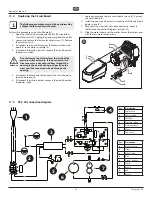
5. Fill the oil cup with EasyGlide (Fig. 3). Do not use too much
EasyGlide, i.e. ensure that no EasyGlide drips into the coating
material container.
Attention
EasyGlide prevents increased wear and tear to the
packings.
1
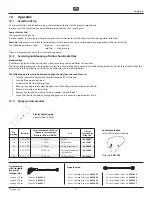
6. Fully depress the pusher stem (Fig. 3, item 1) to make sure the
inlet ball is free.
6
ProSpray 3.20
GB
Description of unit
Starting operation
3.5
Technical data
Voltage
220~240 VAC, 50/60 Hz or
100~120 VAC, 50/60 Hz
Max. current consumption
220~240 VAC
5.5 A
100~120 VAC
12 A
Power Cord
See page 27
Acceptance capacity
1000 Watt
Max. operating pressure
207 bar (20.7 MPa)
Volume flow at 12 MPa (120 bar) with water
1.62 l/min
Max tip size
0.021 inch – 0.53 mm
Max. temperature of the coating material
43°C
Max viscosity
20.000 MPa·s
Weight
13.6 kg
Special high-pressure hose
6,35 mm, 15 m - 1/4” - 18 NPSM
Dimensions (L X W X H)
441 x 324 x 415 mm
Vibration
Spray gun does not exceed 2.5m/s
2
Max sound pressure level
80 dB*
* Place of measuring: 1 m in distance from the unit and 1.6
m above the floor, 12 MPa (120 bar) operating pressure,
reverberant floor.
3.6
Transportation in vehicle
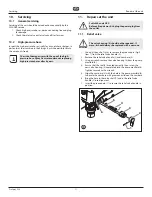
Secure the unit with a suitable fastening.

