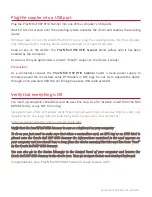
Plug the coupler into a USB port
Plug the Prox'N'Roll HSP RFID Scanner into one of the computer’s USB ports.
Wait 10 to 120 seconds until the operating system activates the driver and enables the coupling
device.
Windows takes 10 to 120 seconds the first time you plug the coupling device into the computer
only. Afterwards, the coupling device will be activated in a couple of seconds.
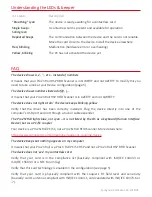
Keep an eye on the device: the
Prox'N'Roll HSP RFID Scanner
blinks yellow until it has been
enabled by the computer.
As soon as the cyan light enters a smooth “breath” sequence, the device is ready!
Precautions
As a contactless coupler, the
Prox'N'Roll HSP RFID Scanner
needs a clean power supply to
remotely power the contactless cards, RFID labels or NFC tags. Do not try to operate the device
through a non-powered USB hub nor through a passive USB cable extender.
Verify that everything is OK
You need a (compliant) contactless card do pass this step. Use for instance a card from the NXP
MIFARE family, or any NFC Forum Tag.
SpringCard also offers contactless cards. Need a small assortment of various chips to start your
developments, or a large batch to issue many cards to your users? Just contact us:
https://www.springcard.com/en/products/cards-tags
Verify that the Prox'N'Roll RFID Scanner is seen as a keyboard on your computer
To do so you just need to make sure that when a contactless card, an NFC tag or an RFID label is
placed onto the Prox'n Roll HSP RFID Scanner the informations contained in the card appears on
your computer and you should hear a beep from the device meaning that the card has been “read”
by the Prox'n Roll HSP RFID Scanner.
You can also go to the Device Manager in the Control Panel of your computer and browse the
Prox'n Roll HSP RFID Scanner in the device tree. Then go to input devices and standard keyboard.
Congratulations, your Prox'N'Roll HSP RFID Scanner is ready to work with!
SpringCard PMU18264-AA 2018/09


