Parts List & Operating Instructions
Form No. 555231, Sheet 2 of 3, Back
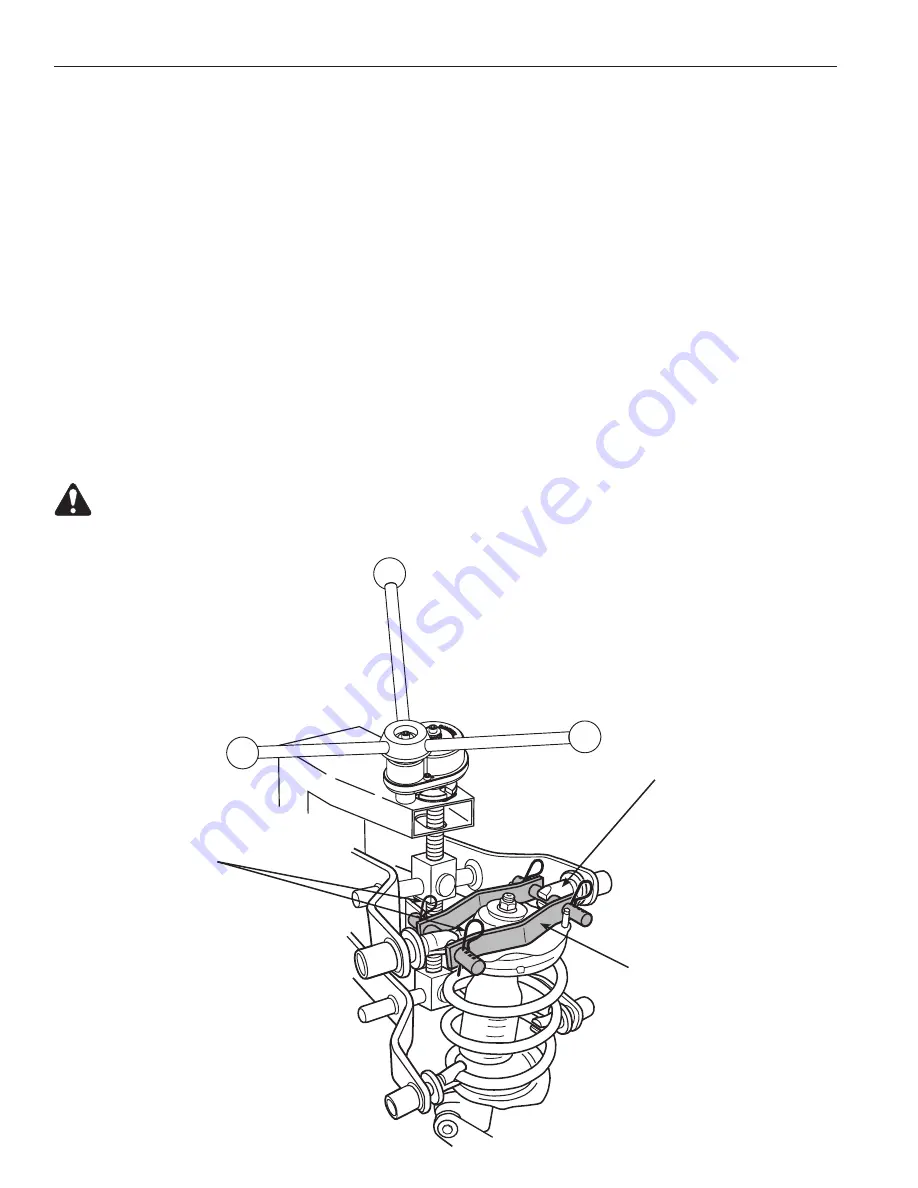
Assemble bridge
straps as close as
possible around the
bearing housing in
the top plate.
Clamp locking jaw on
adjusting pin between
shoulders.
Hairpins
Using the Bridge Accessory
The bridge accessory is designed to be used with the strut spring compressor on strut springs that cannot be
compressed enough to remove the retaining nut.
1. Refer to the vehicle service manual, and follow the manufacturer's recommended procedure to remove
the strut assembly from the vehicle.
2. Refer to the strut compressor instructions to load the strut assembly into the strut compressor.
3. Assemble the bridge on the top plate as shown in Figure 3. (Do NOT use the bridge on the bottom plate.)
•
Place the straps as close as possible around the bearing housing in the strut assembly top plate.
•
Install the hairpins on the adjusting pins.
•
Verify the assembled bridge has solid contact with the top plate.
4. Clamp the strut compressor's locking jaws around the bridge's adjusting pins, between the shoulders on
the pins.
5. Before compressing the spring, refer to the strut compressor instructions and adjust the strut compressor
so the strut top plate is as parallel to the floor as possible.
6. Turn the strut compressor forcing screw to compress the spring only until the spring is loose in the spring
mount.
WARNINg: Compressing the spring too far will cause premature tool failure that can result in
severe personal injury. Compress the spring only until it is loose in the spring mount.
7. Remove the piston rod nut and service the strut as necessary.
Figure 3


