background image

Installation of a New Spring

1. If replacing the spring, remove the old spring from the strut tool. Install the new spring in the tool, assembling 

the locking jaws as shown in Figure 1. Compress the spring.

2. Align the lower spring tip in its receptacle in the lower platform. Replace the top mount. Attach the piston 

rod nut, and torque it to the specifications listed in the vehicle service manual.

3. Check the alignment of both spring coil tips to the mounting platforms. Decompress the spring.
4. Follow the manufacturer's procedure to reinstall the strut assembly.

Maintenance

Item numbers refer to the parts list.

1. Use vehicle chassis grease to keep the forcing screw 

lubricated.

Reassembly Procedure

Follow this procedure if it is necessary to remove the forcing 

screw (Item No. 2), top trunnion (No. 12), or the bottom 

trunnion (No. 11) for repair or replacement.
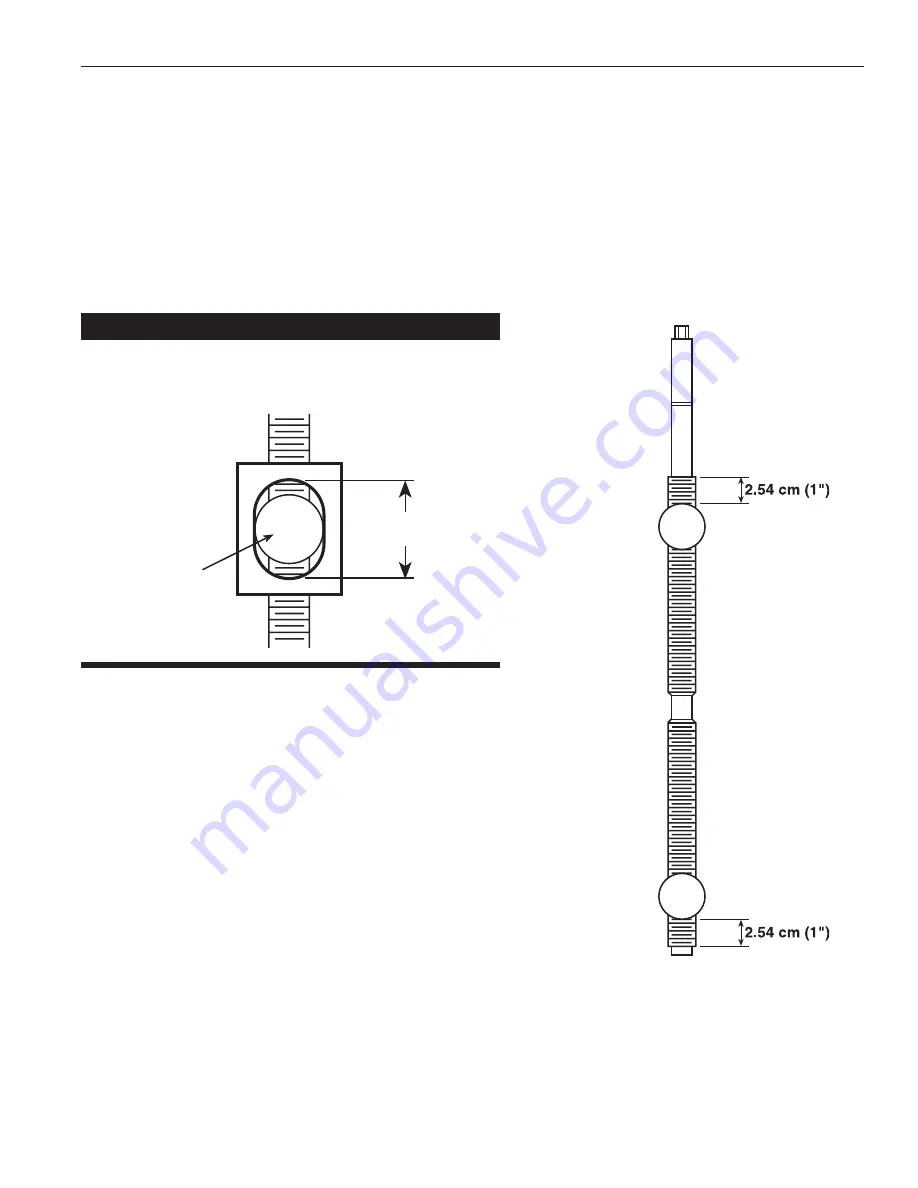
1. Ensure the trunnions (Item Nos. 11 and 12) are driven 

in approximately one inch from the edge of the forcing 

screw's bottom threads and one inch from the edge of 

the top threads, respectively, before remounting the arms 

onto the trunnions. See Figure 5.

Figure 4

Tech Tip

The  top  trunnion  has  been  designed  as  an  indicator  of 

spring compression. When the top trunnion is centered as 

shown in Figure 4, the tool is not applying any force to the 

strut assembly.

Top 

Trunnion

Top

Trunnion

Bottom

Trunnion

Forcing 

Screw

Figure 5

Parts List & Operating Instructions 

Form No. 555231

Sheet No. 3 of 3

© 2009 SPX  (Rev. A, October 29, 2009)

Summary of Contents for 6591

Page 1: ...aining Ring 19 10982 4 Roll Pin 20 544324 4 Locking Foot 21 534689 1 Bushing 22 519945 4 Locknut 23 544323 4 Support Foot 24 1 Bridge consists of 4 14528 hair pins 2 507739 straps 2 519708 adj pins 25...

Page 2: ...strut springs only Checktheconditionofthestrutspringcompressorbeforeeachuse do not use the equipment if it is damaged worn or modified Align the strut assembly before compressing The spring should be...

Page 3: ...s designed to be used with the strut spring compressor on strut springs that cannot be compressed enough to remove the retaining nut Refer to the instructions on the next page 7 Before servicing the s...

Page 4: ...o NOT use the bridge on the bottom plate Place the straps as close as possible around the bearing housing in the strut assembly top plate Install the hairpins on the adjusting pins Verify the assemble...

Page 5: ...grease to keep the forcing screw lubricated Reassembly Procedure Follow this procedure if it is necessary to remove the forcing screw Item No 2 top trunnion No 12 or the bottom trunnion No 11 for rep...

Page 6: ...53 1 Arandela 18 512037 2 Anillo retenedor 19 10982 4 Pasador de rodillo 20 544324 4 Pie de seguro 21 534689 1 Buje 22 519945 4 Tuerca de seguridad 23 544323 4 Base de soporte 24 1 Puente incluye 4 14...

Page 7: ...fique la condici n del compresor del resorte del travesa o antes de cada uso no utilice el equipo si est da ado desgastado o modificado Alinee el ensamble del travesa o antes de comprimir El resorte d...

Page 8: ...del travesa o que no puedan comprimirse lo suficiente para retirar la tuerca retenedora Consulte las instrucciones que aparecen en la p gina siguiente 7 Antes de darle servicio al ensamble del travesa...

Page 9: ...inferior Coloque las correas lo m s cerca posible alrededor de la caja de cojinetes en la placa superior del ensamble del travesa o Instale las horquillas en las clavijas de ajuste Verificar que el pu...

Page 10: ...s de veh culo para conservar lubricado el tornillo de presi n Procedimiento de reensamblaje Sigaesteprocedimientosisehacenecesarioretirareltornillo a presi n art culo No 2 el mu n superior No 12 o el...

Page 11: ...This page intentionally left blank...

Page 12: ...retenue 19 10982 4 Goupille lastique 20 544324 4 B quille de verrouillage 21 534689 1 Coussinet 22 519945 4 crou frein 23 544323 4 B quille 24 1 Pont consiste en 4 14528 pingles cheveux 2 507739 cour...

Page 13: ...V rifiez la condition du compresseur de ressort de jambe de force avant chaque utilisation ne pas utiliser l quipement s il est endommag us ou modifi Alignez la jambe de force avant de comprimer Le r...

Page 14: ...rt de jambe de force sur les ressorts de jambe de force qui ne peuvent pas tre assez comprim s pour enlever l crou de retenue Reportez vous aux directives de la page suivante 7 Avant de r parer la jam...

Page 15: ...e inf rieure Placez les courroies le plus pr s possible autour du corps de palier dans la plaque sup rieure de la jambe de force Posez les pingles cheveux sur les goupilles de r glage V rifiez que le...

Page 16: ...de v hicule pour garder la vis de pression graiss e Proc dure de r assemblage Suivez cette proc dure s il s av re n cessaire d enlever la vis de pression rep re n 2 le tourillon sup rieur n 12 ou le...

Reviews: