7
7.3 Microphone
F3.
0
f=5
.3m
m
CO
OL
-ICA
M DIGITAL CAM
ER
A
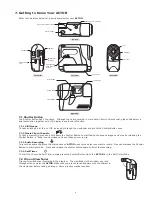
Front View
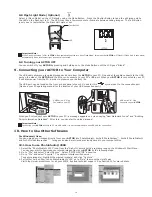
Microphone
The Microphone is located at the front of your
ACTOR.
Put it close to the sound source to
record an audio clip.
7.4 Mode Button
The Mode Button has 2 primary functions:
7.4.1 Turning your
ACTOR
On from the Stand-by Mode
Pressing the Mode Button when the
ACTOR
is in Stand-by Mode (LCD is blank) will reactivate your
ACTOR.
7.4.2 Cycling Through the Operating Modes
You can also use the Mode Button to cycle through the operating modes of your
ACTOR
. (For more details, see Section 8.
Getting Started)
7.5 LCD Display
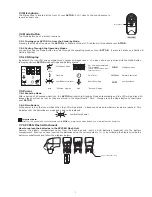
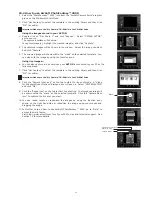
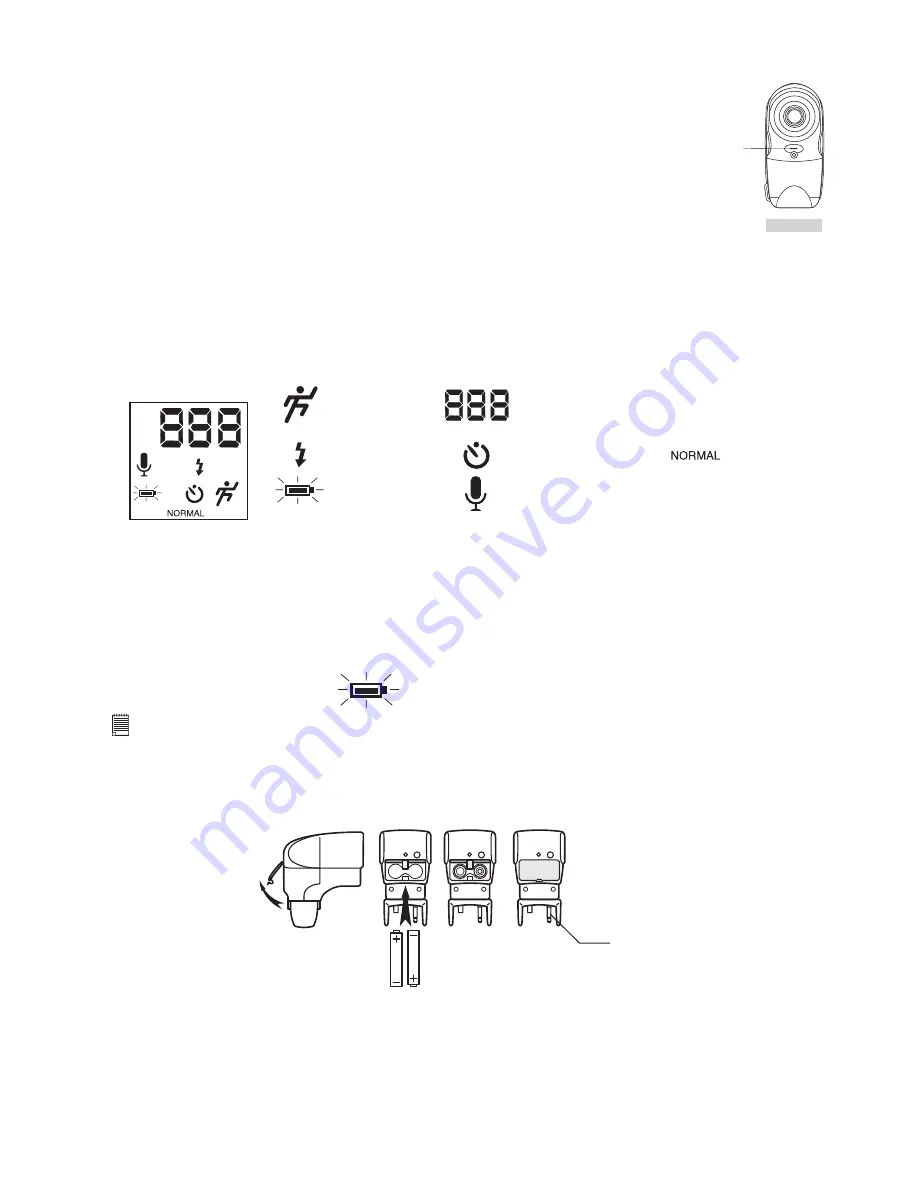
By default, the icon LCD screen displays the number of images taken. It is also used in conjunction with the Mode Button
to display various
ACTOR
mode settings and battery status.
HIGH
LOW
Audio Recording
High Resolution
Low Battery Indicator
Continuous Mode
Flash On
No. of images remaining/
LCD message
(details will be available under
separate sections)
Normal Resolution
Self-Timer
sec
Low Resolution
“Second” Display
HIGH
LOW
sec
min
min
“Minutes” Display
AUTO
AUTO
7.6 Power
7.6.1 Stand-by Mode
After a period of 60 seconds inactivity, the
ACTOR
will switch to Stand-by Mode automatically and the LCD will go blank. All
images taken will not be lost as they are stored in the SmartMedia™ Card. Simply press the Mode Button to reactivate
your
ACTOR
.
7.6.2 Main Battery
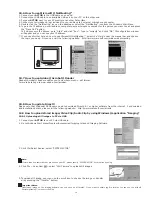
When power is low, the icon will ash then the LCD will go blank. A beep sound when low battery levels are reached. This
indicates that the batteries are weak and need to be replaced.
Low Battery Power
Important Note:
After the LCD goes blank, cannot activate your
ACTOR
by pressing the Mode Button, you must replace the batteries.
7.7
SPYPEN
Flash Attachment
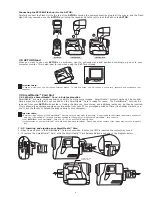
How to replace the batteries in the
SPYPEN
Flash Unit
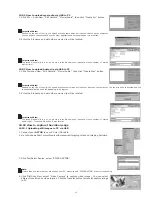
Remove the battery compartment cover from the ash bar and insert 2 AAA batteries (supplied) into the battery
compartment. Ensure you have inserted the batteries using the correct polarity (+) (-) by following the diagram inside the
battery compartment and follow the diagram below.
AAA
AAA
Power connection plug

