14
15
English
English
RC-1:
(REMOS
TM
)
(On/Off)
The RC-1 remote control is required
(sold
separately, see OPTIONS). Allows the user to
activate or deactivate the detection of the camera
(#1,2) or to remotely take a photo or a video
in an
area of 500 ft (#3).
MS-1:
(REMOS
TM
)
(On/Off)
Allows the camera to be triggered wirelessly
by one or more MS-1 devices. (sold separately,
see OPTIONS)
IR-Booster:
(REMOS
TM
)
(On/Off)
Allows the camera to trigger, up to a distance
of 50-ft, one or more remote IR-BOOSTER
infrared lighting devices without the use of an
additional transmitter.
VIEW
View recorded photos or videos on TFT 3.0"
viewing camera screen or on a TV set at home.
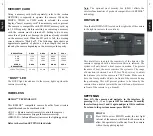
•Viewing with the 3.0" screen:
When VIEW mode is selected,
the latest photo or video recorded appears on the screen
automatically. Press
or
to view next or previous images.
Press
and
to zoom in and out. When the zoom is activated,
press OK to move the image by using
,
,
or
. Press OK
again then
to return to normal view.
Press OK to view the different options available in VIEW mode.
Date and time:
Enlarge the imprinted date and time on the
picture.
Protect:
Protects your photo and video from the
memory card.
Erase one:
Erase from the memory card, the photo or the
video seen on the screen.
Erase all:
Erase from the memory card, all stored
photos and videos, with the exception of
protected photos and videos.
1
2
3
4
Format:
Format memory card and erase all
protected photos and videos.
Exit:
Return to the viewing screen.
Note:
The number of yellow stars that appear to the right of the
screen corresponds to the resolution of the photos.
=Low (5 MP)
=Medium (8 MP)
=High (12 MP)
•
Watching on TV:
You can view the photos or videos directly
from a TV. Connect the yellow end of the cable supplied
into the "VIDEO IN" of the TV and the other end into the
"TV OUT" of the camera. The options are the same as when
viewing on the screen 3.0"(see above).
SOUND RECORDING
This camera SPYPOINT
®
offers the possibility to record the
sound in VIDEO mode. When the VIDEO mode is selected, the
camera automatically records the sound. On the bottom of the
camera, you can find a rubber cap with the inscription MIC. If
the user does not want to record the sound, the rubber cap needs
to stay in place. If the sound recording is required, the user must
lift the rubber cap and turned it slightly so that the microphone
receiver is completely cleared (See figure below).
View


