AFM 4-2
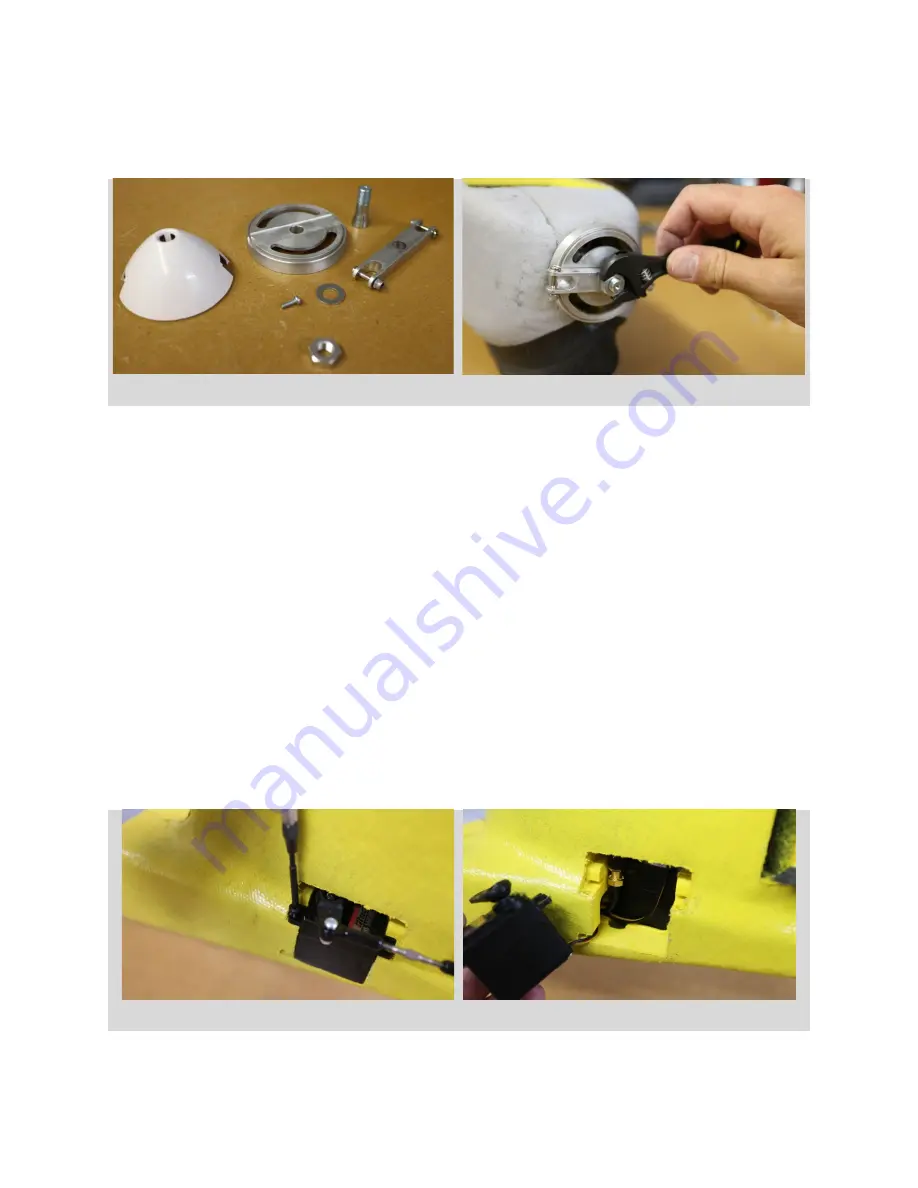
Slide the propeller hub onto the motor shaft. Leave an appropriate gap to ensure the hub spins freely
without rubbing the fuselage. Tighten the propeller nut using the crescent wrench. A loose prop nut
will cause the propeller to launch forward when full throttle is applied. Reattach the spinner.
Left:
Spinner and propeller hub disassembled.
Right:
The prop nut fastens the hub to the motor.
Turn on the handheld transmitter and aircraft. Remove the throttle key and test the throttle. Ensure
no rubbing occurs between the propeller hub and the fuselage. Ensure the propeller spins clockwise
when viewed from behind. Swapping any two motor/ESC wires will reverse the direction of the
motor.
Replacing a Servo
If a servo is immobile, has stripped or partially stripped gears, makes a clicking noise, or cannot hold
its position properly, it must be replaced. The same procedure is used for either servo.
Disconnect the control rod using a Philips screwdriver and crescent wrench. Do not twist the control
rod as this will affect the aircraft’s trim. Next, remove the two nylon screws holding the servo in
place. Grasp the servo arm and slide the servo out from its tray. Pull the servo out until the
connector becomes accessible
Disconnect the bad servo and replace with a new one. Only use pre-calibrated servos from SRP.
Off
the shelf replacements will not have the appropriate connector, nor will they have the correct
servo trim and travel required by the autopilot.
Re-connect the servo and slide it back into the tray. Fasten the servo down with the original two
phillips screws. Re-connect the control rod the same way that it was removed.
Left:
Remove the two nylon retaining screws.
Right:
Servo removed from its tray.
38


