b)
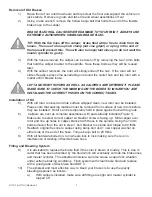
Open one bleeder screw and observe for several minutes. At first the fluid will
begin to escape with intermittent air bubbles. When the air bubbles stop and a
steady flow of fluid is observed, close the bleeder and repeat process on
other side of vehicle.
MAKE SURE TO KEEP A CLOSE WATCH OVER THE FLUID LEVEL INSIDE THE
MASTER CYLINDER DURING THE BLEEDING PROCESS. NEVER LET THE
RESERVOIR RUN DRY. ALWAYS KEEP IT AT LEAST 1/3 FULL!
c)
After bleeding both wheels and topping of the master cylinder, make several
applications of the brake pedal. If a hard pedal is experienced, no further
bleeding is required. If pedal is spongy, repeat bleeding process until a hard
pedal is achieved.
FINAL INSPECTION
11)
Once a hard pedal is achieved, all fittings and connections must be inspected to make
sure there are no leaks. Also check the level in both reservoirs of the master cylinder
and top off if needed.
12)
Put wheels back on the car and turn wheel by hand to insure that the wheel spins
freely and does not interfere with any brake components.
DO NOT DRIVE IN TRAFFIC UNTIL THE BRAKES SAFELY STOP THE CAR A SAFE DISTANCE
WITHOUT A SPONGY PEDAL FEEL!
BRAKING TESTS SHOULD ALWAYS BE DONE IN A SAFE OPEN AREA!
TECH LINE -- If technical help is required, please call 716-759-8666.
NOW ENJOY ULTIMATE STOPPING POWER!!
2
A113-1 & A113-3 Revision 1


