5
5.
Do not attach a saw chain woodcarving blade
or toothed saw blade.
Such blades create
frequent kickback and loss of control.
6.
Do not "jam" the wheel or apply excessive
pressure. Do not attempt to make an
excessive depth of cut.
Overstressing the wheel
increases the loading and susceptibility to twisting
or binding of the wheel in the cut and the possibility
of kickback or wheel breakage.
7.
When wheel is binding or when interrupting a
cut for any reason, switch off the power tool
and hold the power tool motionless until the
wheel comes to a complete stop. Never attempt
to remove the wheel from the cut while the
wheel is in motion otherwise kickback may
occur.
Investigate and take corrective action to
eliminate the cause of wheel binding.
8.
Do not restart the cutting operation in the
workpiece. Let the wheel reach full speed and
carefully reenter the cut.
The wheel may bind,
walk up or kickback if the power tool is restarted in
the workpiece.
9.
Support panels or any oversized workpiece to
minimize the risk of wheel pinching and
kickback.
Large workpieces tend to sag under
their own weight. Supports must be placed under
the workpiece near the line of cut and near the
edge of the workpiece on both sides of the wheel.
10.
Use extra caution when making a "pocket cut"
into existing walls or other blind areas.
The
protruding wheel may cut gas or water pipes,
electrical wiring or objects that can cause kickback.
SAVE THESE INSTRUCTIONS.
WARNING:
DO NOT let comfort or familiarity with product
(gained from repeated use) replace strict adherence
to safety rules for the subject product. MISUSE or
failure to follow the safety rules stated in this
instruction manual may cause serious personal
injury.
OPERATING INSTRUCTIONS
Removing or installing diamond wheel
(optional accessory)
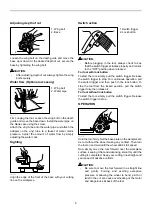
1
2
3
001676
CAUTION:
•
Always be sure that the tool is switched off and
unplugged before installing or removing the wheel.
•
Use only the Makita wrench to install or remove the
wheel.
To remove the wheel, hold the outer flange with the
wrench and loosen the hex bolt clockwise with the hex
wrench. Then remove the hex bolt, outer flange and
wheel.
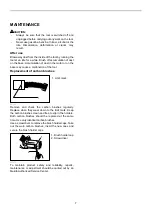
To install the wheel, follow the removal procedure in
reverse. Always install the wheel so that the arrow on the
wheel points in the same direction as the arrow on the
blade case. BE SURE TO TIGHTEN THE HEX BOLT
COUNTERCLOCKWISE SECURELY.
1
2
3
4
001677
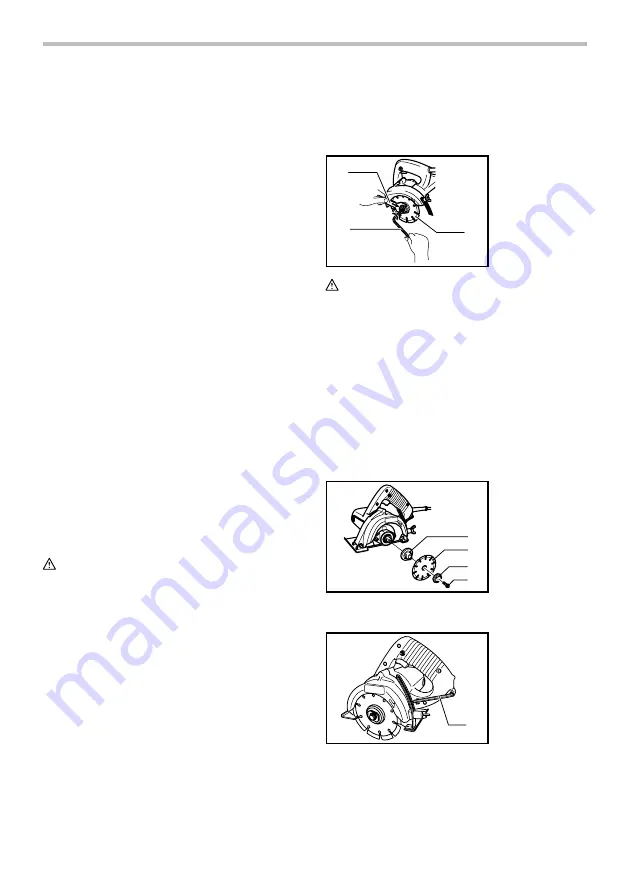
Hex wrench storage
1
001678
When not in use, store the hex wrench as shown in the
figure to keep it from being lost.
1. Hex wrench
1. Inner flange
2. Diamond wheel
3. Outer flange
4. Hex bolt
1. Wrench
2. Hex wrench
3. Diamond wheel


