background image

13

Programming-
instruction

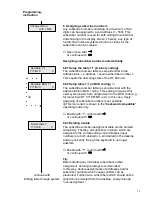
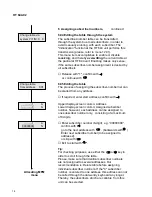
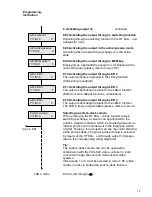
6  Assigning subscriber numbers

Any subscriber number consisting of a maximum of four
digits can be assigned to a unit address (1 - 500). This
subscriber number is used for both calling the subscriber
and showing in the display screen. Thereby, any type of
hierarchical number-systems which are clearly for the
subscribers can be created.

 Open menu with

     or continue with 


Assigning subscriber-numbers automatically

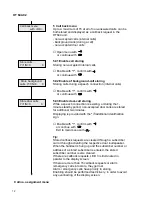
6.01 Setup the table 1:1 (in binary coding)

The subscriber-number table is setup identical to the
address table, i.e. address 1 equals subscriber number 1.
This equals the delivering state of the HT 644 unit.


)

6.02 Setup table 1:1 (in BCD coding) 

The subscriber-number table is setup identical with the
address table in BCD coding. This setting is required for
older systems which are programmed in the BCD code (e.g.
for replacing a HT 311/351MC unit). In this case, freely
assigning of subscriber-numbers is not possible.

This menu item is shown in the "

backward compatible

"

operating mode only.

 Enable with "1", confirm with

     or continue with 


.

6.03 Deleting a table

The subscriber-number-assignment table can be deleted
completely. Thereby, all subscriber numbers which are
assigned to the corresponding unit addresses (input
numbers) are both deleted (i.e. eliminated) in the desktop
and any call entry through the keyboard is no longer
possible.

 Enable with "1", confirm with

     or continue with 


continue with

Editing table through system

Tip:

Before starting any individual subscriber-number
assignment, deleting is always recommended.
In this way, double assignments of addresses and/or
subscriber numbers which cause conflicts can be
prevented. Furthermore, subscribers which should not be
called can be deleted from the desktop, simply through
"non-assignment ".

  Delete table ?
  Y=1/N=0               0

  Set table BCD 1:1
 Y=1/N=0                 0

 Change call no.
              with  <OK>

  Set table 1:1
 Y=1/N=0                 0

Summary of Contents for HT 644-02

Page 1: ...Electronic special departement Siedle Multi Programming instruction HT 644 02 05 03 ex Vers ES 04 5x ...

Page 2: ...e executed before the system is commissioned up for initial operation please refer to menu item 12 01 Through this initialization all units which are connected to the system are entered and a status catalogue of the particular units is created The status catalogue is needed to communicate status information to all units such as assignment of the corresponding subscribers to a subscriber group or f...

Page 3: ... combination with MFM 611 10 Programming menu back Forward Set clock with OK Change call no assign with OK Please dial Alarm emerg menu with OK Output 12 acti vate with OK Switch LED 4 with OK Areas ft Enable dis OK Basic parameters programming OK TLP call menu with OK Coll call menu with OK Call back menu with OK MFM program with OK Service menu with OK ...

Page 4: ...door calls 12 6 Assigning subscriber numbers Assigning subscriber numbers freely to subscriber addresses 13 7 Allocating MFM Allocating MFM keys both to functions and subscriber numbers 15 8 Activating output 12 Activating the output in combination with various functions 18 9 Switching LED 4 Allocating the LED to various functions 20 10 Areas functions of Enable Disable Enabling disabling the desk...

Page 5: ...ssignment to a subscriber group the menu is not shown other than in stage 2 Siedle Multi systems of stage 2 can be configured as either a total system with 2 global speech paths or a group system with both one global and a maximum of 15 local speech paths One group address is assigned to each subscriber to a group in addition to the logic address Two global speech paths Group address 0 Group syste...

Page 6: ...ne switching exchange Activation is through a MFM key please refer to item No 7 05 Allocating MFM Exactly that unit becomes active at which the respective MFM key is actuated however all other switching exchanges become automatically passive The status message A or P shows the respective operating state in the display screen Activate the active passive mode Enter 1 and confirm with Continue with P...

Page 7: ...n be selected for the Siedle Multi system Backward compatible old For older systems with HT 44x 0 or HT 64x 0 units with an address range of a maximum of 254 subscribers and with HTZ 442 0 units as well as equipped with a limited range of functions in general for systems with a delivery date before 2001 Stage 2 new For systems with an expanded range of functions and addresses up to a maximum of 50...

Page 8: ...ntry The text output in the display screen can be setup in 5 country languages at any time G 1 German UK 2 English F 3 French NL 4 Dutch I 5 Italian Enter the respective digit and confirm with Continue with TLP call menue Exit to main menu with Land Country 1 D 1 GB 2 F 3 NL 4 ...

Page 9: ... parallel call within the own group Enable with 1 confirm with or continue with Exit to main menu with Please note The corresponding door parallel call calling function is programmed in the door loudspeaker controller Up to a maximum of 4 subscribers can be programmed without any limitations to a global or a group parallel call receipt When the power supply is calculated for systems with more than...

Page 10: ...ve calls Tip Collective calls are enabled by pressing the key and entering the respective group number 0 generic collective call 1 15 Group collective call 3 02 Authorization to receive a collective call in general Authorization to receive generic collective calls 3 03 Authorization to receive group collective calls Authorization to receive collective calls from the own group Activate with 1 confi...

Page 11: ... the mode backward compatible it is impossible to receive both an announcement and a fire alarm signal simultaneously If the collective call receipt function is activated the fire alarm menu is not displayed 4 02 Enabling emergency call processing and displaying Enable with 1 confirm with or continue with 4 03 Enabling alarm 1 call processing and displaying Enable with 1 confirm with or continue w...

Page 12: ...e acoustic signaling and if there is an authorization the possibility of clearing are only possible through the unit with the address 1 switchboard function 4 06 Signalization period When an alarm or emergency call is received a special signal is sounding at the HT 644 unit The signalization period can be setup from 1 to 98 seconds When a setup of 99 seconds is made the signal sounds without any t...

Page 13: ...itional two minutes Displaying is provided with the additional identification sign Enable with 1 confirm with or continue with Exit to main menu with Tip Stored callback requests are cleared through a subscriber call or through activating the respective door loudspeaker When the handset is hung up and the subscriber number or address of a stored subscriber is entered the stored subscriber number i...

Page 14: ...BCD code e g for replacing a HT 311 351MC unit In this case freely assigning of subscriber numbers is not possible This menu item is shown in the backward compatible operating mode only Enable with 1 confirm with or continue with 6 03 Deleting a table The subscriber number assignment table can be deleted completely Thereby all subscriber numbers which are assigned to the corresponding unit address...

Page 15: ...nfirm with Upper display screen column Address Lower display screen column Assigned subscriber number however each address can be assigned to one subscriber number only consisting of a maximum of 8 digits Enter subscriber number 8 digit e g 09999999 confirm with go to the next address with backwards with Enter next subscriber number to be assigned to address 2 or skip with Exit to start with Alloc...

Page 16: ...be programmed an acknowledge signal sounds next entering or continue with 7 01 Allocating teleswitching functions Functions from 1 to 9 can be entered The functions from 10 to 15 should not be entered 7 02 Allocating subscriber numbers With entered subscriber numbers the subscriber number which consists of a maximum of 4 digits must be entered however with a 1 1 allocation the address must be ente...

Page 17: ... to which the call must be forwarded 7 12 Allocating a concierge group forwarding fct Enter number of concierge group to activate by the button 7 13 Allocating a Single concierge forwarding fct Configurate the control key to activate deactivate the funct Enter the address number of the receiver for this function 7 14 Allocating the switching doormatic function Control button for activating reset t...

Page 18: ...urrent key allocation Actuate the corresponding MFM key through single or double click The corresponding allocation is shown in the display screen 7 19 Deleting the key allocation Actuate the corresponding MFM key through single or double click The corresponding allocation is deleted Exit to start with Output 12 menu Clear allocation MFM button MFM ass to Door release 2 Display ass of MFM button ...

Page 19: ... output when an alarm call is existing 1 When a new alarm call is existing the output is activated until the calling tone CNG is deactivated 8 03 Activating an output when an callback request is existing 1 Whenever a callback request please refer to menu 5 is existing the output is activating 8 04 Activating the output when a call is existing 2 Whenever a new call is existing in parallel to a call...

Page 20: ...nction The LED is freely programmable please refer to menu 9 to pos 8 01 Selecting a porter s desk camera When employing the HT 644 unit as a porter s desk switching exchange a camera can be allocated to the porter s telephone station which is activated whenever an internal porter s call is carried out to the telephone station of a flat Thereby the occupant can see the visitor standing at the port...

Page 21: ...g 9 01 Connecting LED 4 with a reporting line The LED can be connected with a reporting line and it can thereby show the states of the reporting inputs of various units When enabling enter the number of the reporting line or continue with if applying 9 02 Determining the reporting input of a unit Enter the unit address of the unit which sends the report confirm with 9 03 Showing the state of outpu...

Page 22: ...rmatic is active If the doormatic function is activated the LED is illuminated 9 08 Reversing the display function The LED display is inverted i e the LED is switched off when a function is active however it is illuminated when a function is passive In this way e g reporting functions which are based on the door opener function can be inverted to pos 9 01 Enabling areas functions menu Exit to star...

Page 23: ... function which must be edited If display screen changes to the respective digit function is enabled released If display screen changes to function is disabled barred confirm with or continue with 10 02 Enabling or disabling call barring The function of the key call barring can be enabled or disabled Release with 1 confirm with or continue with These menu items are only available in Stage 2 system...

Page 24: ...t key can be released or barred Release with 1 confirm with or continue with 10 06 Releasing barring the door opener key The function of the door opener key can be released or barred Release with 1 confirm with or continue with 10 07 Releasing barring the doormatic function The doormatic function is enabled through the F function can be released or barred Release with 1 confirm with or continue wi...

Page 25: ... the display screen Open menu with or continue with The time can either be synchronized through a system clock if available in the system or is manually set any power failure switches of the clock Enter through keyboard confirm with or continue with Service menue Set clock with OK Set clock manually _ _ _ _ Set clock using sys _ _ _ _ ...

Page 26: ...location menu Each time when commissioning up the system for initial operation or after editing the system configuration one freely selectable HT 644 unit can perform the initialization in principle Start initialization with 1 confirm with or continue with Initialization run All unit addresses are automatically called In response each existing unit reports its status The left side of the display s...

Page 27: ...e performed if the SEMTEST system test unit or the service logging printer are not available Release with or continue with Displaying format The last two data protocols are shown in the 8 digit hexadecimal format as well as information whether the receiver confirmed the transmitted data protocol Y or whether it did not confirm N Well founded knowledge of the data format content is required for the...

Page 28: ...ually configuration and enclose this the system documentation The agreed function of the HT 644 you can find at the functional description into our special tender the unit address and group no you can find into the system and cable running plan or the enclosed address call no list of the system documentation For further informations please contact your Siedle Service center or direct the Electroni...

Page 29: ...Electronic special department S Siedle u Söhne Telefon und Telegraphenwerke Stiftung Co Post box 1155 78113 Furtwangen Bregstraße 1 D 78120 Furtwangen Telefon 49 7723 63 378 Telefax 49 7723 4573 ...

Reviews: