Lincoln SCR Manual
38
Pre-Lighting Instructions.
The Control Board has 4 separate programs. Each program is specific to certain fuels.
Before lighting the Stove for the first time, be sure the correct program is chosen.
To change the program on the board, the Stove must be off and plugged in. The programs
are identical in operation, except for the Cycle Time. The Cycle time is the total of the
ON Time & OFF Time added together. The ON Times are constant, so this means that
the OFF Time is increased or decreased, depending on the program chosen.
The programs break down as follows:
1 -
Program 1.
The Cycle Time is 7.5 seconds. This program will be the default program
when the Stove is first plugged in.
This program is for use with Pellets & Cherry
Pits.
(See figure 26 on page 39)
2 -
Program 2.
The Cycle Time is 8.5 seconds.
This program is for use with Pellets,
Corn, Wheat, Rye, Cherry Pits & Distillers Grain Pellets.
(See figure 26 on page
39)
3 -
Program 3.
The Cycle Time is 9.5 seconds.
This program is for use with Pellets,
Corn, Wheat, Rye, Cherry Pits & Distillers Grain Pellets.
(See figure 26 on page
39)
4 -
Program 4.
The Cycle Time is 10.5 seconds.
This program is for use with Pellets,
Corn, Wheat, Rye, Cherry Pits & Distillers Grain Pellets.
(See figure 26 on page
39)
As the Cycle Time increases, the BTU rate of the stove decreases. If the incorrect
program is chosen for a specific fuel, the burnpot will overload and the Stove will loose
its fire and go out. Another way to look at it is this: burning pellet using program 1 will
have a Higher BTU rating than pellets burning on programs 2 through 4. The same is true
for burning corn, using program 2 will have a higher BTU rating than corn burning on
programs 3 and 4. Looking at the list above you see which fuels are approved for any
specific program. Using any of the other programs will cause the burnpot to overload.
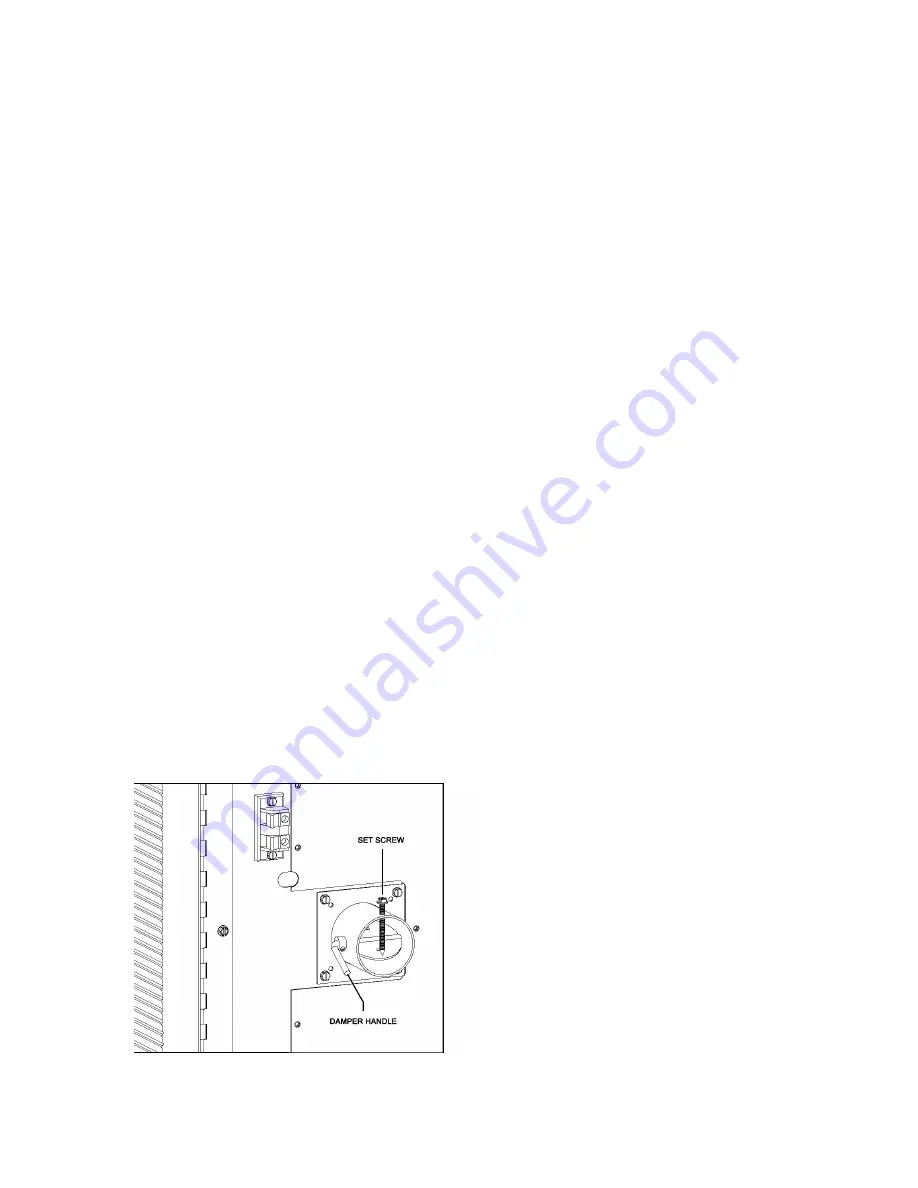
The damper must be adjusted for each
specific fuel as well and should be set
during the first fire.
To adjust the damper for other types of
fuel, use the following procedures:
First turn the setscrew clockwise until it
stops against the tube. See figure 24.
Figure 24


