
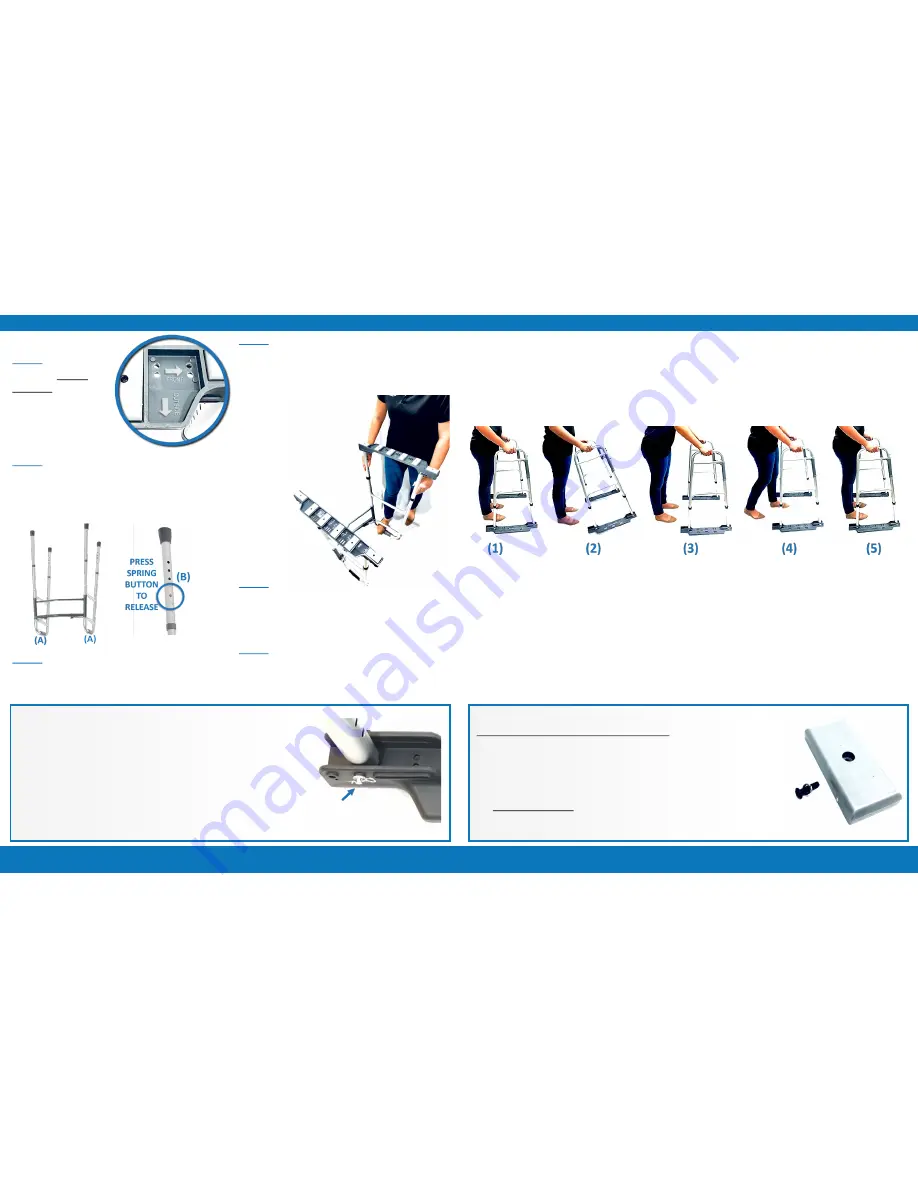
REPLACING THE BOTTOM NYLON PADS
(replacement pads need to be purchased separately)
It is important to note that the bottom nylon pads will not wear out evenly;
thus, not all pads need to be replaced at the same time.
•
Use a Phillips screwdriver to remove the screw in the center of the pad
to remove the old pad and replace with new.
•
Do not overtighten the screw.
Replacement Parts
•
RP2001
–
Stabilizers Replacement Pads (Nylon) 6pk
•
RP2003
–
Stabilizers Replacement Pads (Rubber) 6pk
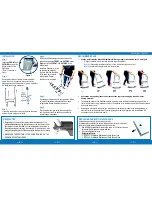
INSTALLATION
Step 1:
Locate the
FRONT
and
OUTSIDE
arrows at the
bottom of each of the
Stabilizers.
(This will be needed in
Step 4)
Step 2:
Remove the old legs of walker. Unfold the walker
frame, flip it over, and secure it with your foot by
stepping down on either handle
(A)
, giving the walker
the steadiness during installation.
Step 3:
Proceed to remove the old legs by pushing the spring
buttons
(B)
and pulling up carefully.
Figure 1
RECOMMENDED USE
•
Use the walker with the attached Stabilizers following a regular standard walker’s 3 point gait:
(1
)
Align the middle of your foot with the back legs of the walker
(2
)
&
(
3)
Lift the walker and place it in front of you with all four legs on the floor
(4) & (5)
then carefully step forward, one foot at a time
•
Use caution when gliding indoors after outdoor use to prevent damaging sensitive indoor
flooring materials.
•
The elongated design of the Stabilizers makes the walker more stable when transferring to and from a
chair or bed. Make sure to press down firmly on the handles of the walker and carefully sit down or stand
up from the chair or bed.
•
Post-surgery it is recommended that the nylon pads be replaced with rubber pads (sold separately) in
order to provide solid stability that will prevent gliding. As mobility is regained with rehabilitation, the
nylon pads can be installed once again.
Step 4:
Identify which Stabilizer goes on what side of the
walker by aligning the
FRONT
and
OUTSIDE
arrows
(Figure 1)
with the
FRONT
and
OUTSIDE
of the
walker frame.
Install one Stabilizer at a time
by opening the extension
legs and inserting them both
at the same time onto the
walker frame. Repeat
position on the other side.
Step 5:
Adjust proper height using the spring buttons. Make
sure both Stabilizers are adjusted with the same
height before flipping the walker frame over.
Step 6:
Flip the walker over and verify desired height for
use. See the Helpful Tips and Usage section for
product usage instructions.
HELPFUL TIPS
•
Depending on the size of your walker and/or desired height, the
preassembled extension leg positions may not be the correct one for
your walker. If this is the case, you can simply adjust the position of
the extension legs by removing the cotter pin
(C)
and placing it in the
desired hole opening in the Stabilizer that fits ideally with your walker.
•
MAKE SURE THE POSITION OF THE EXTENSION LEGS IS THE
SAME ON BOTH STABILIZERS.
(C)
—
6
—
—
7
—
—
4
—
—
5
—
SG1001 (Rev. 02/27/18)


