background image

40791-1802

1 12

Tools Required:


Drill

Thin Bladed Flat Head Screwdriver

Phillips Screwdriver

10 mm Wrench 

1/4” (7 mm) Drill Bit

*3/8” (9.5 mm) Masonry Brill Bit for drilling into masonry

*3/16” (5 mm) Drill Bit for drilling into wood and wall studs

* For model PDS-1805-E only

PDS-1800-E Hardware Included:  

(2) M6 x 15 mm (5/8” long) Screws

(2) M6 Nylock Nuts

PDS-1805-E Hardware Included:

(4) M6 x 50 mm (2” long) Lag Screws

(4) M6 x 40 mm (1-1/2” long) Plastic Masonry Anchors

(4) M4 x 25 mm (1” long) Screws

(4) Washers

(4) Drywall Anchors

Your Electronic Safe Combination:

Serial #:

 Instructions

IMPORTANT

Record the serial number from the tag on the back 

of the safe or the tag on the inside of the lock cover 

plate on the front of the safe.
Record your combination number.

NOTE:  You can store your Key #, Serial # 

and Combination on Stack-On’s SECURE 

website – stackon.com under Customer 

Service. Storing your Key # or Combination 

will provide instant access to this important 

information should you ever lose your keys or 

your combination.  

Only you will have access to this information.

Keep keys and combination in a secure place away 

from children.

DO NOT STORE KEYS OR YOUR COMBINATION 

INSIDE SAFE

PDS-1800-E

PDS-1805-E

®

NOTE:  The key has also been provided in case 

you lose or forget your security code or the 

batteries run low.  If you lose your key, you 

may purchase a replacement key by 

referencing the serial number located under 

the removable lock cover.  See section at the 

end of this instruction regarding 

replacement keys.

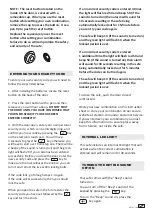
Locate the batteries inside the safe. Open the 

battery compartment on the back of the door 

by pushing the tab in the direction of the arrow 

and install the batteries.

GETTING STARTED

When you first receive your new electronic safe 

you will need to open the door with the key in 

order to install the batteries.  Batteries are 

included and are located inside the safe.

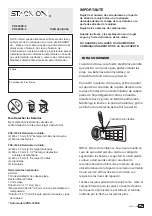
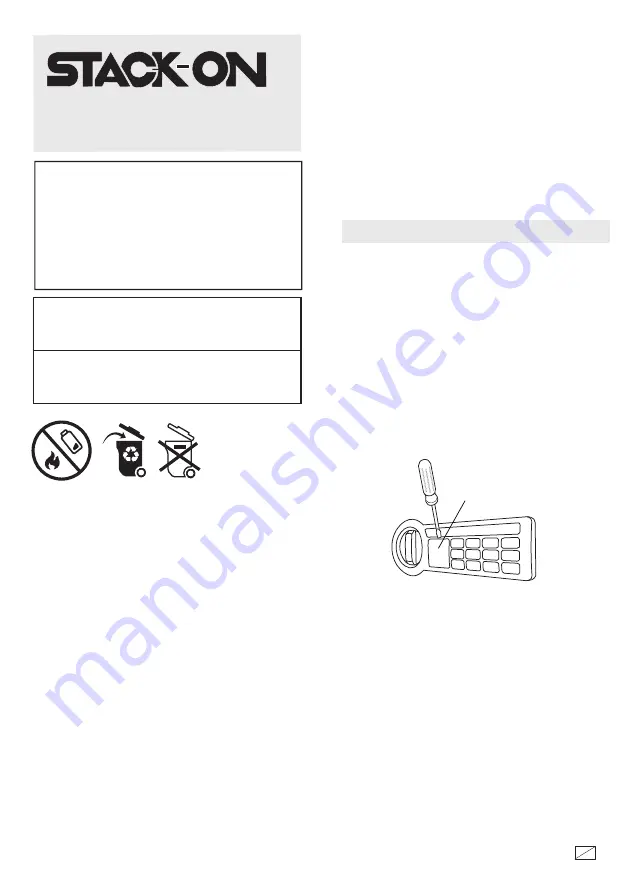
To open the door with the key, first remove 

the lock cover from the front of the faceplate 

using a thin bladed flathead screwdriver as 

shown.  Insert the key and turn 

counterclockwise.  Hold the key in the open 

position and turn the knob to the right to 

open the door.

LOCK COVER

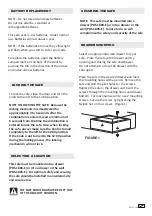
Battery Disposal 

Please dispose the used batteries

per municipal or provincial law.

Summary of Contents for PDS-1800-E

Page 1: ...ou will have access to this information Keep keys and combination in a secure place away from children DO NOT STORE KEYS OR YOUR COMBINATION INSIDE SAFE PDS 1800 E PDS 1805 E NOTE The key has also bee...

Page 2: ...sh the reset button Replace the cap securely over the reset button after setting your combination Failure to do so will compromise the safety and security of the safe If an incorrect security code is...

Page 3: ...l compromise the safety and security of the safe To lock the safe close the door and turn the knob to the left to the 12 00 position LOCKING THE SAFE NOTE ON LOCKING THE SAFE Because the locking mecha...

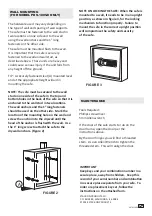
Page 4: ...ht o the ground NOTE The safe must be secured to the wall stud on one side of the safe in the top and bottom holes in the back of the safe so that it is anchored to the wall stud in two locations The...

Page 5: ...visit the following link https www stack on com customer service 2 Locate and click on the Replace your lost keys combination icon 3 Follow the Instructions provided to receive your key combination or...

Page 6: ...DOES NOT COVER ANY ACCESSORIES OR PARTS USED WITH OR IN THE PRODUCT WHICH ARE NOT INCLUDED WITH THE ORIGINAL PURCHASE THIS WARRANTY IS EXCLUSIVE AND EXPRESSLY IN LIEU OF ALL OTHER WARRANTIES EXPRESSE...

Page 7: ...05 E Hardware incluido 4 M6 x 50 mm 2 de largo tirafondos 4 M6 x 40 mm 1 1 2 de largo de pl stico Anclajes de alba iler a 4 M4 x 25 mm 1 de largo Tornillos 4 Arandelas 4 Escarpias PDS 1800 E PDS 1805...

Page 8: ...la luz parpadear en rojo 5X y emitir un pitido 5X si el sonido est encendido y la alarma sonar durante 30 segundos lo que har que la caja fuerte se bloquee autom ticamente durante 5 minutos antes de v...

Page 9: ...n el caj n y tratar de abrir y cerrar la caja fuerte y el caj n No intente cerrar el caj n con la caja abierta Coloque la caja fuerte en el caj n deseado y marque los ori cios de montaje con un l piz...

Page 10: ...te que la caja fuerte est bien conectado a la viga de la pared y la pared como se describi anteriormente Estas unidades son pesadas y pueden causar lesiones graves si la unidad se cae desde cualquier...

Page 11: ...lic sobre el icono para reponer sus llaves combinaci n extraviados Replace your lost keys combination 3 Siga las instrucciones para recibir su llave combinaci n o dispositivos RFID NOTA Usted puede gu...

Page 12: ...STA GARANT A NO CUBRE NING N ACCESORIO NI PARTES USADAS CON O DENTRO DEL PRODUCTO QUE NO VIENEN INCLUIDOS CON LA COMPRA ORIGINAL ESTA GARANT A ES EXCLUSIVA Y EXPRESAMENTE EN LUGAR DE TODA Y CUALESQUIE...

Reviews: