40787-2205
4 12
If the door of the safe starts to rub on the
door frame, open the door per the
instruc�ons above.
By the door hinges you will find a threaded
stem. Use an Allen Wrench to �ghten the
threaded stem. This will realign the door.
MAINTENANCE
IMPORTANT
Keep keys and your combina�on number in a secure
place, away from children. Keep this record of your
serial number and combina�on in a secure place
separate from your safe. To order a replacement key
set, visit:
h�ps://www.stack-on.com/key-replacement-form/
Tools Required:
Phillips screwdriver
5mm Allen wrench
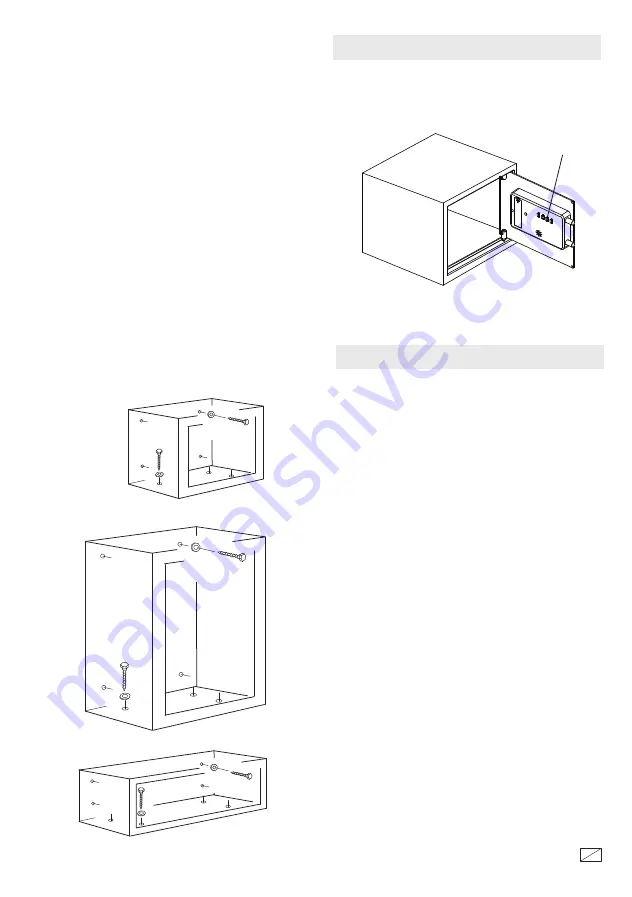
Figure 2
Secure the safe to a wall stud, and to a
permanent shelf or floor, using the predrilled
moun�ng holes in the safe.
NOTE: The safe must be secured to a wall stud
on one side of the safe in the top and bo�om
holes in the back of the safe so that it is
anchored to the wall stud in two loca�ons. Wall
anchors should be used on the other side. The
safe should also be mounted to a permanent
shelf or to the floor. Use the hardware provided
or consult your hardware retailer for fastening
hardware for your par�cular moun�ng surfaces.
Mark the holes to be used. Drill the appropriate
diameter and depth of pilot holes depending on
the type of hardware being used and the
moun�ng surface.
Secure the safe with the fasteners. (Figure 2)
KEY HOOKS
Key hooks can be used to organize keys
as shown below
KEY HOOKS
Cannon Security Products
2895 W. Capovilla Ave, Suite 140
Las Vegas, NV 89119
© 202
2
Cannon Security Products


