background image

English

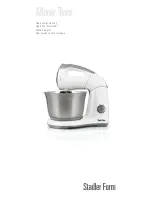
MIXER TWO. STAND MIXER

Congratulations on the purchase of Premium class Mixer Two. The use 
of this mixer will easily cope with a variety of culinary tasks processing 
products. Convenience and simplicity of operation will give you doubtless 
pleasure.
For additional information visit: www.stadlerform.ru

IMPORTANT SAFETY INSTRUCTIONS 

Read carefully and save all the instructions provided with an appliance.


Never eject beaters or dough hooks when the appliance is in operation.


Ensure fingers are kept well away from moving beaters and dough hooks.


Do not operate for more than 3 minutes at a time when mixing heavy 
loads. None of the recipes in this manual are considered a heavy load.


We are very safety conscious when designing and manufacturing consu-
mer products, but it is essential that the product user also exercise care 
when using an electrical appliance. 


Listed below are precautions which are essential for the safe use of an 
electrical appliance:


Read carefully and save all the instructions provided with an appliance.


Always turn the power off at the power outlet before you insert or remove 
a plug. Remove by grasping the plug - do not pull on the cord.


Turn the power off and remove the plug when the appliance is not in use 
and before cleaning.


Do not use your appliance with an extension cord unless this cord has 
been checked and tested by a qualified technician or service person.


Always use your appliance from a power outlet of the voltage (A.C. only) 
marked on the appliance.


Close supervision is necessary when your appliance is being used near 
children or infirm persons.


Never leave an appliance unattended while in use.


Young children should be supervised to ensure that they do not play with 
the appliance.


Do not use this appliance for any purpose other than its intended use.


Do not place this appliance on or near a hot gas flame, electrical element, 
or on a heated oven. Do not place on top of any other appliance.


Do not let the power cord hang over the edge of a table or bench or touch 
any hot surface.


Do not operate this appliance with a damaged power cord.


Do not immerse this appliance in any liquid.

MIXER DESCRIPTION 

1. 

12 speeds with LCD display

For precise speed control.

2. 

Power On switch

3. 

Feedback motor control system 

Motor power is automatically increased under heavy load to maintain 
speed at low RPM. Also allows a low speed for folding in dry ingredients.

4. 

Attachments removal button

Press to remove attachments

5. 

Twin motor 3-way beating action

The Patented system uses a second motor in the stand to drive the bowl 
when the mixer is attached to the stand. This produces a much more 
powerful mixer than conventional hand/stand mixers.

6. 

Offset spring loaded scraper beaters 

Scrape the bottom of the bowl and allow access for adding ingredients 
while the mixer is operating.

7. 

Large 3.6 litre Stainless steel bowl

A full sized bowl for those big mixing tasks.

8. 

Non-slip feet

9. 

Turbo Boost Function 

To quickly combine ingredients.

10. 

Head tilt lock

Allows the head to be tilted out of the bowl.

11. 

Hand mixer release button

Press to remove handmixer when head is tilted out of the bowl.

12. 

Independant  stand speed control

Bowl speed can be changed independant of mixer speed.

OPERATION

Before first use

Before assembling your mixer be sure the power cord is unplugged from the 
power outlet and power switch is in the ‘OFF’ position. 

1.  Press the ‘tilt’ button, located at the back of the unit. While the button 

is depressed, hold the handle and ease the head of the mixer back. The 
Mixmaster head will lock into this tilt position.

2.  Select the desired attachments, depending on the mixing task to be per-

formed: beaters for whisking, mixing and beating, or dough hooks for 
kneading.

3.  Place the beaters into their correct openings. Ensure both beaters or 

dough hooks are fully inserted into the correct sockets or your mixing 
results may be affected.

NOTE

The two beaters and dough hooks are different shapes and only fit into 
their correct openings.

4.  Place mixing bowl onto the turntable and lock into place by rotating 

clockwise.

5.  To lower the head of the Mixer and beaters/dough hooks into the bowl, 

depress the ‘tilt’ button, hold the handle with the other hand and ease 
the head of the mixer down. A ‘click’ will indicate when the head has 
reached the correct position.

Summary of Contents for MIXER TWO

Page 1: ...Mixer Two Gebrauchsanweisung Operating instructions Mode d emploi Инструкция по эксплуатации ...

Page 2: ...BOOST ON Mixer Two 4 2 3 7 6 8 9 11 5 12 10 1 ...

Page 3: ...e hohe Effizienz und perfekte Mi schungsqualität im Vergleich mit herkömmlichen Mixern erreicht Deutsch STANDMIXER Mixer TWO Herzlichen Glückwunsch zum Kauf des Standmixers Two Premium Class Mit diesem Mixer können Sie ohne Mühe verschiedene kulinarische Pro dukte herstellen und die leichte Bedienung dieses Mixers wird Ihnen viel Spaß dabei machen Für zusätzliche Informationen besuchen Sie unsere ...

Page 4: ...ür vorgesehenen Löchern ein 4 Setzen Sie die Rührschüssel auf dem Ständer auf und drehen Sie diese im Uhrzeigersinn bis zum sicheren Sitz der Schlüssel auf dem Ständer 5 Drücken Sie den Verriegelungsknopf und senken Sie den Mixer in Be triebsposition bis er einrastet BENUTZUNG 1 Schließen Sie den Mixer an das Stromnetz an 2 Für die Einschaltung des Mixers bringen Sie die Hauptschalter in die EIN S...

Page 5: ...0 g 1 TL Salz ACHTUNG Betreiben Sie den Mixer ohne Unterbrechung nicht länger als 5 Minuten 1 Für den Hefenvorteig Dafür Hefe Zucker Wasser Milch und Butter in einer mittelgroßen Schüssel mixen und ca 10 Minuten warm stehen lassen bis der Teig leicht zu schäumen beginnt 2 Mehl und Salz in die Schüssel sieben Stecken Sie die Knetehaken in den Mixer ein 3 Nach und nach Mehl in Hefenvorteig zugeben u...

Page 6: ...is appliance with a damaged power cord Do not immerse this appliance in any liquid Mixer Description 1 12 speeds with LCD display For precise speed control 2 Power On switch 3 Feedback motor control system Motor power is automatically increased under heavy load to maintain speed at low RPM Also allows a low speed for folding in dry ingredients 4 Attachments removal button Press to remove attachmen...

Page 7: ...ater Approximate 115ml 3 8 cup lukewarm milk Approximate 85ml 60g butter melted 4 cups plain flour Approximate 500g 1 teaspoon salt lt is recommended that the maximum Mixing contents should not be more than 3 5 times of the above portion 1 Combine the first five ingredients in a small bowl and allow to stand in a warm place until mixture begins to froth About 10 minutes 2 lnsert dough hooks into t...

Page 8: ...s de 3 minutes Les recettes figurant dans le présent mode d emploi ne prévoi ent pas la charge maximale du mixeur Français Ne déplacez pas le mixeur lors de son fonctionnement Avant de mettre des accessoires assurez vous que le mixeur est débran ché du réseau N utilisez que des accessoires d origine qui font partie du lot du mixeur Evitez le contact des parties tournantes du mixeur avec des doigts...

Page 9: ...esse et la vitesse courante s affichera sur l écran si on retient les boutons les valeurs changent plus vite REMARQUE Afin d éviter des jets de gouttes commencez le malaxage à une petite vi tesse et augmentez la successivement après CONSEIL Les vitesses recommandées de malaxage sont citées d habitude dans des recettes culinaires ou sur les emballages des mélanges prêts BOUTON Boost Pour une vitess...

Page 10: ...in dans la farine commencez à pétrir la pâte à la vitesse 1 en l augmentant progressivement jusqu à 4 la vitesse de rotation de la coupe est low 4 Si les ingrédients se collent aux bords de la coupe enlevez les à l aide d une spatule en plastic Le temps de malaxage est de 3 4 minutes Con tinuez jusqu à ce que la pâte ne prenne la forme de bulle La pâte doit être lisse et être de consistance homogè...

Page 11: ... миксер в местах с повышенной влажностью Не допускайте попадания на электроприбор брызг воды и не эксплуати руйте миксер вне помещений Не используйте миксер непрерывно при максимальной нагрузке более 3 минут Рецепты приведенные в данной инструкции не предусматри вают максимальной нагрузки миксера Не перемещайте миксер во время работы Перед установкой насадок убедитесь в том что миксер отключен от ...

Page 12: ...иксер вниз в рабочее по ложение до щелчка Использование 1 Подключите миксер к электросети с напряжением 220 240 В 2 Для включения миксера установите основной выключатель в поло жение ON включено 3 Для выбора скорости нажимайте кнопки увеличения или уменьшения скорости при этом текущая скорость будет отображаться на дисплее при удерживании кнопок значения переключаются быстрее ПРИМЕЧАНИЕ Для предот...

Page 13: ...г 1 чайная ложка соли ВНИМАНИЕ Не эксплуатируйте миксер без перерыва дольше 5 минут 1 Приготовьте опару Для этого смешайте дрожжи сахар воду молоко и масло в небольшой миске и дайте постоять в тепле пока смесь не начнет слегка пениться приблизительно 10 минут 2 Просейте в чашу муку добавьте соль Вставьте крюки для теста в миксер 3 Постепенно добавляя в муку опару начните вымешивание теста с 1 скор...

Page 14: ...5 годам при условии что изделие используется в строгом соответствии с настоящей инструкцией по эксплуатации и применяемыми техническими стандартами 45 12 12345 сорок пятая неделя последние две цифры года номер продукта 4512 12345 неделя год номерпродукта Датаизготовления Дата изготовления зашифрована в виде группы цифр в серийном номере расположенном на корпусе прибора Дату изготовления следует чи...

Page 15: ...came up with the idea to develop attractive and appealing household products Martin Stadler CEO Stadler Form Наша общая цель наслаждаться процессом делая жизнь яркой Она также подразумевает внедрение ди зайнерских вещей в повседневную жизнь человека это наш основной принцип Множество бытовых приборов являются важными и полезными обитателями нашего дома вместе с тем они часто гадкие утята в семье И...

Reviews: