


Mounting and Installation
12
243205 / 857360300040
2018-01-29·BA00·III·en·02
EN
EN
EN
EN
EN
EN
EN
EN
EN
EN
EN
EN
EN
EN
EN
EN
EN
EN
EN
EN
EN
EN
EN
EN
EN
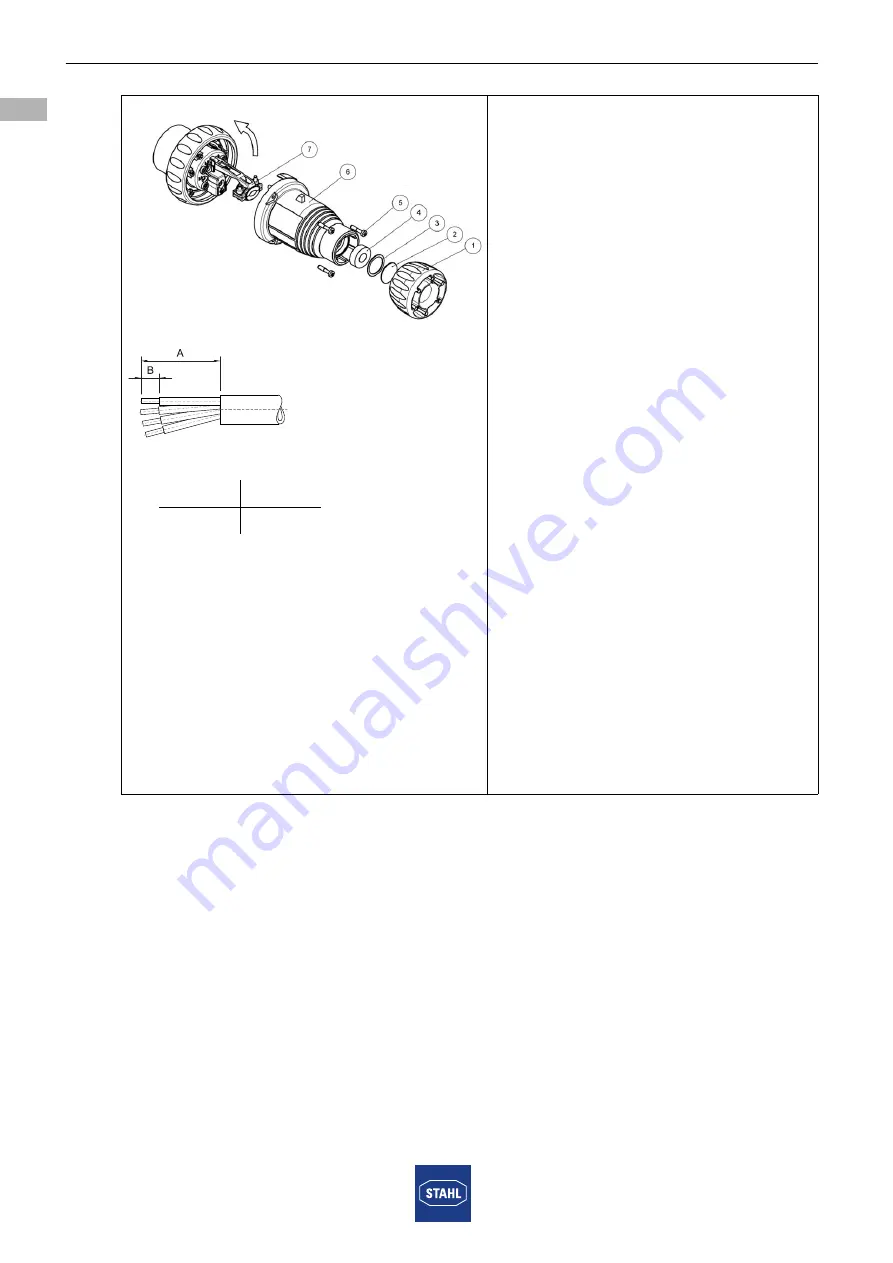
SolConeX extra-low voltage plug
Series 8573/12
11222E00
11201E00
• Unscrew the screw connection (1)
and remove the dust cover
plate (2).
• Remove the pressure ring (3)
and sealing ring (4).
• Loosen the enclosure screws (5)
and remove the connector
enclosure (6).
• Insert the conductor into the screw
connection, pressure ring and seal.
If necessary, adjust the internal
diameter of the seal by trimming it
to match the conductor.
• Open the strain relief (7) and
pivot it by 90°.
• Insert the conductors in the
corresponding terminals and
clamp them (for tightening torque,
see chapter "Technical data").
• Make sure the stripped conductor
ends are fully inside the terminal.
• Pivot the strain relief back and
mount it on the conductor.
The clamping point must not be
under strain.
• Screw down the connector
enclosure (for tightening torque,
see chapter "Technical data").
• Press the seal into the connector
enclosure (pre-stamped side
pointing inwards), place the
pressure ring and tighten the
screw connection.
A [mm]
B [mm]
85
12


