background image

- 13 -

Water for washing

60-65°C (140-149°F)

Water for rinsing/sanitizing

82-90°C (181-194°F)

7. 

Emptying of the tank in models equipped with a drain pump

Turn the device off by pressing the 

 switch , then open the door of the device, remove the overflow plug and close 

the door. Turn the drain pump on using the 

 button . The draining process proceeds automatically until the tank 

is completely emptied of water. In order to reactivate the device, put the overflow plug back in its place, close the door and 

press the On/Off switch. However, if the device will not be used any more, turn the main switch off.

8. 

Emptying of the tank in models not equipped with a drain pump 

Turn the device off by pressing the 

 the switch , then open the door of the device, remove the overflow plug and wait 

until the water is drained off completely from the tank. Put the overflow plug back in its place, close the door of the device.

 Do not turn the device off when the water is still in the tank. Before turning the device off, always empty the tank 

of water. In the event the device will no longer be used, after the completion of the above and the possible initiation of a 

regeneration cycle, it is necessary to turn the device off by pressing the switch. The main switch should then be turned off and 

the water valve should be closed.

7.  PROBLEMS, CAUSES, SOLUTIONS

Note: 

If the activities for the removal of the faults described in the table below did not provide the desired result, please 

contact the repair service (qualified technical personnel).

PROBLEM

CAUSE

SOLUTION

The device does not turn on

The doors of the device are not closed 

properly 

Open and then close the door again

Blown fuse

Replace the fuse (call the service)

Improper connection to the electrical 

network

Check the connection to the electrical 

network

Washing process lasts too long 

Wash water temperature is not 

correct

Set the correct temperature

Incorrect water level in the chamber 

of the device

Clean the water inlet filter

The device does not wash dishes

Broken washing pump

Call the service

Low pump pressure

Clean the pump filter

Water temperature too low

Adjust the water heating time

Incorrect washing agent

Contact the manufacturer

Arms covered with lime scale or the 

presence of foreign bodies

Clean the arms and remove the 

foreign bodies

Empty detergent container

Fill the container

Faults in the water treatment device

Kontakt mit Service

Spots on forks, glasses and vessels

Incorrect arrangement of the dishes

Arrange the dishes in accordance with 

the instructions

Rinse water temperature is too high

Set the correct temperature

Incorrect water pressure

Clean the filters

Water hardness level is too high

Check the water hardness

The detergent did not work, because 

of dirty water in the device

Change the water in the device

Incorrect drying of the dishes

Change the water in the device

Incorrect rinse agent

Contact the manufacturer

Summary of Contents for 801400

Page 1: ...1556 801565 801566 supply voltage 230 400 V Model 801505 801506 801507 801515 801516 801517 INSTRUCTION MANUAL STALGAST Radom sp z o o ul Staniewicka 5 03 310 Warsaw telephone 22 517 15 75 fax 22 517 15 77 www stalgast com email stalgast stalgast com v1 0 07 2016 ...

Page 2: ...ivities carried out before the start of washing 8 6 2 Loading of the dishwasher 8 6 3 Manual elements 8 6 4 Electronic elements 10 7 PROBLEMS CAUSES SOLUTIONS 13 8 MAINTENANCE 14 9 PACKAGING LOADING AND TRANSPORT 15 10 LIST OF SPARE PARTS 16 11 ELECTRICAL WIRING DIAGRAM 18 11 1 Electrical wiring diagram for dishwasher 801400 801401 18 11 2 Electrical wiring diagram for dishwasher GE313 GE323 GE333...

Page 3: ...d possibly repaired at a specialized repair point Never open the housing of the device by yourself Never try to repair the device by yourself it could lead to life threatening situations It is prohibited for any changes and repairs to be performed by persons who are not professionally trained Protect the power supply cable from contact with sharp or hot objects and keep it away from open flames Wh...

Page 4: ...cle 2 5 l cycle Boiler capacity 2 5 l 5 5 l 6 5 l Tank capacity 14 l 26 l 26 l Standard cycle duration 120 180 sec 120 180 sec 90 120 180 sec Noise level 64 dB A Protection IPX3 Net weight 30 kg 58 kg 58 kg Power cord type H07RN F 3x1 5mm2 with plug 3x2 5mm2 5x1 5mm2 5x1 5mm2 Wash water temperature 60 65 C 140 149 F Rinse water temperature 82 90 C 181 194 F The dishwasher has an automatic sanitiza...

Page 5: ...getting wet e g during the cleaning of the device The device should be placed in the desired location and then the protective packaging should be removed The device should be leveled using a spirit level and four adjustable legs in order to ensure its stability Any other way of leveling the device should be approved by the manufacturer 4 2 Connection to the power supply source The device s connect...

Page 6: ... order to ensure secure operation the value of water pressure should be between 2 4 bar If the pressure is higher it is necessary to install a pressure regulator The main valve should be installed over the pipe feeding water to the device The main valve should be installed in an easily accessible place for this reason it should not be installed behind the device The cycle duration was given for th...

Page 7: ...e the following safety rules training of staff in the use of the device in accordance with the information contained in this instruction manual training of the personnel in the scope of the basic principles of operation of electrical appliances workplace safety and provision of first aid in case of need before starting any maintenance work disconnect the device from the power supply it is prohibit...

Page 8: ...will appear on the display The levels of detergent and rinse aid in the containers The correctness of the filters placement the correctness of the nozzle rotation the throughput of the device whether there are any foreign bodies inside the device which prevent the correct operation of the device 6 2 Loading of the dishwasher 1 Plates The basket can hold 12 deep plates or 18 flat plates It is neces...

Page 9: ...the wash cycle press the button fig 11 After starting the wash cycle the indicator lamp will light up If the door is opened during the wash cycle the program stops automatically After the door is closed the program continues the wash cycle After the program is completed the wash cycle indicator lamp turns off and the boiler heating element lamp lights up Remove the basket from the device chamber F...

Page 10: ...on turns the device on Set button confirmation of the introduced input data setting of the password access to data setting P1 P2 P3 P4 P5 P6 Down arrow reduces the washing or rinsing temperature drain pump optional Up arrow increases the washing or rinsing temperature and increases the duration of the wash or rinse cycle C1 90 sec C2 120 sec C3 180 sec Stop button turns the device off does not dis...

Page 11: ...he displays will show the following data washing water temperature 40 70o C The arrows can be used to adjust the temperature on display 2 SERVICE SETTINGS it is recommended that they are not changed Press again The displays will show the following data minimal sanitization temperature 50 90o C The arrows can be used to adjust the temperature on display 2 Press again The displays will show the foll...

Page 12: ... or a short circuit in the probe E3 LO temperature of probe T3 is too low below 0 C or an open circuit in the probe E3 HI temperature of probe T3 is too high above 110 C or a short circuit in the probe E4 power outage during the operation of the dishwasher Et boiler overheating E1 temperature difference between probe T1 and T2 is too high 30 C E2 safety temperature exceeded error displayed after t...

Page 13: ...ivities for the removal of the faults described in the table below did not provide the desired result please contact the repair service qualified technical personnel PROBLEM CAUSE SOLUTION The device does not turn on The doors of the device are not closed properly Open and then close the door again Blown fuse Replace the fuse call the service Improper connection to the electrical network Check the...

Page 14: ...hers for this purpose In case of intensive use of the device it is recommended that the filters are cleaned every 30 40 washing cycles in order to ensure the proper functioning of the device For this purpose it is necessary to partially empty the tank of water The filters should be removed and it must be ensured that the greasy deposits and food remnants do not fall into the opening under the filt...

Page 15: ...ilure of the device caused by the user s non compliance with the guidelines contained in this manual as well as their failure to comply with the applicable laws and standards will not be treated as a liability of the manufacturer Breaks in the operation of the device If it is expected that the device will not be used for a longer period of time it is necessary to empty the containers for the deter...

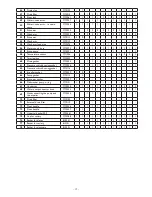
Page 16: ...Contactor 5 5 kW M70145 1 1 1 1 1 1 2 2 2 2 21 Contactor 7 5 kW M90339 1 1 1 1 22 Transformer 230 V 10 V M90466 1 1 1 1 23 Control board M71075 1 1 1 1 24 Executive board M71074 1 1 1 1 25 Three phase interference suppression filter M72083 1 1 1 1 1 1 1 1 1 1 26 Single phase interference suppression filter M72014 1 1 27 6 position terminal block M72037 1 1 1 1 1 1 1 1 1 1 28 3 position terminal bl...

Page 17: ...2025 1 1 1 1 1 1 1 1 1 1 61 Pressure switch housing gasket M72026 1 1 1 1 1 1 1 1 1 1 62 Pressure switch housing gasket M72116 1 1 63 Impeller gasket M72027 2 2 64 Pump gasket M72114 1 1 65 Rinse arm gasket M72227 1 1 66 Dishwasher pump o ring M72121 1 1 67 Conductor M72030 1 1 1 1 1 1 1 1 2 2 2 2 68 Water pump connector hose M72033 1 1 1 1 1 1 1 1 1 1 69 Hose connecting the pump and the impeller ...

Page 18: ...L linear pump L K chamber heater indicator light L Led LED indicator light L C washing time indicator light L Z power supply indicator light L B boiler indicator light E electrovalve Chamber heater Thermostat Pressure sensor Boiler Program switch Programme switch off Magnetic switch off Branching cube Control board Fuse Main switch off Condensator ...

Page 19: ...r pump L K chamber heater indicator light L Led LED indicator light L C washing time indicator light L Z power supply indicator light L B boiler indicator light E electrovalve Condensator Programme switch Programme switch off Magnetic switch off Chamber heater Thermostat Main switch off Control board Branching cube Pressure sensor Fuse Boiler KAD Box Power strip Contactor ...

Page 20: ...er heater Boiler Cube Rinsing pump Washing liquid pump Drain pump Water pump Electrovalve Drain pump KAD Box Fuse Electric terminal Contactor P Contactor K Contactor K Condensator Pressure sensor Transformer Micro switch off Probes Control panel Boiler Boiler Chamber Control board ...

Page 21: ...ility to transport your equipment to a collection point you can use the services of specialized companies Remember Do not dispose of used equipment along with household waste This could cause high fines The symbol of the crossed out waste bin on the product its packaging or the instruction manual means that the product should not be disposed of to normal waste bins The user is obliged to hand over...

Reviews: